Tutorial Tuesday: Art Deco Macrame Bracelet
Tutorial Tuesday is a blog series where I share a do-it-yourself jewelry tutorial.
1. Cut two 12″ strands of Econoflex craft beading wire and anchor them into a notch on the top of your mini macrame board.
2. Cut one 50″ strand of Econoflex craft beading wire – this will be your knotting strand.
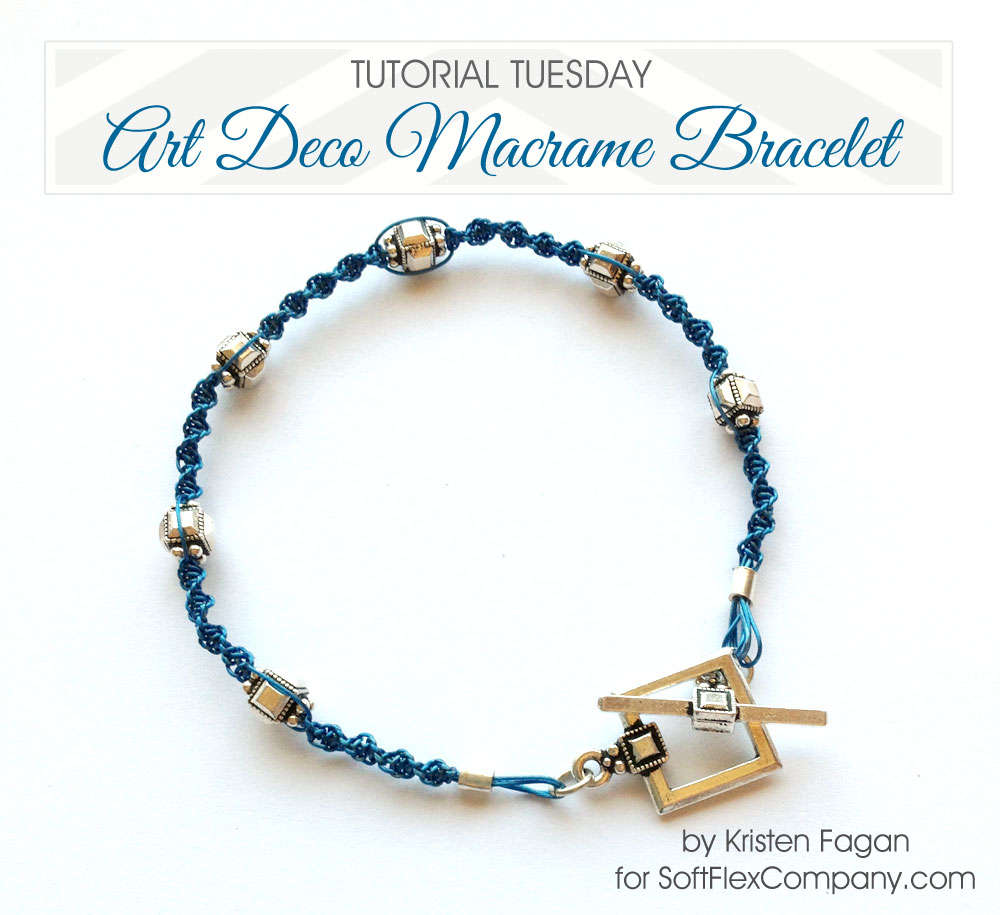
3.Create 20 knots using the Half Knot Spiral method below.
- The right wire goes over the two center wires, then under the left wire.
- The left wire goes under the two center wires, then comes up through the hole and passes over the right wire.
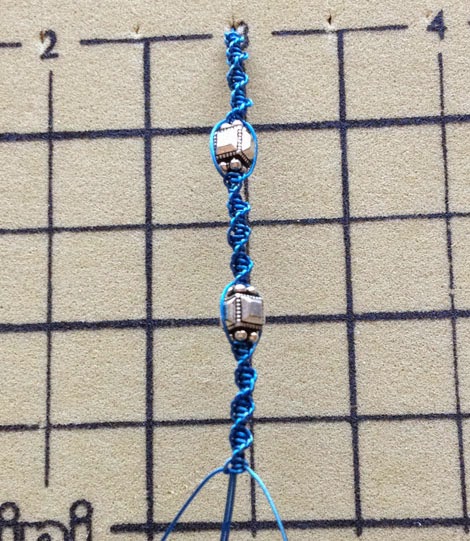
4. Pick up one silver cube bead, remove the two center wires anchored at the bottom of your macrame board and string the bead them and up to your last knot.
5. Wrap your knotting wire around the bead and continue your Half Knot Spiral pattern below the bead creating another 20 knots.
6. Repeat steps 4 and 5 until you reach your desired bracelet length, keeping your clasp size in mind.
7. Add a 3mm crimp tube and crimp around 1 jump ring using the mighty crimper. Attach one side of the toggle clasp to the jump ring. On the other end of the bracelet, add a 3mm crimp tube and crimp around 1 jump ring using the mighty crimper. Attach the other side of the toggle clasp to the jump ring. Click here for crimping instructions.