Tutorial Tuesday: Wire Wrapped Stone Necklace

Tutorial Tuesday is a blog series where I share a do-it-yourself jewelry tutorial on Soft Flex Company’s blog.
I love how serendipitous designing jewelry can be. My sister was visiting me last weekend and brought a wire wrapped stone necklace that I made her many years ago. She said she wears it all the time and that a friend of her is always trying to swipe it from her, haha. So, naturally she wanted me to make her friend one. We set off on a shopping trip to find stone slices and because we couldn’t pick just one so, I ended up making 6 new wire wrapped stones!
Today, I’ll share my process with you. Let me start by saying I’m not a expert wire wrapper. I like to try new things and experiment and this project is very much a “go with the flow” idea. Each stone slice is shaped differently so, there is no one way to wrap it. Skills needed for this are wire looping and ability to experiment and play with the wire. Click to learn how to make a wire wrapped loop.
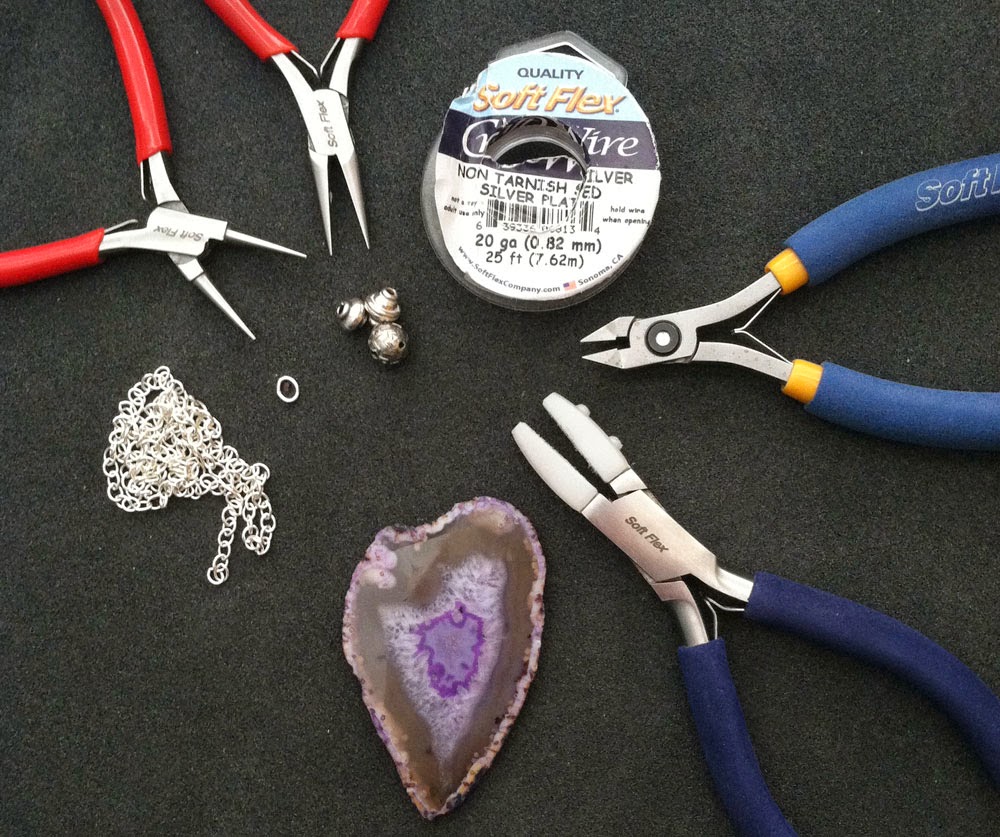
Cut Soft Flex Craft Wire into a 30″ length. I like to have more wire then less to work with so, if you are unsure go a little longer. Use your nylon jaw pliers to smooth out the wire before beginning.
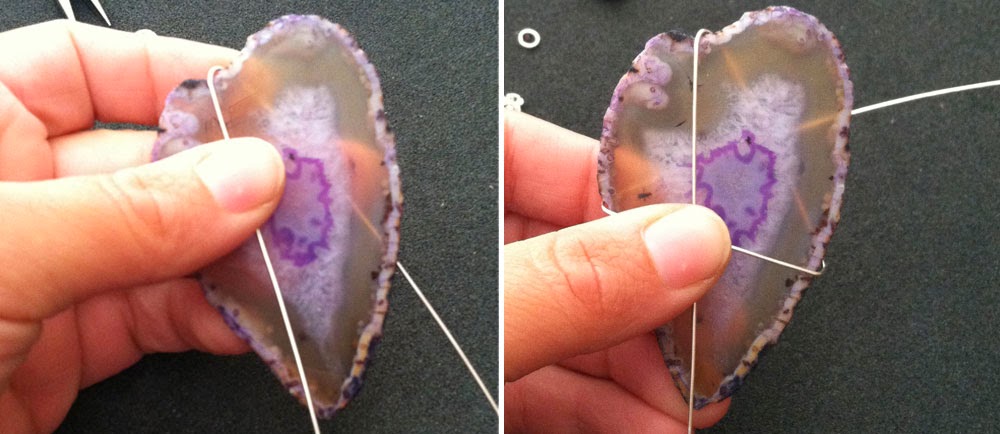
At approximately the half way point on your wire choose a spot to begin your wrap. Now, just play with wire wrapping it up and down and around the stone slice until it feels secure – being mindful to leave about 4-5″ tail of wire to wire wrap your pendant’s loop. I chose a few areas to thread the wire under a wrap as seen below to help secure the stone.When you are close the the end on one tail end wrap it around the closeout wire to finish it.

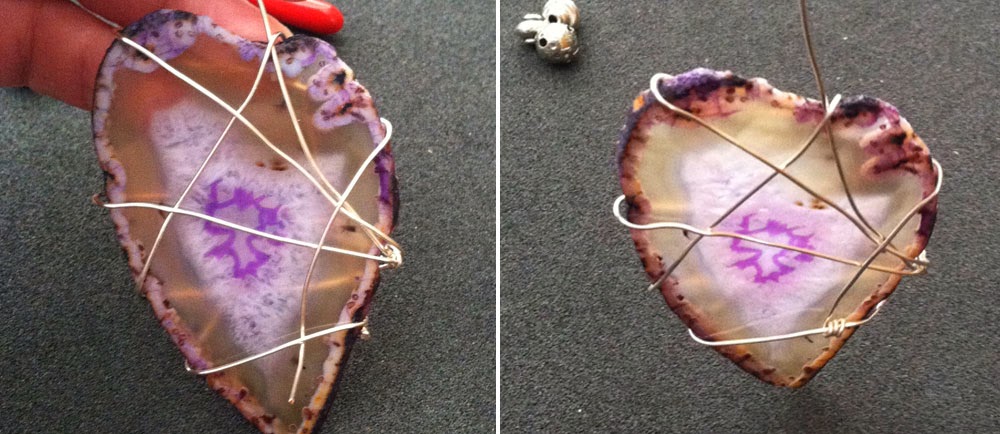
When you feel close to being done, take your long tail end and position it at the top where you will make your pendant loop. Hold the tail and lightly shake it up and down making sure the stone is secure and there are no areas springing loose. If there is a spot of weakness, you will need to adjust your wire to secure that spot before finishing.

Once secure, and your wire tail is positioned pointing up in the spot where you plan to add your loop, string your silver bead. Then using your round nose pliers create your pendant loop. I made my loop large enough to fit through my chain. Click to learn how to make a wire wrapped loop. Hold your loop with your chain nose pliers and wrap the remaining wire around your loop, the bead and under your bead if you’d like. Cut off any excess wire and tuck in the tail with your chain nose pliers.
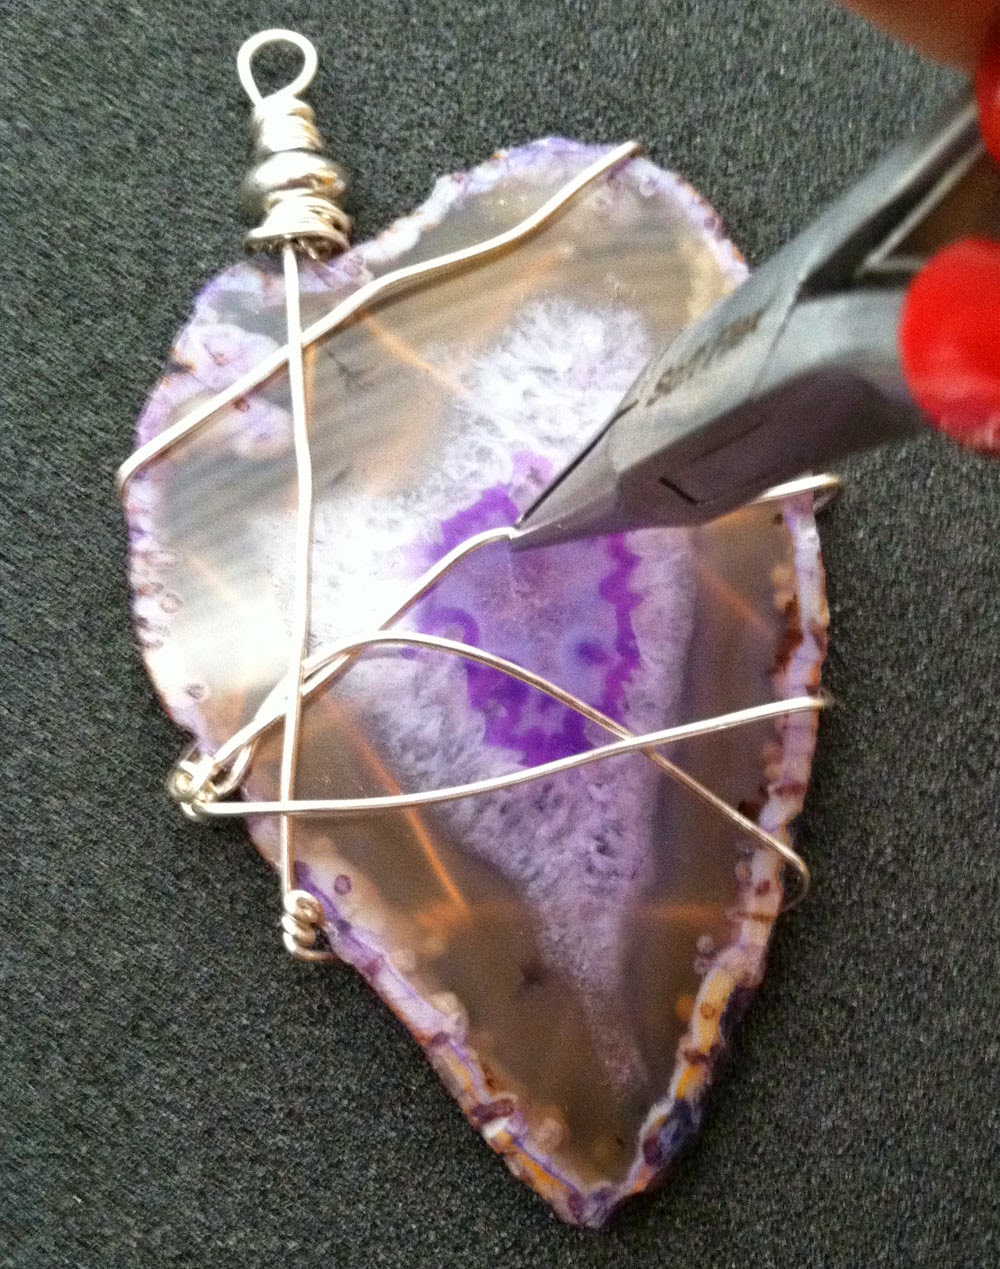
Use your chain nose pliers and any place on my wire that was a little wonky I grabbed and gave a small twist. This helped to straighten the wire around my bend and hug the stone tighter. It also give a little extra detail.

Use your chain nose and attach the two ends of your chain to a jump ring. 24″ chain length should be large enough to slide over your head. You may lengthen or shorten the chain and add a clasp instead if you’d like.


Hey there, I think your blog might be having browser compatibility issues. When I look at your website in Ie, it looks fine but when opening in Internet Explorer, it has some overlapping. I just wanted to give you a quick heads up! Other then that, awesome blog!
Thanks for the heads up! I’ll look into what causing the overlap issue. All my best, Kristen