Tutorial Tuesday: Woven Triangle Necklace

Tutorial Tuesday is a blog series where I share a do-it-yourself jewelry tutorial.
My creative co-worker Sara Oehler originally created this design in Tucson last year. It has been showcased in our booth for the past year and people always love this design – including me! I have wanted to make my own as soon as I laid eyes on it. Since it’s such a popular design, I wanted to share the tutorial with you, our lovely Soft Flex wire fans and hope you’ll give it a try.
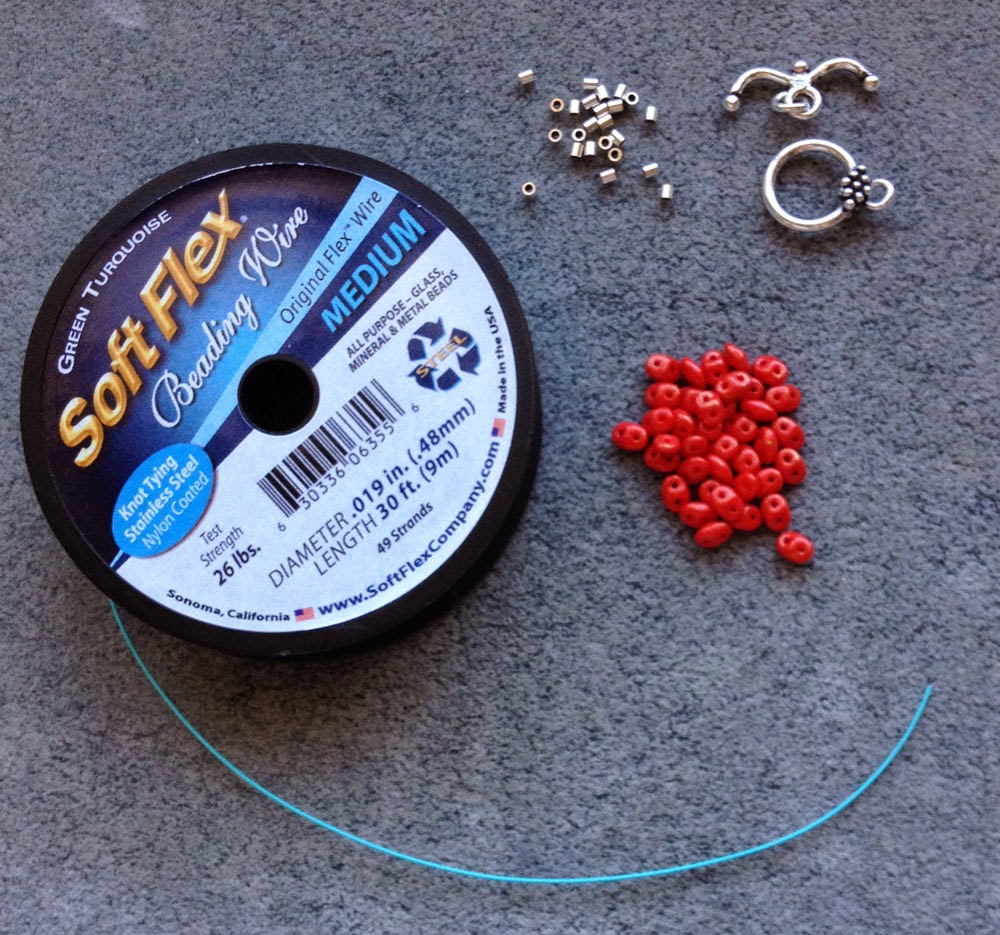
Soft Flex .019 Diameter Beading Wire in Green Turquoise – 44″
2x2mm Silver Filled Crimp Tubes – 26
5mm Silver Plated Open Jump Ring – 2
Silver Plated Toggle Clasp – 1
Regular Crimping Pliers
Cutters
Bead Stoppers

Instructions


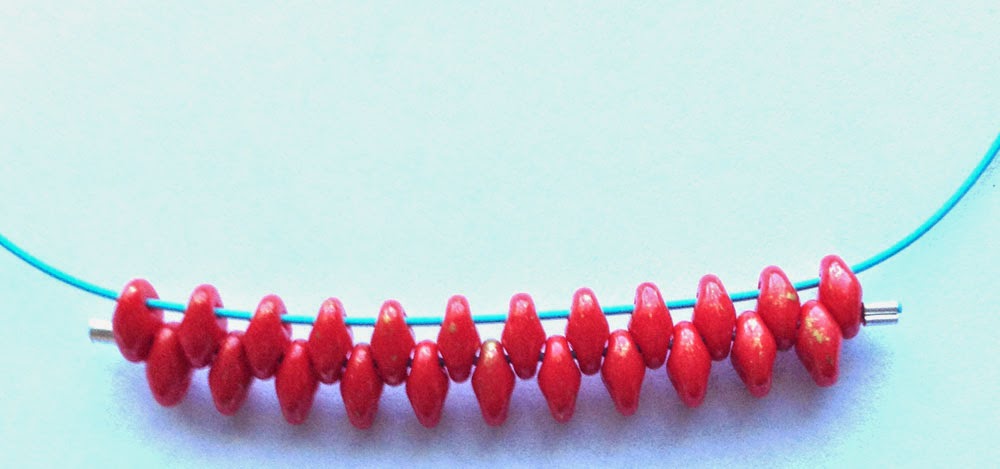
Test that your crimp is secure and not slipping then, trim excess wire on both crimp ends.This completes your second row of beads.
Design notes: You will need to manipulate and bend your completed woven SuperDuo rows to allow you to only pass through one bead at a time on the third row and so on. This third row is where the longer beading wire begins to come in handy. After you string a new bead and go through the bottom hole of the next bead your wire will curl in a circle, just wiggle your wire through. The slight wire bend will not affect the final design.


String one 2x2mm crimp tube onto the bead weaving wire strand and crimp near the end of the wire. Use the wire strand side not crimped and string through the bottom hole of the first SuperDuo bead. Next, string through one hole of a new SuperDuo bead, then string through the bottom hole of the second SuperDuo bead. Continue this pattern until you have 10 new SuperDuo beads strung in between the 11 beads in the row above. String your wire through the final SuperDuo bead from the second row of 11 beads. String one 2x2mm crimp tube onto the end and crimp as close to the last bead as possible. Test that your crimp is secure and not slipping then, trim excess wire on both crimp ends.
Continue with this bead weaving pattern until you have a total of 12 rows and have crimped one final bead at the bottom of the triangle.

Attach a jump ring to each end of your toggle clasp. Remove the bead stopper from each side of your necklace. String a crimp tube onto one end, wrap wire around one jump ring and crimp. String a crimp tube onto the other end, wrap wire around the other jump ring, adjust necklace to your desired size (I chose 18″) and crimp. Trim excess wire.

Using the same pattern, you can create two small triangles and make matching earrings!