Jewelry

Tutorial Tuesday: Evil Eye Talisman

EvilEye-1

Tutorial Tuesday is a blog series where I share a do-it-yourself jewelry tutorial on Soft Flex Company’s blog.

Throughout history, man has made many forms of talismans designed to ward off bad luck and in Turkey, the tailsman is the Nazar Boncuğu (evil eye). I picked up this evil eye pendant at the 2014 Bead&Button show to give to one of my best friends to display in her home. It is said that when an evil eye cracks, it has done its job of protecting you. I gave it to her this weekend. I wasn’t sure if she had one already but, her mom assured me that you cannot have too many!


Materials:

Cut a 24″ piece of white string or cord and feed it through the pendant hole evenly. Grab both string pieces, wrap around your finger and tie a tie at the base of the pendant.

Put a dab of glue on the end pieces of the string to stiffen it and make it easier to thread through the dichroic beads. String 1 dichroic bead onto one of the strings and then holding both strings make a knit close to the bead. String 1 dichroic bead onto the opposite strings from the first and then holding both strings make a knit close to the bead. String 1 dichroic bead onto the first string again and then holding both strings make a knit close to the bead.

Put a dab of glue around the knot of the string and cut off excess string. Attach the jumpring to the final knot.

Cut a 10″ strand of black Soft Flex beading wire and feed through the jumpring. Then string 1 large silver spacer bead, 1 Samunnat clay bead and 1 small silver spacer bead. You should have two wire ends coming up from the last spacer bead.

String a 2x2mm crimp tube on each wire end. Loop your wire back through the crimp tubes creating the top loop and crimp. (Note: You just need one crimp to securely make a top loop, I choose to use two for the symmetrical look). Cut off any excess wire. For step by step instructions on how to crimp with the magical crimping pliers, click here.


Lastly, using 10″ of colored silk ribbon tie a bow through the jumpring between the string and beading wire to finish it off.

Tutorial Tuesday: Turquoise Nugget Cluster Necklace and Earrings

TurquoiseNugget-1

Tutorial Tuesday is a blog series where I share a do-it-yourself jewelry tutorial on Soft Flex Company’s blog.

The Tucson Gem and Bead Show is right around the corner! I think that had something to do with me reaching for these turquoise nugget beads. Will you be visiting Tucson this year? It is a tradition for owners and designers to gather in Tucson every year and search for new and exciting beads, gemstones, and jewelry and Soft Flex Company is in a whole new location for 2015. This year, you can find us at the To Bead True Blue show from February 1-9th at the Doubletree Tucson Reid Park, we’ll be in the Board Room. Hope to see you!
Materials:

We’ll start with the necklace cluster dangle. Cut three 6″ pieces of bone Soft Flex beading wire. On each strand, string one gold 2mm crimp tube and one round bone bead. Loop the wire back through the gold 2mm crimp tube and crimp. Cut off excess wire.

Next, string one turquoise nugget bead and one gold cube bead on two strands of the three strands of wire. On the third strand, string a turquoise nugget bead, a gold cube bead, another turquoise nugget bead and another gold cube bead.

Add a gold 2mm crimp tube to each strand. Aligned the longest strand in the middle and two smaller strands on each side. For each strand loop the wire around the 10mm jump ring and back through the crimp tube. Leave a little bone beading wire showing on each strand before crimping for a flexible dangle. For step by step instructions on how to crimp with the magical crimping pliers, click here.

Attach the small 4mm jump ring to the top of the 10mm jump ring.

Now let’s create the necklace. Cut 24″ length of bone Soft Flex beading wire. Place a bead stopper at one end. String 25 gold cube beads, one 3mm gold plated round bead, small 4mm jump ring attached to the dangle you created, one 3mm gold plated round bead and 25 gold cube beads.

Tie a figure 8-knot on one side of the gold beads then remove the bead stopper and tie another figure 8-knot on the other side. (Note: you could also add a gold crimp to each side and crimp the beads in place if you prefer). For step by step instructions on how to tie and 8-knot, click here.

Lastly, figure out your desired length, string a 2mm crimp tube on each wire end. Loop your wire around the toggle and bar clasp on either end, back through the crimp tube and crimp. Cut off excess wire. For step by step instructions on how to crimp with the magical crimping pliers, click here.

For the earrings, create two dangles the same way you created the cluster dangle above. Instead of attaching to a jump ring you attach each strand to a gold plated ear wire.

Tutorial Tuesday: Jingle Bell Necklace

JingleBellNecklace-1

Tutorial Tuesday is a blog series where I share a do-it-yourself jewelry tutorial on Soft Flex Company’s blog.

‘Tis the season for a statement necklace to go with your holiday outfit! Tired of the traditional giant jingle bell on a rope? Want to add a little sparkle and pop of color? I think this super simple update on the jingle bell necklace is just the thing to give your holiday a last minute jingle, jangle color burst.

Materials:

Begin by separating your jingle bell beads into colors. Cut 8″ strand of beading wire from your spool. I chose to use Soft Touch, our premium wire, in this design because of the soft thread like drape you get with it.

String a 2x2mm crimp tube on one side of your wire. Loop your wire back through the crimp tube leaving a small loop and crimp. Cut off excess wire. For step by step instructions on how to crimp with the magical crimping pliers, click here.

String 6 silver, 6 gold, 6 green, 6 purple, 6 silver, 6 blue, 6 pink, 6 gold, 6 pink, 6 blue, 6 silver, 6 purple, 6 green, 6 gold and 6 silver jingle bell beads. String a 2x2mm crimp tube. Loop your wire back through the crimp tube leaving a small loop and crimp. Cut off excess wire.

Measure your chain to your desired length and cut into two lengths. I cut two 9″ of chain. Using your chain nose pliers, open two gold jump rings and attach each chain length to your crimp loops on each end of your jingle bell strand.

Lastly, add a jump ring to each end of the chain and attach your lobster clasp.

With my leftover jingle bell beads and chain, I created another smaller version of this necklace. The smaller version can be worn shorter or pair them together for a double jingle jangle design!

Tutorial Tuesday: Candy Cane Charm Necklace

CandyCaneNecklace-1

Tutorial Tuesday is a blog series where I share a do-it-yourself jewelry tutorial on Soft Flex Company’s blog.

Just in time for the holidays! This silver and red, long and layered multi-strand candy cane charm necklace is the perfect solution to your holiday outfit. This easy to wear necklace is lightweight and festive and elegant at the same time.


Materials:


Cut 3 strands of beading wire about 24″ each.String a pattern of alternating long and short silver tube beads for the longest layer.

Next string the middle layer in the following pattern; 3 red crystal beads, 1 double heishi spacer bead, 3 red crystal beads, 1 double heishi spacer bead, 3 red crystal beads, 1 candy cane charm on a jump ring, 3 red crystal beads, 1 candy cane charm on a jump ring, 3 red crystal beads, 1 candy cane charm on a jump ring, 3 red crystal beads, 1 double heishi spacer bead, 3 red crystal beads, 1 double heishi spacer bead, 3 red crystal beads, 1 double heishi spacer bead,3 red crystal beads.

Lastly, string a pattern of alternating barrel and square silver beads for your shortest layer.

Take some time to look at the three layers together on a bead board before crimping to make sure you are happy with bead placement. Starting with your shortest strand, string a 2x2mm crimp tube on each side of wire. These crimps will hold your beads in place. Attach a bead stopper on one side of your wire close to the crimp, this will keep your beads secure while you crimp the other side. Then remove the bead stopper and crimp the second side. Repeat this process for the remaining two strands. For step by step instructions on how to crimp, click here.


Once you have all three strands complete and beads crimped into place, use a bead stopper to hold all three strands on each of the necklace being sure to leave some wire at each end for adding your clasp. Adjust your wire as needed until you are happy with the placement.
Attach 1 jump ring to the toggle and 1 jump ring to the toggle bar. String a 3x5mm crimp tube on one end, loop wires through the toggle jump ring and back through your crimp tube. Crimp using mighty crimping pliers. Cut off your excess wire. Repeat on the other side of your necklace. For step by step instructions on how to crimp, click here.


Tutorial Tuesday: DIY Wire Wrap Napkin Rings

NapkinRings-1

Tutorial Tuesday is a blog series where I share a do-it-yourself jewelry tutorial on Soft Flex Company’s blog.

Wrap up these twig inspired wire napkin rings for your Thanksgiving day gathering or gift them as a “thank you” for this year’s holiday hostess!


Materials
Two Tone Champagne Colored 3 Cut Czech Glass Beads
Tube to wrap wire around (I used wrapping paper tube)

Cut 40″ of Craft Wire. Use your nylon jaw pliers to smooth out the wire. Wrap wire around the tube 6 times.

Remove from the tube, take the short wire end and using your chain nose pliers wrap the wire tail around one of the loops to secure the ring.


Now use the long wire tail and feed it through the ring. Zig zag the wire up and down adding in two or three beads on every other pass. I found that if my wire was even slightly bent some beads had a hard time passing through. Using my nylon jaw pliers to smooth out the wire before stringing the beads helped in most cases.If you happen to run out of wire, you may easily add more by wrapping the end of a new wire piece around one of the ring wires and then continue zig zagging up and down and adding beads as you were.


Continue until you have used most of the wire and wrap the wire end around the ring to secure.


Many wishes for a Happy Thanksgiving! 

Tutorial Tuesday: Ball Ornament Earrings

OrnamentEarrings

Tutorial Tuesday is a blog series where I share a do-it-yourself jewelry tutorial on Soft Flex Company’s blog.

Super simple, quick and adorable ornament earrings for your holiday gatherings and gifts!


Materials:


 String one spacer and one bead onto each head pin.


 Use your chain nose pliers to bend at a 90 degree angle.


 Use your round nose pliers to make a loop. Cut off excess wire or wrap around the base. For step by step instructions on how to make a dangle, click here.


Use your chain nose pliers to open the loop and attach to an ear wire. Follow steps 1-5 for second earring.


Art Bead Scene Challenge

absspringbanner

I have been reading the Art Bead Scene blog for a few years and it’s a wonderful blog dedicated to art beads with features on art bead artists, inside the studio highlights, jewelry designs and jewelry tutorials. Art Bead Scene hosts a fabulous monthly design challenge that incorporates art beads and is based on a work of art. I usually read the challenge, view the entries, enjoy  and move on. But in July, I decided to participate and submit a design to their Flickr pool for the monthly challenge and low and behold I ended up being chosen as a random winner! How lucky is that? I think it was a nudge from the universe for me to get involved and challenge myself artistically more often.

This was the July challenge:

Little_Mermaid_-_mermaids_treasures_-_Edmund_Dulac_for_Andersen

The Little Mermaid, 1911 by Edmund Dulac
Pencil, pen, black ink and watercolour with scratching out on paper
12¼ x 9 7/8 in. (30.8 x 25.2 cm.)

This is the design I submitted to the Flickr pool:

IMG_2080

Just for participating in the challenge, I was chosen as a random lucky winner and won these beautiful beads from Gaea Handmade!

Gaea

Really, how gorgeous are these? I am so happy to have these jewel tone beauties in my bead stash and look forward to creating with them. Thank you Gaea Handmade and Art Bead Scene!

Click here to see the Art Bead Scene July Monthly Challenge Recap

Click here to read the Art Bead Scene blog.

Tutorial Tuesday: Remnant Seed Bead Earrings

RemnantEarrings

Tutorial Tuesday is a blog series where I share a do-it-yourself jewelry tutorial on Soft Flex Company’s blog.

We all have little groupings of leftover beads from another design, don’t we? I am particularly fond of this mix of seed beads I’ve been holding onto. The enjoy the bright playful colors together and decided to finally put them to use in these earrings. 

This design is also great for using leftover Soft Flex beading wire clippings. I have a bag of beading wire remnants that I hold onto for small projects such as this. I found two 6″ strands of Tanzanite beading wire in my stash that paired well with this design. The Tanzanite color reminds me of denim and because of that it feels like a “go with anything” neutral color to me. Do you agree? 

Look through your beading wire remnants stash and find two 6″ strands. I used Soft Flex beading wire in Tanzanite but, for this design you can use just about any color you have. 


Materials:


Clip a bead stopper to one end of  your beading wire strand to keep your beads from slipping. String a crimp tube, 16 seed beads and another crimp tube.

If you are using open jump rings, use your chain nose pliers to close both of them.

Then, one end at a time, wrap your beading wire around one of your jump rings and back through the crimp tube. Once you have both ends around the jump ring and through the crimp tubes you may adjust the size of your loop.

When you are happy with the shape, crimp the crimp tubes using the Magical Crimper or Regular Crimping Pliers. (I used the Magical Crimper to turn the crimp tube into a 2mm bead.)

Once crimped securely, cut off your excess wire and using chain nose pliers, attach to your ear wire to the jump ring. Repeat for the second earring.

Tutorial Tuesday: Knitted Craft Wire Bracelet

KnittedCraftWire-1

Tutorial Tuesday is a blog series where I share a do-it-yourself jewelry tutorial on Soft Flex Company’s blog.

I have confessed my love for knitting bracelets out of Soft Flex Beading Wire before but, knitting with Soft Flex Craft Wire proved to be more difficult for me to grasp. I believe that’s because I first  learned to knit on a spool using flexible beading wire, which has give to it. Craft Wire is of course, rigid by nature. I struggled a few times and finally decided I would make it work. (Thank you for that gem of a saying, Tim Gunn.)

I found this video by Beaducation on YouTube that made knitting with Craft Wire finally click and make sense for me.It helped me see that with craft wire you pull the wire out to the edge of your spool with your stylus, then flip the wire up and over your pin with your fingers.The tension is carried from one pin to the next – not through pulling on the tail as it is with flexible beading wire.

Materials:
Soft Flex Craft Wire Green -26 Gauge
Soft Flex Craft Wire Bronze – 20 Gauge
5-Pin Knitting Spool
Draw Plate
Cutters
Round Nose Pliers
1 Strand Clasp, Toggle with Jump Rings
or Make your own clasp

Working straight from your Soft Flex Craft Wire 26 Gauge Spool knit the wire using a 5-Pin Knitting Spool. String the wire down through the center of the knitting spool leaving about a 2″ tail. Wrap the wire around your pins in the same manner as this Beaducation video minus the addition of beads.


Once you have completed your desired length of wire knitting, cut off about 2″ extra wire form the spool and carefully remove your knitted wire tube from the spool. Take the end of the wire and thread it into the last 5 open loops to secure your knitted tube. The result will be a wonky shape as shown.

Using a draw plate, run your knitted wire tube through one of the large holes to begin smoothing out the shape. Then move to a smaller hole and so on until you are happy with the wire shapes and diameter.


Next, you’ll need to finish off your wire ends. You may choose to use a cone or bead cap or you can wire wrap your own cones as I did. To wire wrap your cones, cut a 10″ piece of 20 Gauge Bronze Craft Wire (it’s better to error on the side of too much length then not enough).  About 1/2″ from the green knitted tube end, stick one end of the bronze wire through the knitted tube and tuck it around the knitted tube to secure it. Then begin wire wrapping the tube towards the end. When you get to the end of the knitted tube, use your round nose pliers to create a loop and then wire wrapped back down the tube to where you started making sure to cover the tube entirely with wire and cut off excess. Repeat on the other side.

At this point you can add you jump rings and clasp or you can make your own. I decided to make a simple hook clasp to finish off my bracelet. Cut 2-3″ of 20 Gauge Bronze Craft Wire and straighten the wire with nylon jaw pliers.

Using my round nose pliers I made a small loop on one end and then made a larger loop with my large bail making Wubbers pliers.Trim excess wire so it’s about the same length as the little loop.

Lastly, work harden the clasp with a nylon hammer and rubber block and attach to one end of your bracelet. Here is the finished design. I especially like to wear it layered!


Agate Necklace Collection

AgateCollectionClick to shop the Agate Necklace Collection


The idea of creating “collections” has been on my mind lately. I usually work on one-of-a-kind items. My creativity comes in spurts and I create what I want in the moment. It’s fast, inspiring and most of the time fleeting. My agate necklace collection started in the same way. I created a necklace for my sister years ago. She has loved it all these years and when she visited me in March she asked that I make one for a friend. We picked a few stones, I made her friend one and her two more and thought about how other people may enjoy this style of necklace.


IMG_5039


My mom came out to visit a few months later and requested a necklace for herself so, I made her two and picked up a handful of more stones to work with. That’s how this collection got started! I have lovingly hand picked and wire wrapped a handful of sliced agates ranging from 3-4 inches. Then, I adorn them with a bead and hang on chain ranging in lengths from 18″-30″ for a a uniquely versatile statement necklace.


IMG_5697


Brazilian agate is one of the most beautiful minerals on earth. The rough contour of the outside of the rock is a contrast to the beauty within. It has taken about 80 million years to form and each slice is an original. The agate’s vivid color may be obtained through a dye process, but the markings in the stone are natural. Brazilian agate balances the four energies: physical, mental, emotional and spiritual. Worn for protection, centering, healing and strength as well as better concentration, more confidence and an overall feeling of composure. Protects you from stress and energy drains.

I find myself wearing one of these necklace almost daily. I like the long length and something about wearing natural stones grounds me. Agate being a protector from stress and energy drains sure helps too.  These natural agate necklaces will lend a natural raw edge to your everyday style. Click to shop the Agate Necklace Collection.


2014 Bead&Button Show Recap

BB1


Here are Sara and I are ready to demonstrate using Soft Flex Beading Wire at The 2014 Bead&Button Show in Milwaukee, Wisconsin. This marks my 5th or 6th year working the show with Soft Flex Company. I’m not entirely sure because, the years tend to blur together and I took a few years off after having my second child so, I haven’t worked them all in a row. For those in the beading industry this is one of the largest trade shows of the year. It is full of inspiration with hundreds of classes, free make it take it’s and demos, design challenges on display and large selection of beading vendors and art bead makers.

It is one of two trade shows a year I work in Soft Flex’s booth. It really nice to get out from behind my desk, spend time with my co-workers I rarely see and interact with our customers face to face. I did a lot of demoing on how to crimp as well as using Soft Flex wire to knit and macrame.


BB3


I played around with knitting 28G Soft Flex Craft Wire during the show. I had a customer stop by having a tough time getting the final shape to look good so, I created a design that day and asked him to come back the next day and I would discuss how it went. We realized that he didn’t have a draw plate. This tool is necessary to work harden and even out the wire strand after knitting Craft Wire.


BB4


Creating a macrame design with Soft Flex Wire. I loved this mini macrame board that Sara found on Amazon so much, I bought it from her to take home with me! It holds Soft Flex beading wire perfectly. So much easier then using tape – I find that the wire slips out of the tape too easily.


BB2


My beading haul from the Bead&Button Show! Although I don’t NEED any more beading supplies I can’t help but shop a little when I’m at a show. It’s wonderful to see items in person, see design ideas and buy directly from artists and small businesses.

  1. Soft Flex Beading Wire  in Colors Peridot, Green Turquoise, Citrine, Red Jasper, Chrysoprase and Antique Brass Color.
  2. Wanderlust Pennants by Tesori Trovati Jewelry
  3. Crane Bead, If Love was a Bead and Tiger Bead from Beads of Courage
  4. Bokamo Bracelet Supplies
  5. Ceramic Beads by Golem Studio
  6. Shell Donut Pendants by Lillypilly Designs 
  7. Brass Bead Strand from Hands of the Hills


BB5


Super random, I posted on Facebook that I was at the Milwaukee Public Market (cool place!) and my Phoenix friend Tosca saw it and and said she’ll be in Milwaukee that week too! She stopped by the show on Saturday night and we grabbed a bite to eat. It was great getting to know her better. We met during the Phoenix Art Mural Project in December and haven’t gotten together since. Social media at it’s finest when spontaneous meeting occur!


10402686_711727542198806_375566925167628641_n

BeadDreamsCollage


We at Soft Flex Company had so much fun sharing our love of beading at the Bead&Button Show this year through demonstrations in our booth, free make-it-take-its, sponsoring Bead Dreams, sponsoring the ISGB exhibit and sponsoring the Beads of Courage Design Challenge. Looking forward to what’s in store for next year! Until then, I need to get my bead on.

If Inspire Were A Bead: Beads of Courage Jewelry Design Challenge

Inspire1


Since I first shared about the Beads of Courage “Creativity in Full Circle” design challenge sponsored by Soft Flex Company in this post – I have a bit more information about the process to share. It’s really flippin’ cool!

The challenge begins with 10 Beads of Courage children, siblings and parents who create beads based on words like Love, Hope and Spirit and what those words mean to them. 10 glass bead artists were then challenged to create beads based on the top designs. 10 jewelry designers chosen by Soft Flex Company were challenged to incorporate the beads into a finished necklace design.

Inspire2


The bead I received was based on if INSPIRE were a bead … designed by Kailey Maks (Age: 8) from Ann & Lurie Children’s Hospital of Chicago, IL.

In her words: Meaning to breathe life – dolphin and water do both. It is said unicorn dolphins – finding a cure for illness and ocean waves – storm/sickness. Fitting that a unicorn dolphin symbolizes findings a cure!

The bead artist that brought Kailey’s design to life in glass is Nanette Charif from Tucson, AZ.

Nanette’s Bio: I have been a glass artist for 9 years. I began collecting beads and stringing them together over 30 years ago. My focus started with beads and what I can do with them and adding my hand crafted beads with store beads for my jewelry. I have since learned to make murini and multi-colored canes along with more sculptured type pieces like turtles, fish, and pumpkins. I get much of my inspiration from my wonderful lush backyard  and my beautiful Koi pond. Tucson also has the benefit of other cultures to enrich all of us.

Click to purchase if Inspire was a bead … as well as see all the other top bead designs!


Inspire3


If INSPIRE were a bead was then sent to me and I incorporated it into this  necklace bringing “Creativity in Full Circle”! When I received my bead in the mail it was equal parts excitement and fear. I had just a few weeks to complete my design, the final necklace was to be  showcased with designers I respect and admire, but mostly I wanted to honor the bead designed by Kailey and created by Nanette and it’s a bead based on the word Inspire!

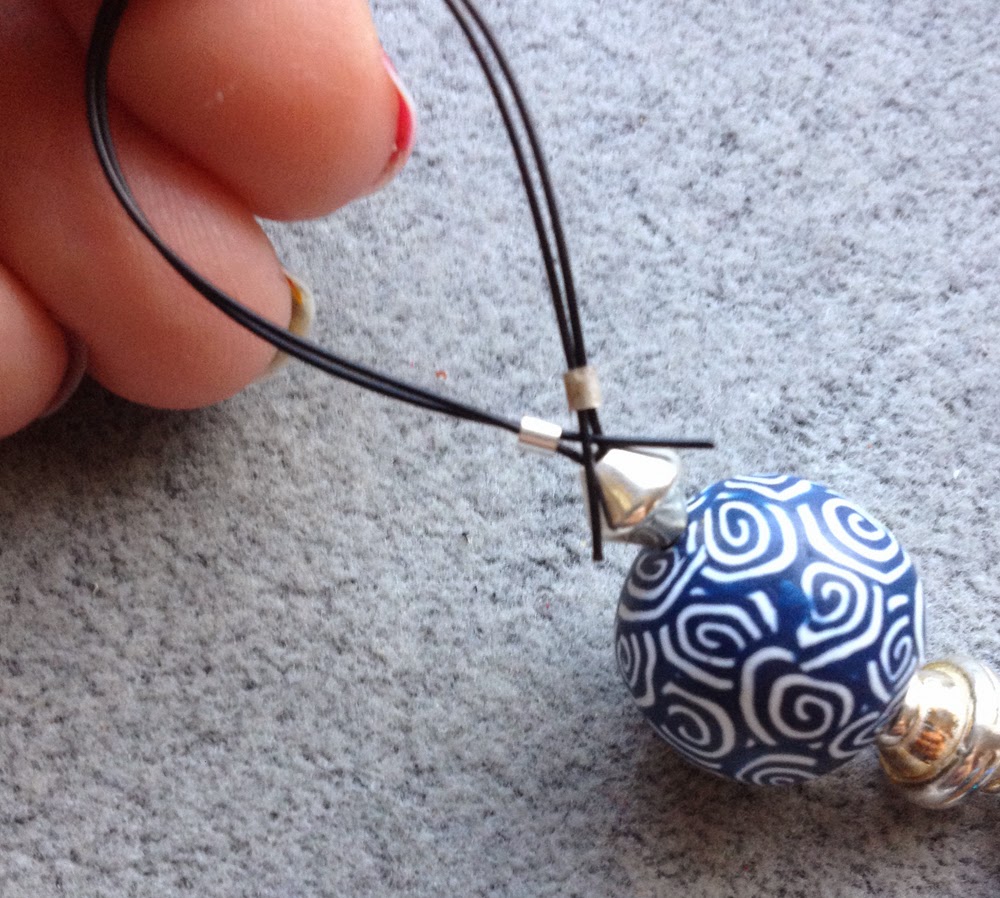
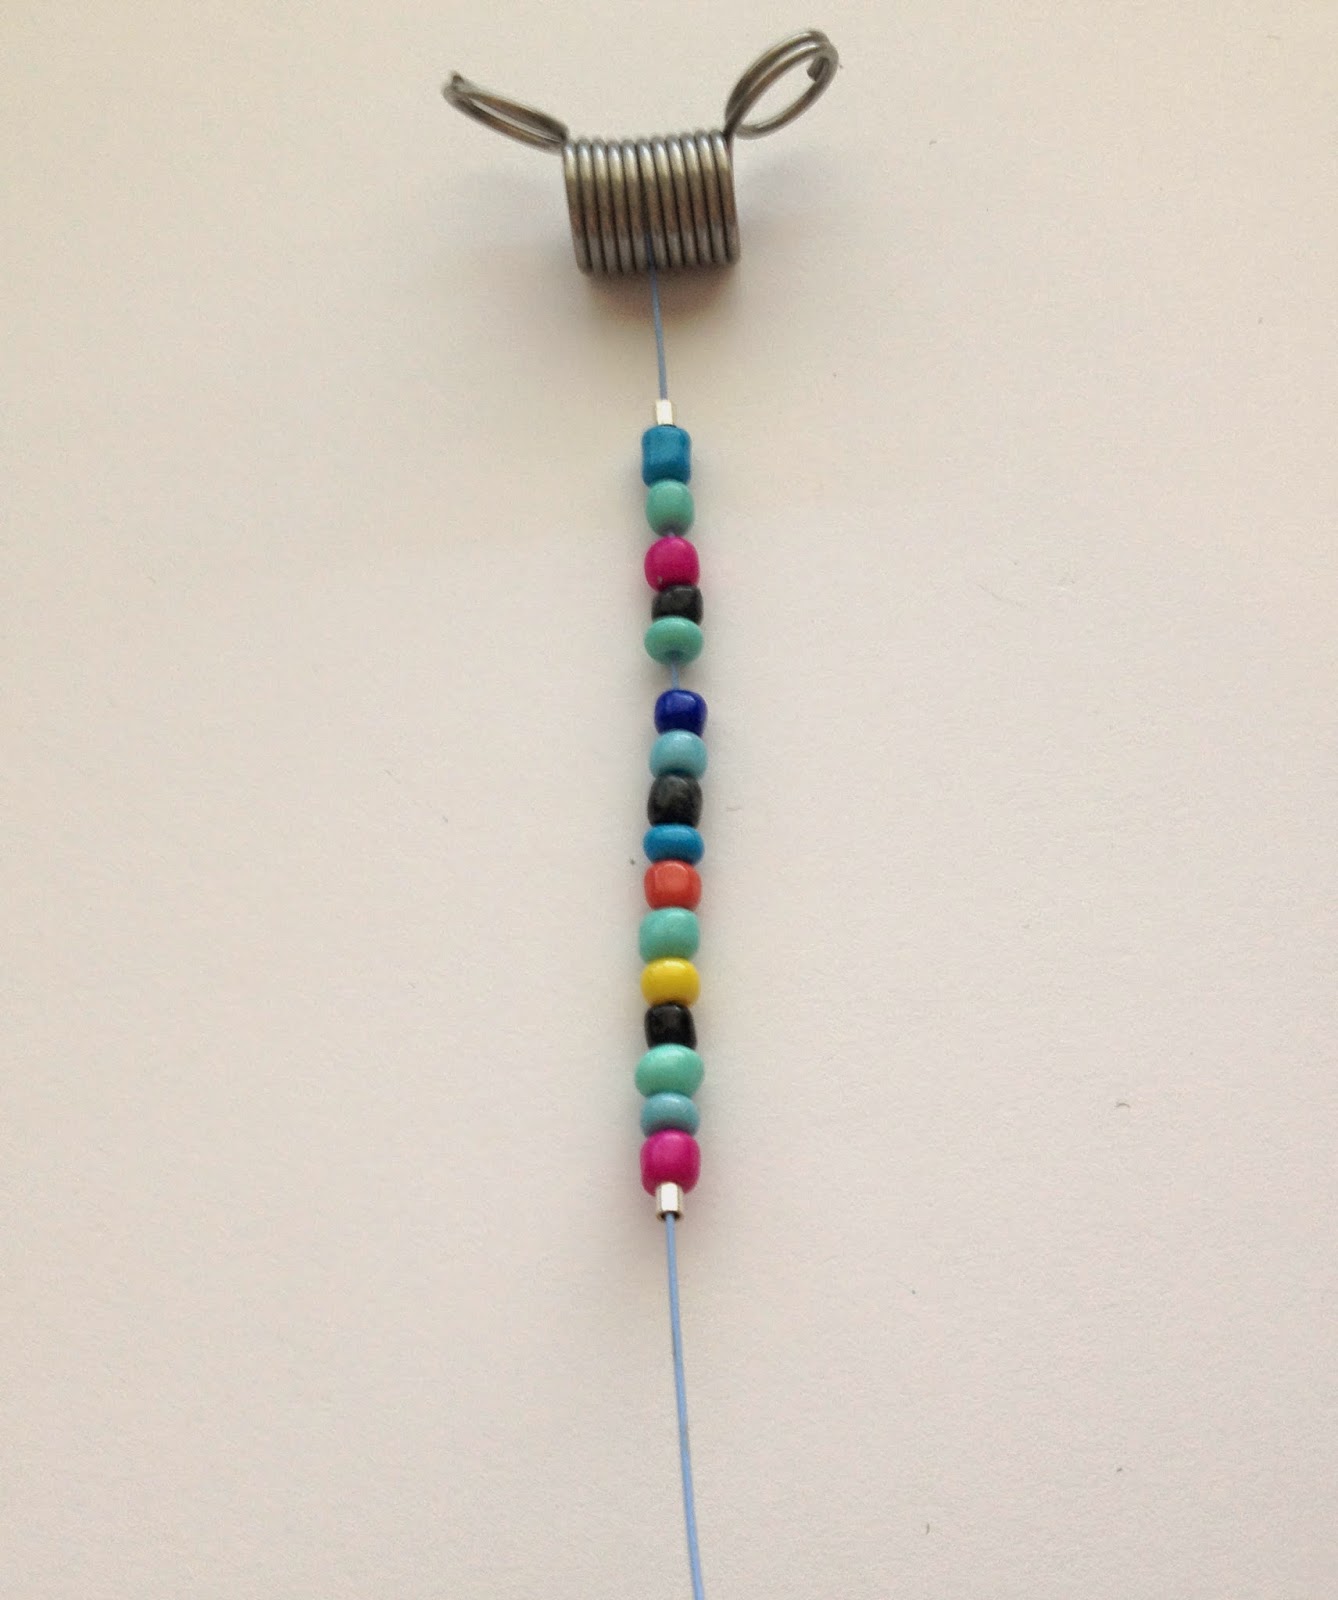
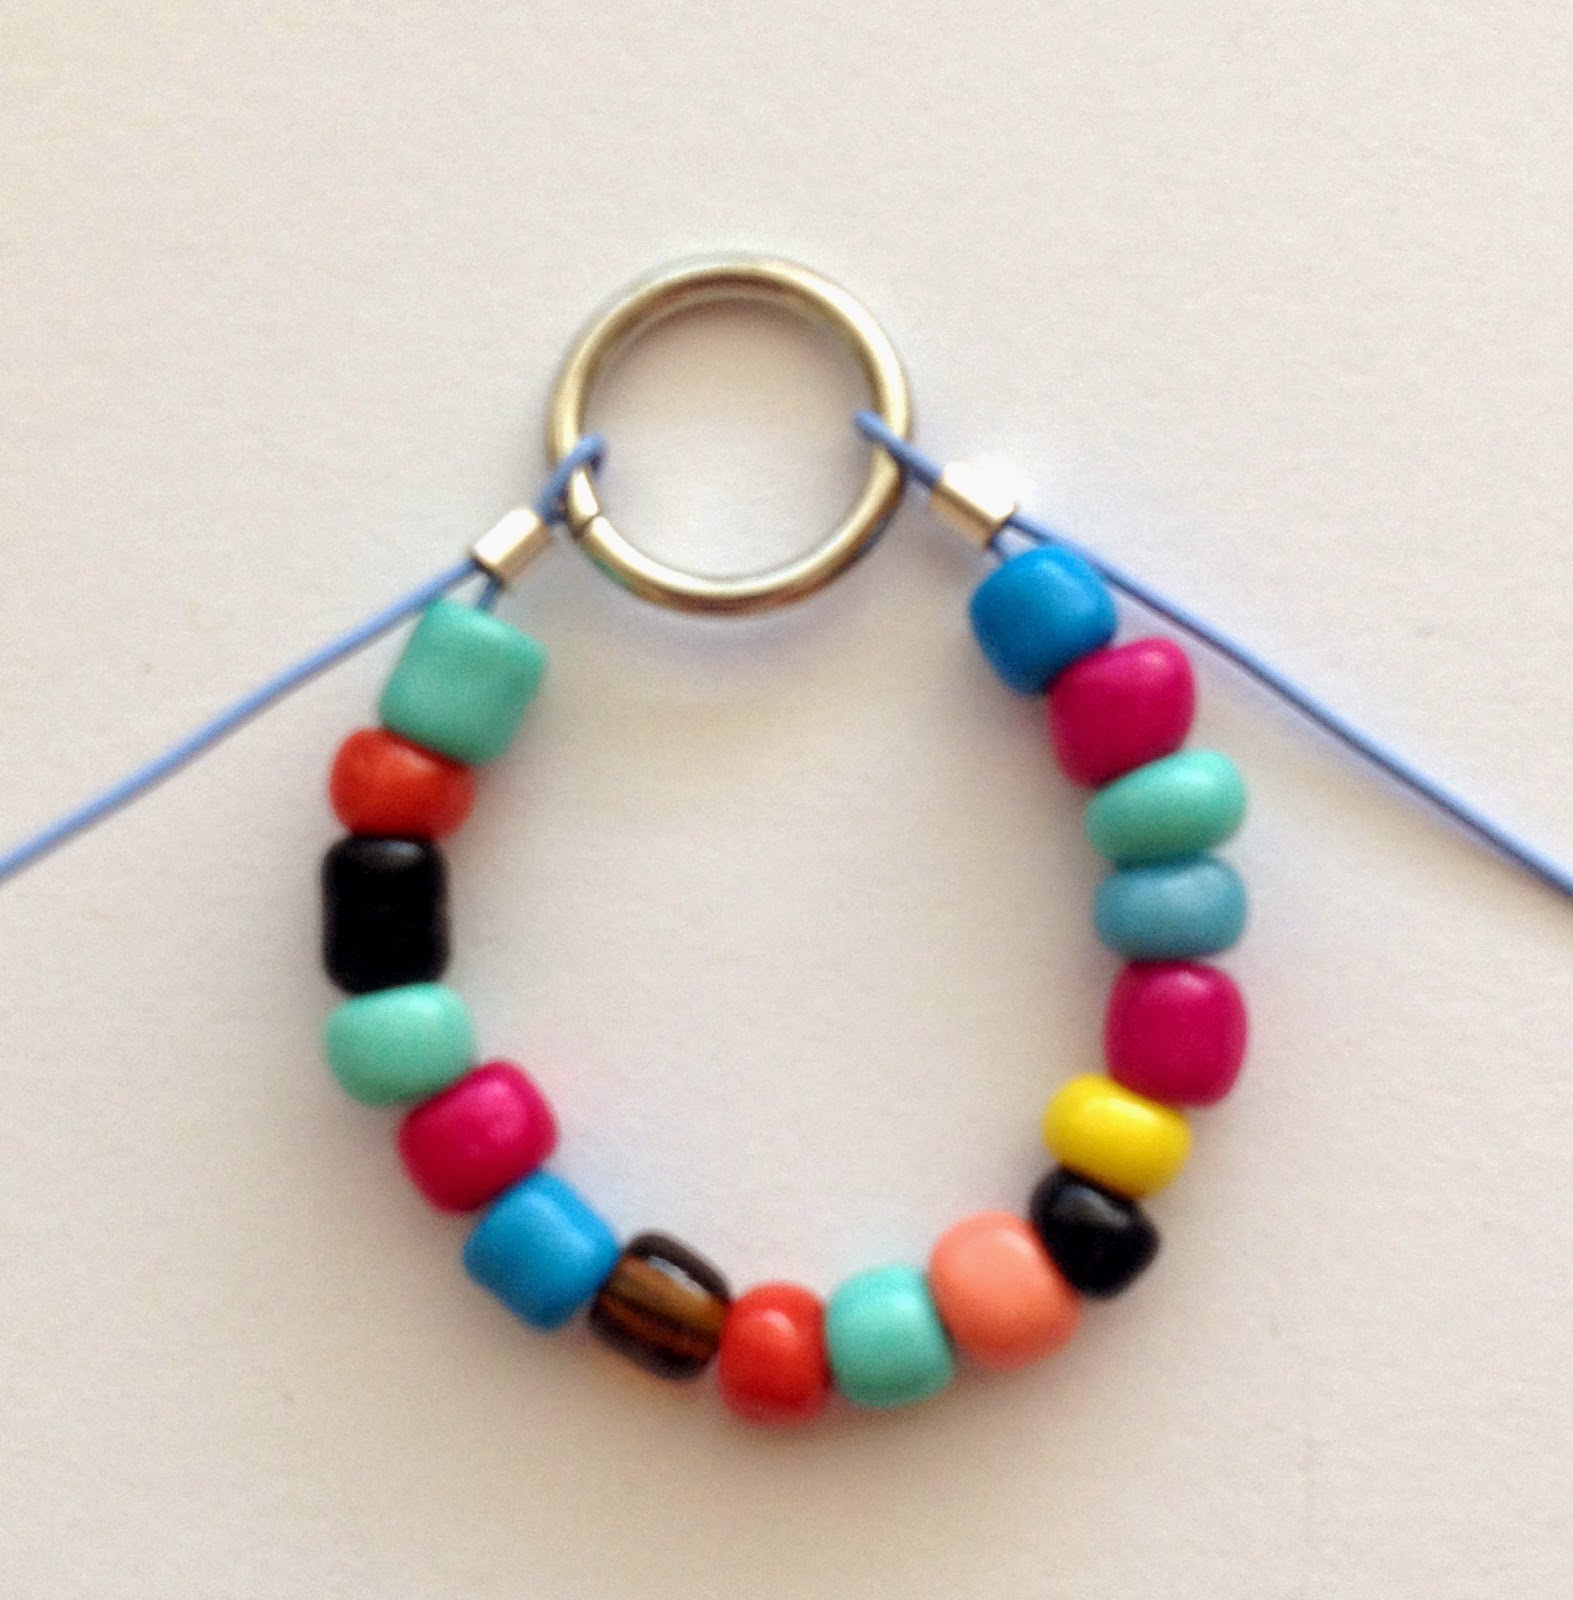
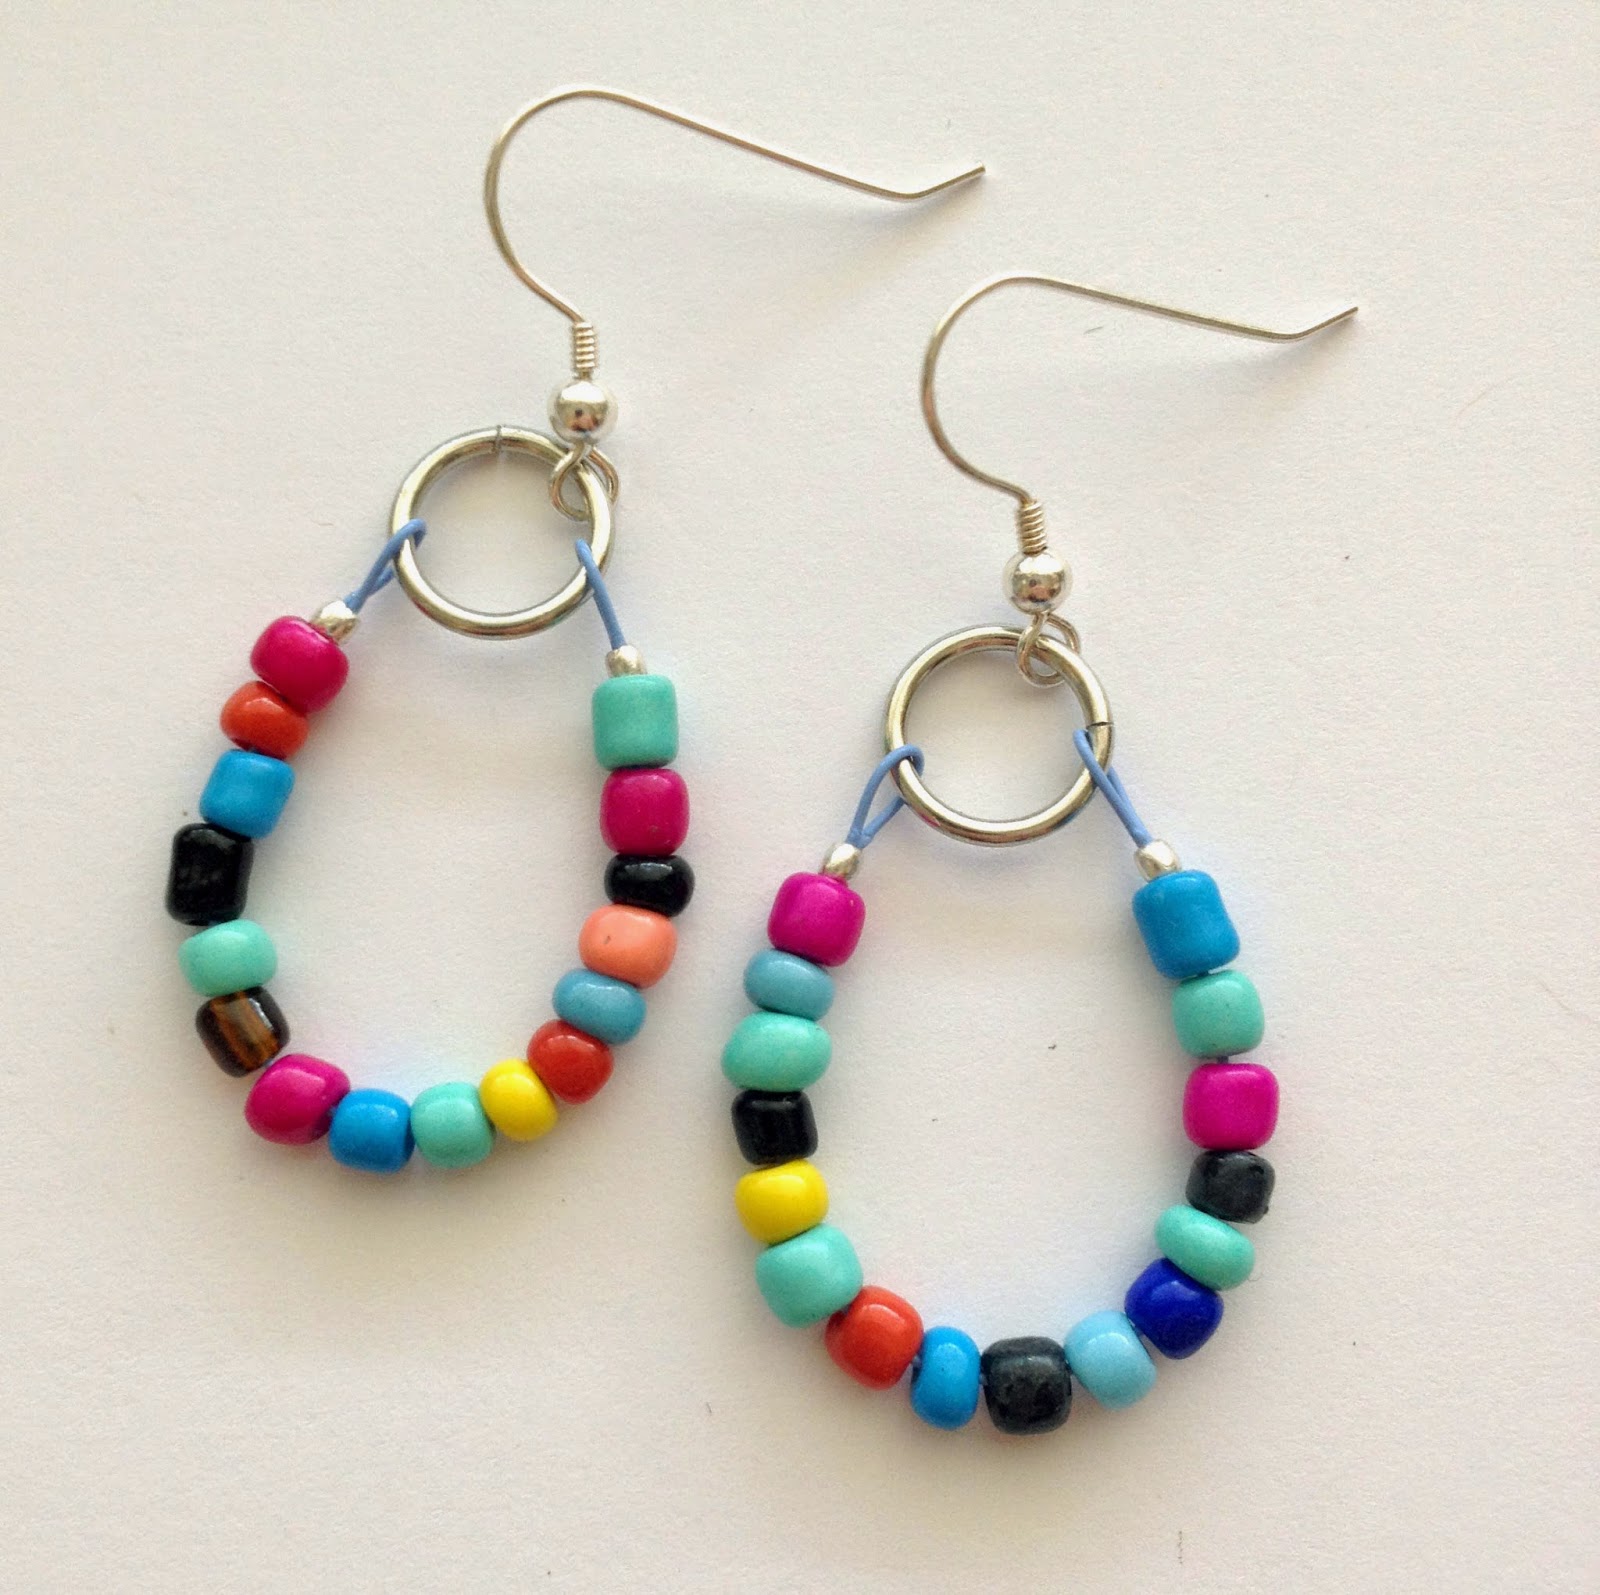
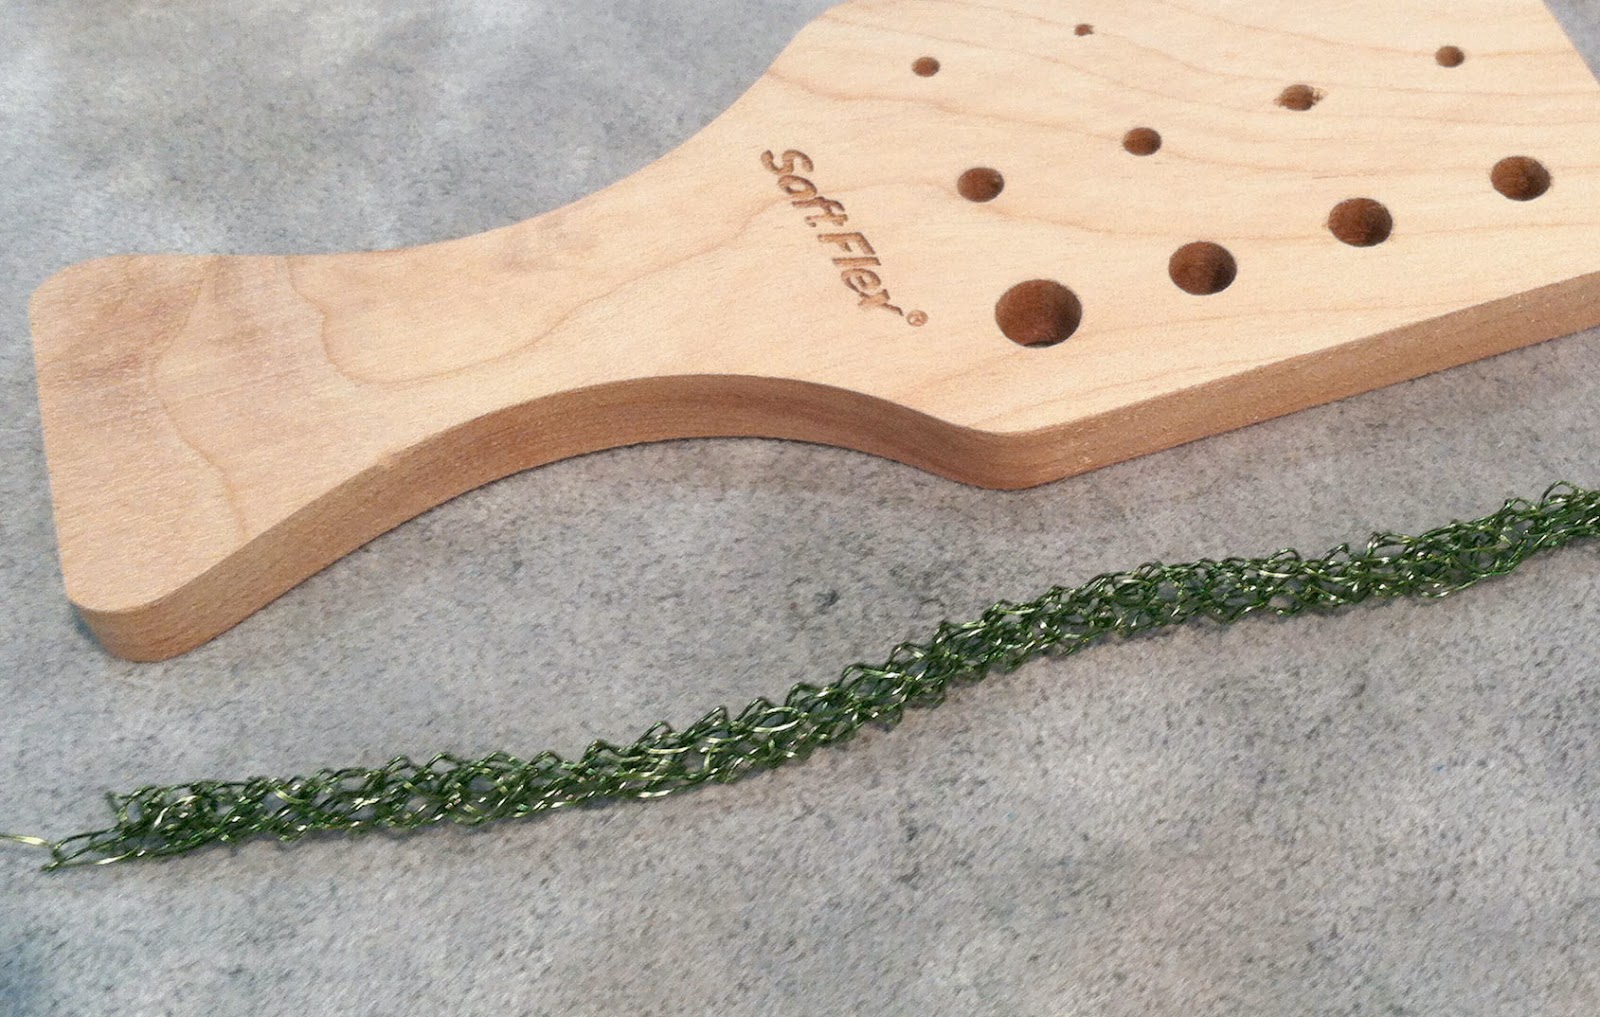
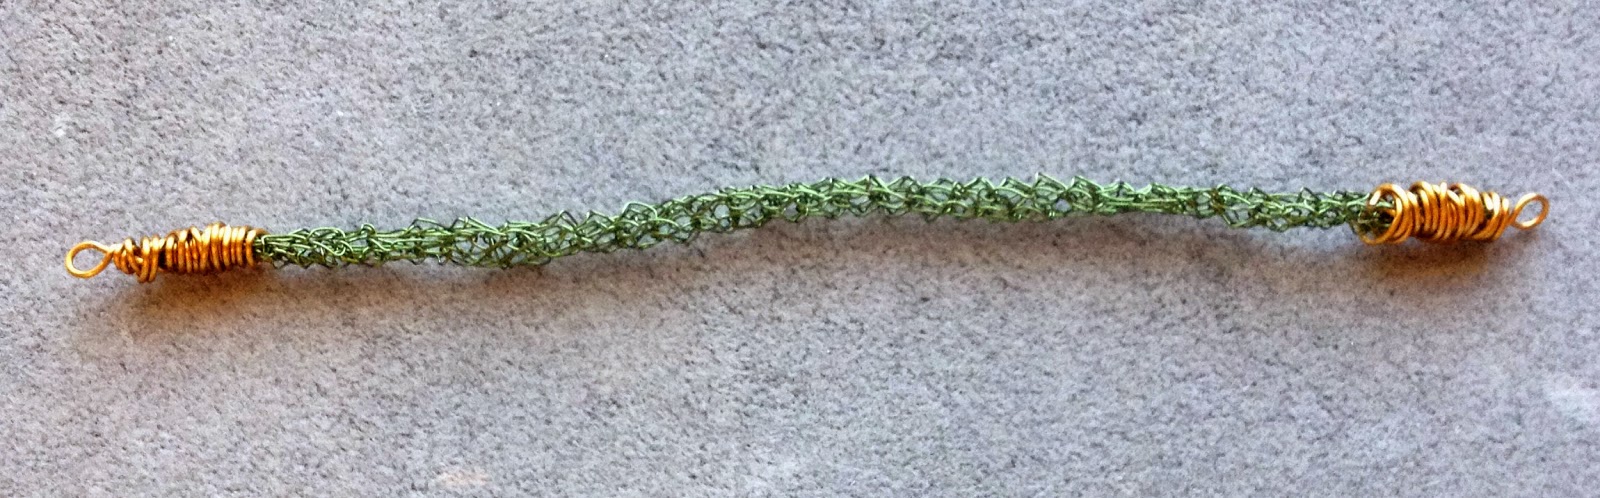
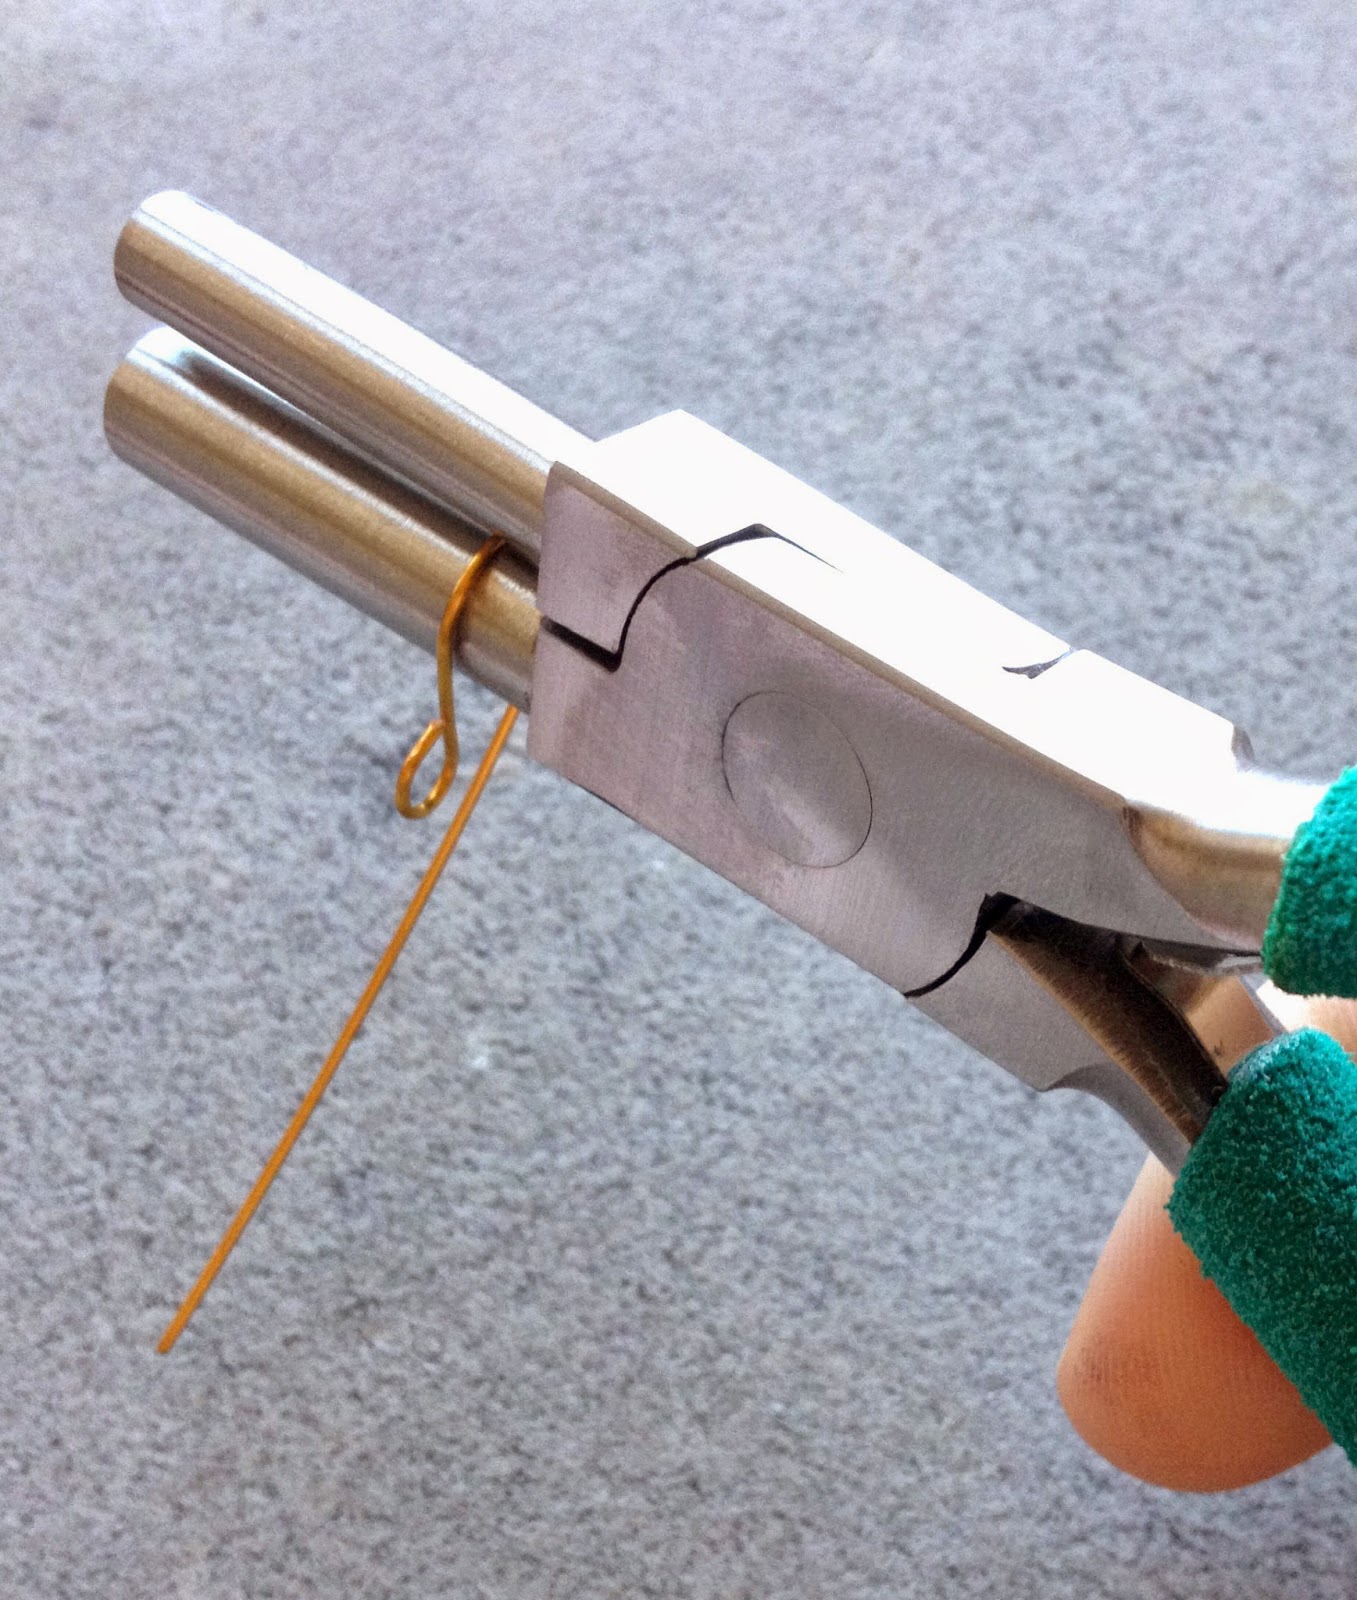
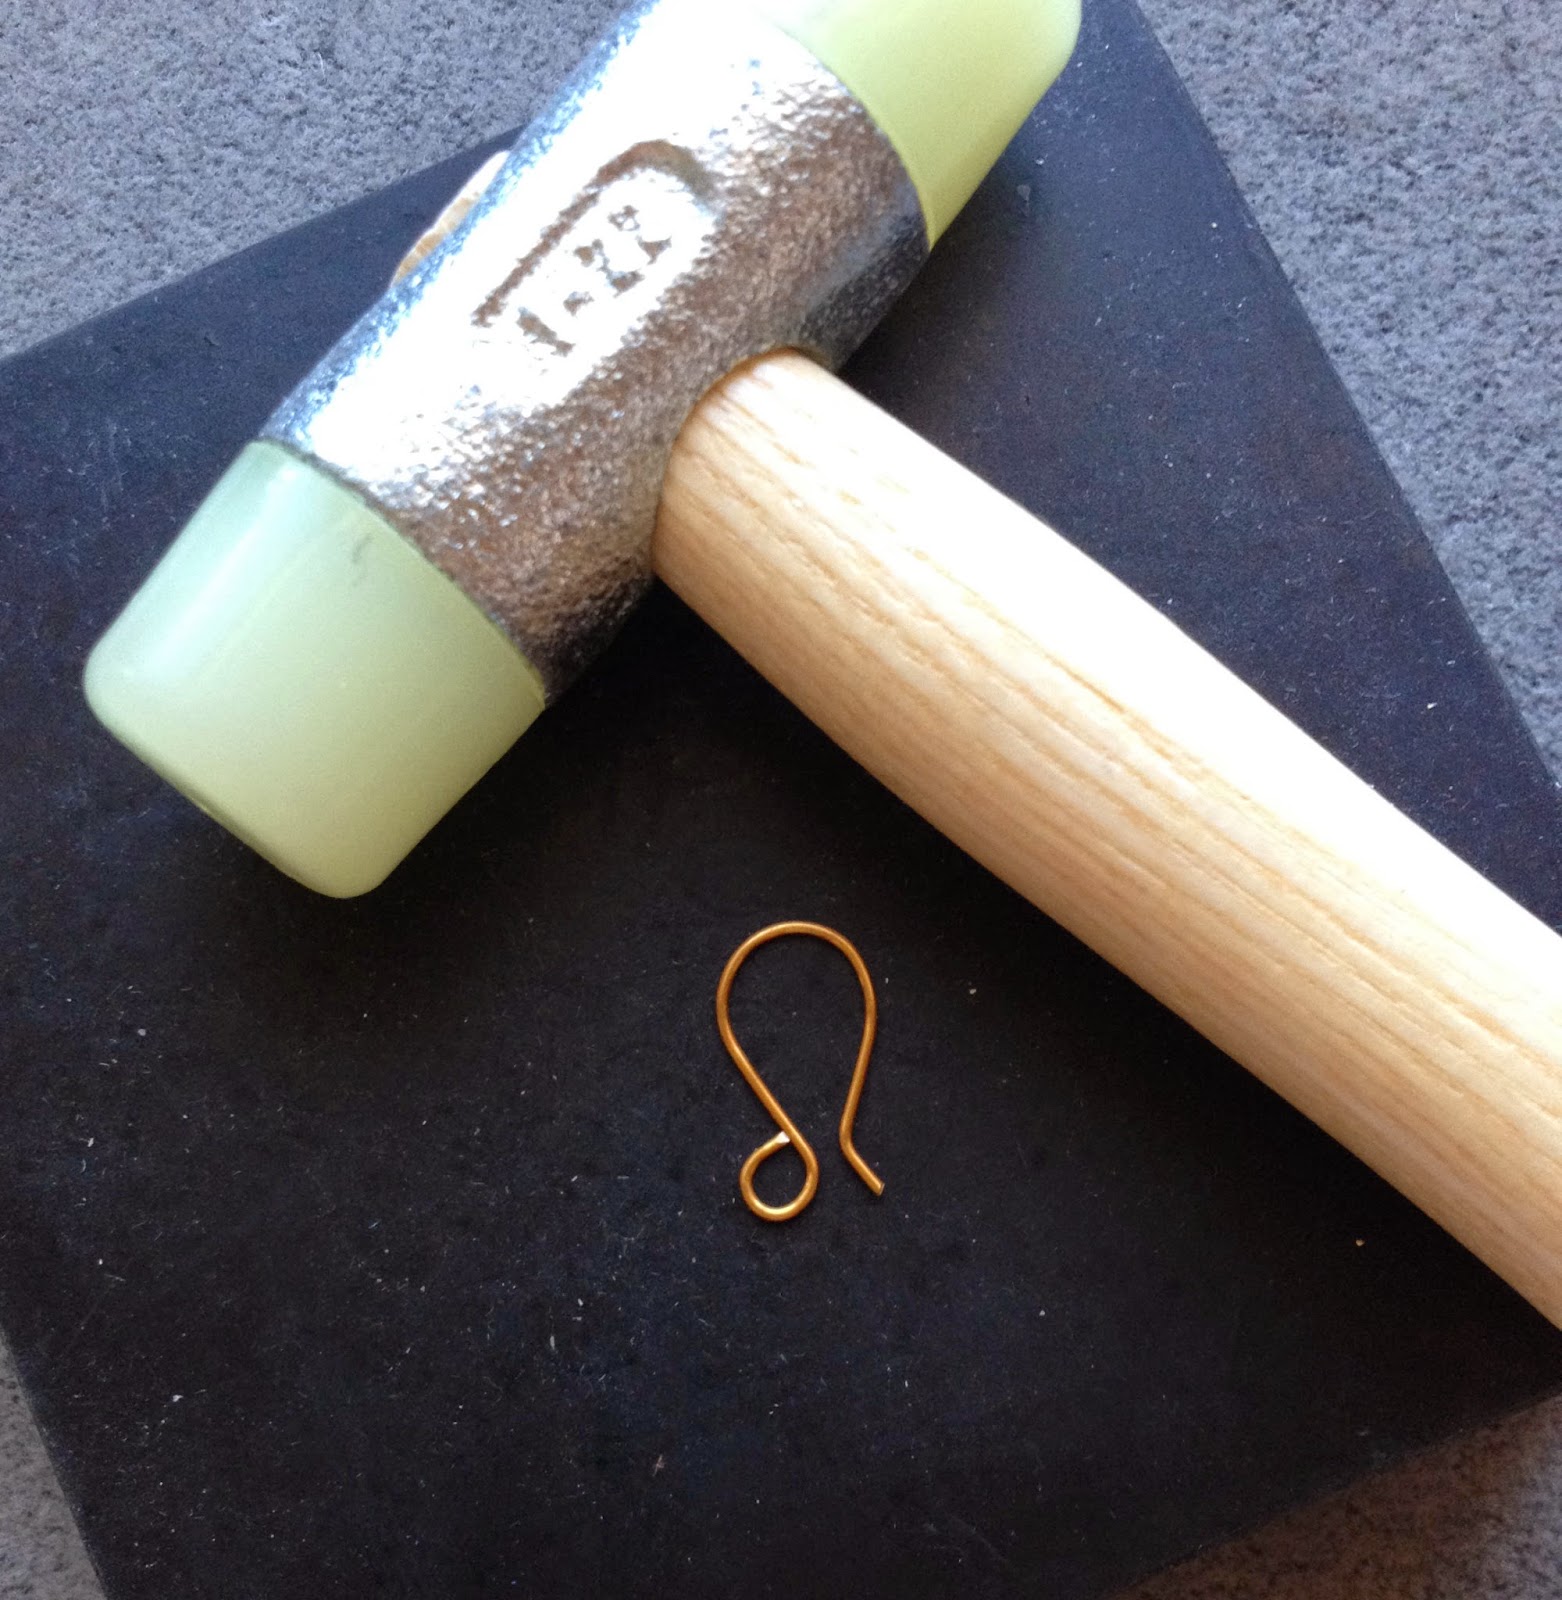
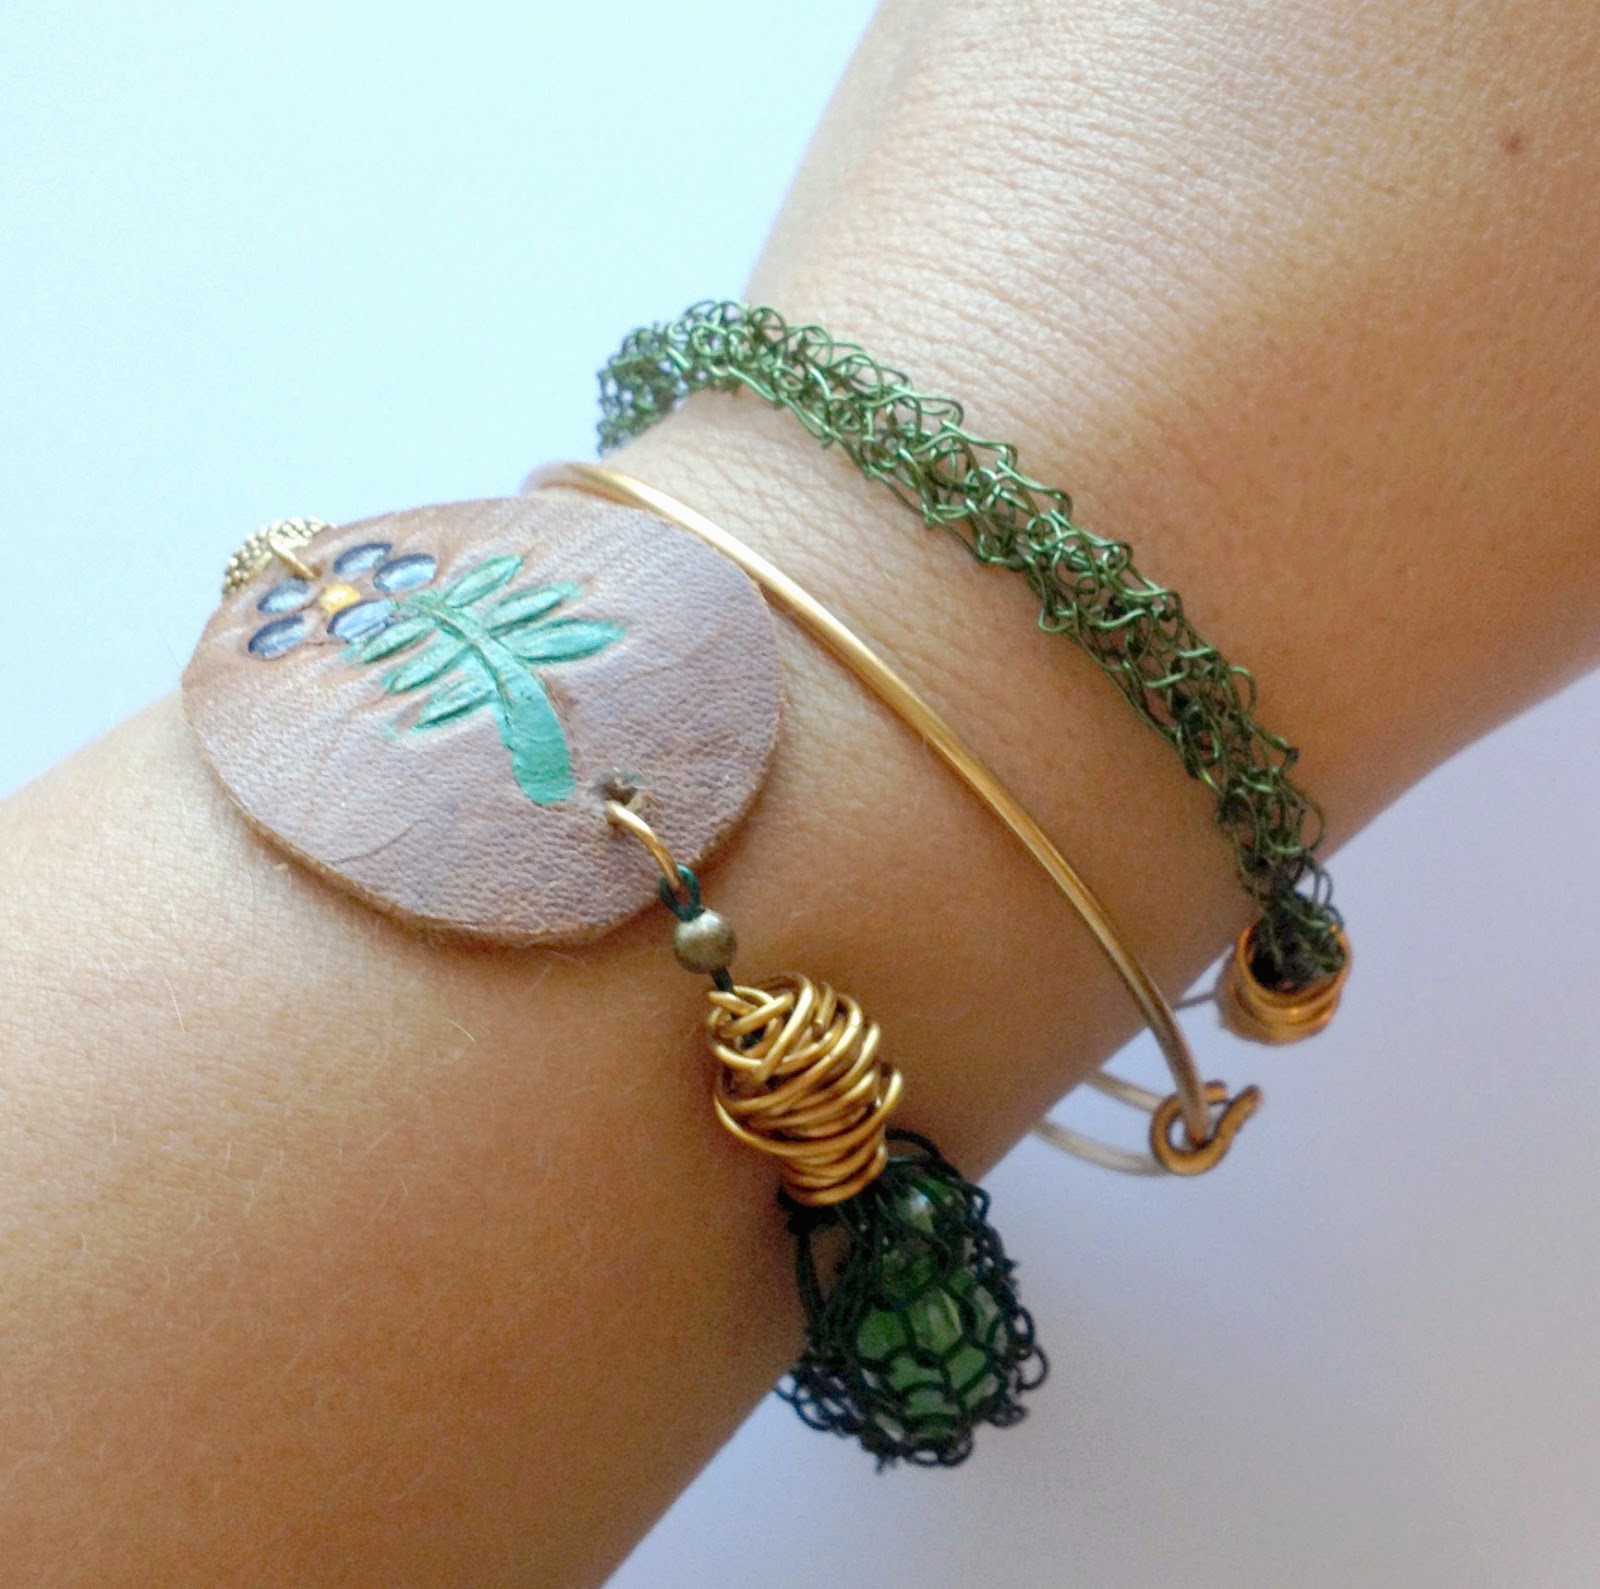
I needed to push myself to create something that hopefully would inspire others. I began working with the bead to create a hanging pendant. I’m inspired by jewelry designs that use interesting materials and force me look closer and examine how it was created. With that in mind, I knew I wanted the pendant to have some fun elements like the Dark Blue Lapis Soft Flex Wire and bead tassel. I also felt that knitting Dark Blue Lapis Soft Flex beading wire would add interest with texture. I knit with wire often but, had yet to add beads to my knitted designs so, of course I wanted to try that out and knitted with Swarovski crystal beads! Lastly, I added some fun blue glass beads from my stash and added those and crystal beads to complete the necklace. I was a little concerned I was putting too many idea in one piece but, I think by keeping the color scheme classic and simple in blue and white it helps it all work together.

I’m truly honored to be one of the 10 designers participating in this challenge  alongside jewelry designers I admire so very much and a wonderful cause I am happy to support! The finished necklace designs were featured at the 2014 Bead&Button Show in Milwaukee and sold to raise money for the Beads of Courage Program.


10402686_711727542198806_375566925167628641_n


The designers chosen by Soft Flex Company to make the final pieces include:
Jamie Hogsett
Diane Trepanier

Visit Beads of Courage to learn more and see how you can get involved with this amazing organization! Beads of Courage, provides arts-in-medicine for children coping with serious illnesses, their families and the health care providers who care for them. Truly an awesome organization.

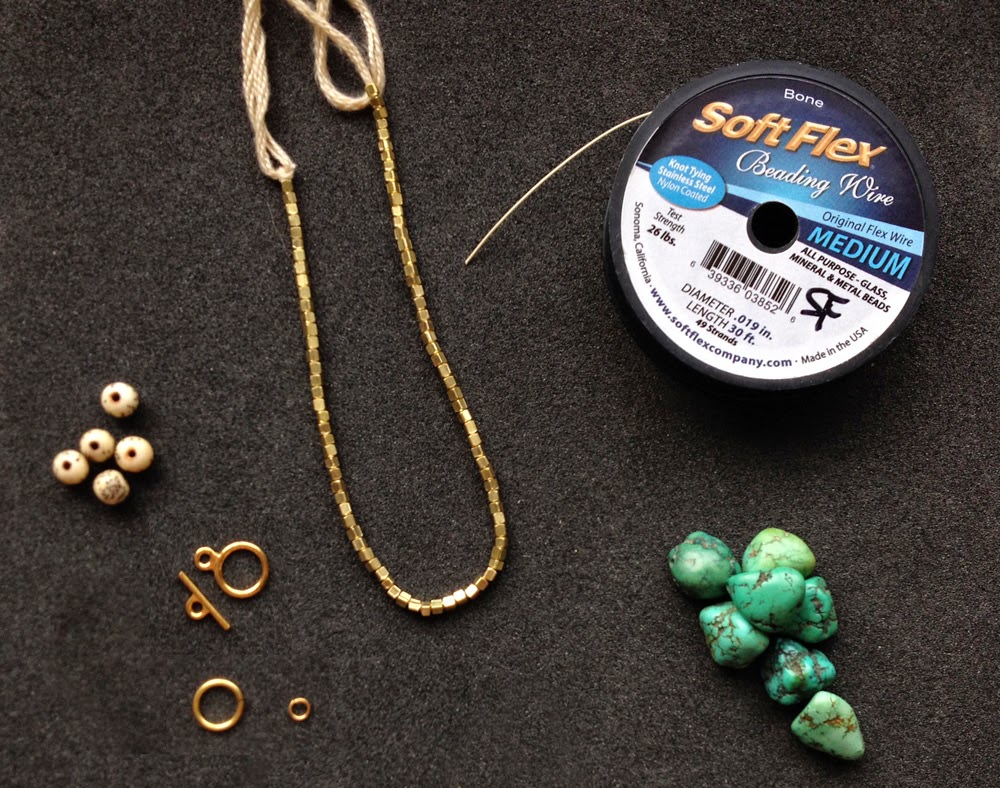
Visit Soft Flex Company for more information about this project with Beads of Courage and the products used in the final jewelry designs.