Jewelry

Tutorial Tuesday: Braided Ladybug Bracelet

Ladybug-1

Tutorial Tuesday is a blog series where I share a do-it-yourself jewelry tutorial on Soft Flex Company’s blog.

One of earth’s loveliest little creatures, the ladybug makes an appearance in this playful ladybug braided bracelet. It’s a perfect accessory to welcome Spring! Skills needed to complete bracelet are braiding and crimping.


Materials:
Cutters
Chain Nose Pliers
Mini Bead Stoppers

Cut Soft Flex Beading Wire into three 16″ lengths, one black and two red wires. With the black wire positioned in the middle, attach all three wires securely to your bead stopper leaving 2.5″ inch tail for each wire. Begin braiding your wires and whenever a red wire is in the middle add 1 black seed bead. After a couple rows you’ll start to see the pattern emerge and the black wire will look like a wave running through the braid.


Once you have 15 black seed beads throughout your braid, string one ladybug bead (back side first) through all three beading wires keeping the black wire in the middle. Next, string your red bicone bead through the middle black wire and allow the two red wire to wrap around the bicone bead. Now, string all three wires through your second ladybug bead (front side first) so that your ladybug beads are facing one another. Continue your braid pattern on the second side, adding black seed beads to the red wires whenever they are in the middle until you have used the remaining 15 black seed beads. Please another bead stopper on this end to secure the wires.

Using your chain nose pliers, open the 4mm jump rings and attach to each side the toggle clasp. Remove the bead stopper on one side of your bracelet and string a 3mm crimp tube onto all three wires.String  the 4mm jump ring attached to the circle end of your toggle clasp through all three wires and back through the crimp tube. Do not crimp yet. Remove the bead stopper from the other side of your bracelet and string a 3mm crimp tube onto all three wires.String  the 4mm jump ring attached to the bar end of your toggle clasp through all three wires and back through the crimp tube. Do not crimp yet.

Measure your finished bracelet and see if it is the size you desire before crimping. If you need to make the design smaller remove the clasp and crimp and undo a bit of the braid, re-string the crimp and clasp and measure again. If you need to make the design slightly larger you may simply add an extra jump ring to one or both sides of the toggle clasp to easily extended the design.

Once you are happy with the bracelet size, use your Magical Crimpers to close the crimp tube. For crimping instructions, click here. Finally, trim off the excess wire close to the crimp.


Beads of Courage Jewelry Design Challenge

imageBeads of Courage and Soft Flex Company are teaming up for a special design challenge called “Creativity in Full Circle”.

For the “Creativity in Full Circle” design challenge, 10 glass beads were created based on drawings by 10 children in the Beads of Courage program. Those beads were sent to 10 jewelry designers who were asked to create a finished necklace design with each bead. The finished necklace designs will be featured at the next Bead&Button Show in Milwaukee and sold to raise money for the Beads of Courage Program.

My word is inspire and this is the imaginative bead I received this week, now I need to get to work on creating a necklace design. I’m super excited to be one of the 10 designers participating in this challenge  alongside jewelry designers I admire and a wonderful cause I am happy to support!

For those of you who are not familiar with Beads of Courage, they provide arts-in-medicine for children coping with serious illnesses, their families and the health care providers who care for them. Truly an awesome organization.

Visit Beads of Courage to see how you can get involved with this amazing organization!

Visit Soft Flex Company for more information about this project with Beads of Courage.

Tutorial Tuesday: Mediterranean Dangles

TurquoiseDangle-1

Tutorial Tuesday is a blog series where I share a do-it-yourself jewelry tutorial on Soft Flex Company’s blog.

The shape of the ear wires, low hanging hoops and color scheme give these earrings a modern Mediterranean vibe. I created similar black and pewter earrings awhile ago that I wear all the time. This is project is easy and great for a beginning beaders. Skills required are crimping and wire looping.

For crimping help, please visit our webpage, All about Crimps.


Materials:

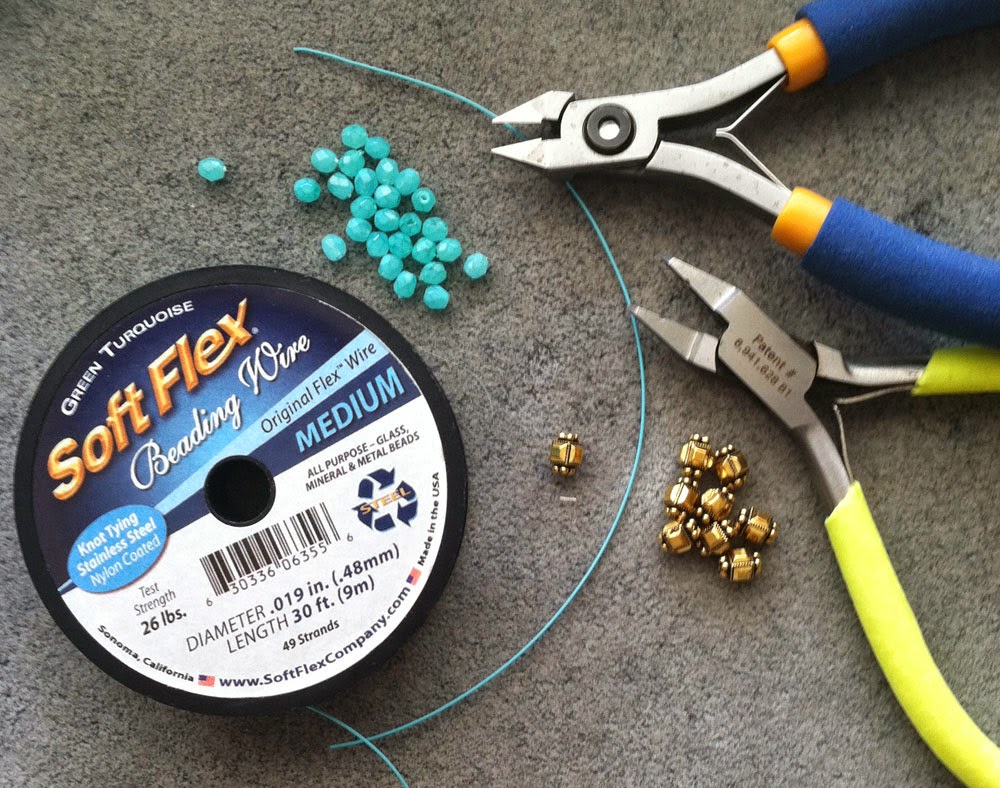
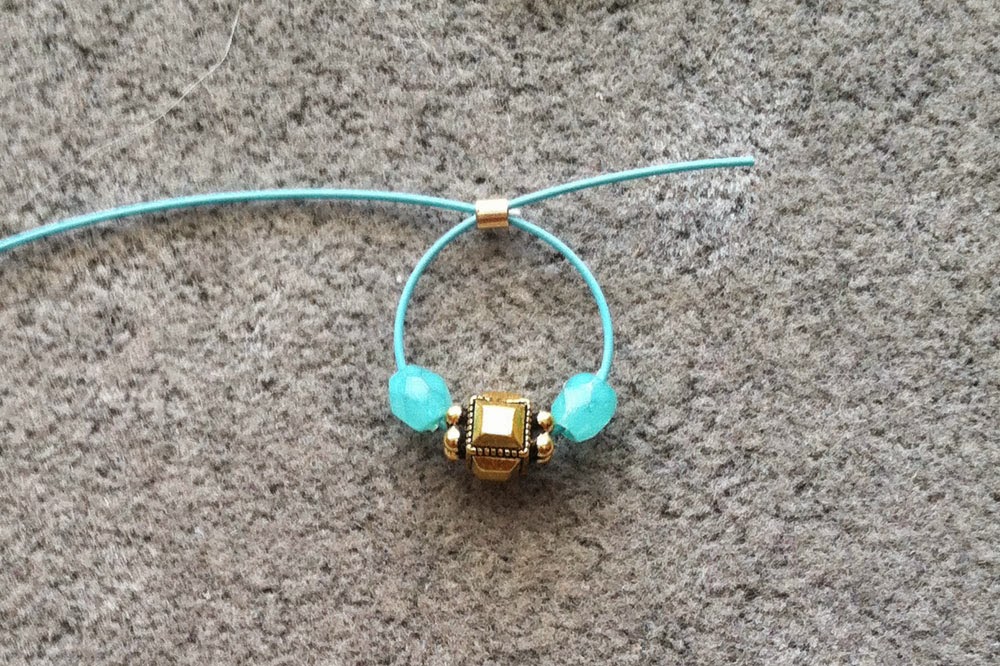
Cut Soft Flex Beading Wire into two 8″ lengths, one for each earring.  String crimp tube, one turquoise fire polish bead, one gold plated spacer bead and one turquoise fire polish bead. Take the other end of the wire make a circle back through the crimp tube for your first loop.

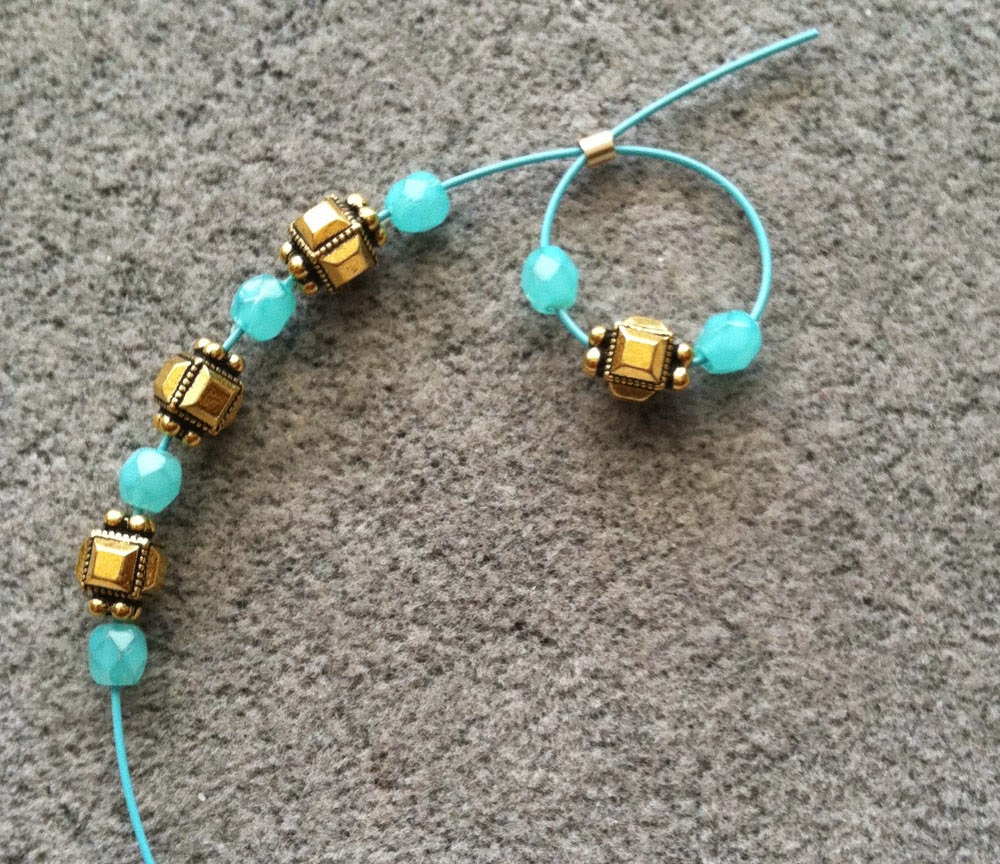
Using the tail that went through the crimp for the loop, string your beads for the second loop. Alternate 1 turquoise fire polish bead and 1 gold plated bead until you have 4 turquoise fire polish beads and 3 gold plated beads.

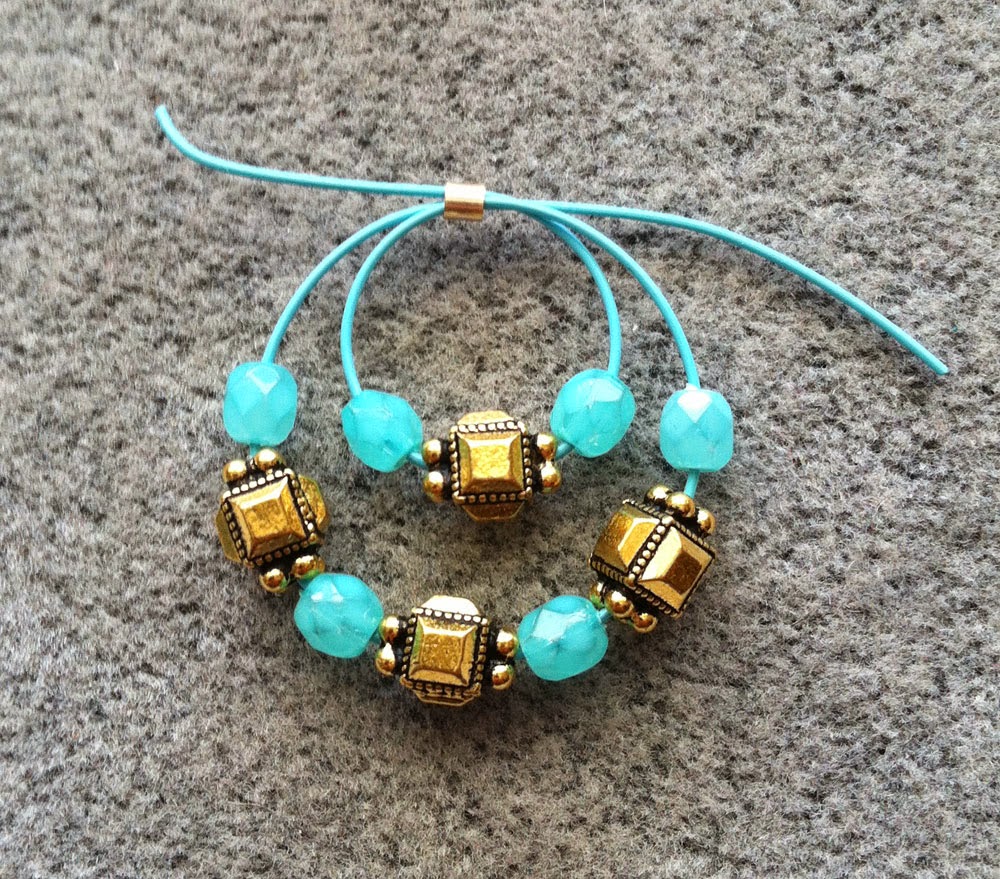
Take your wire tail and feed it through the crimp tube again making your second loop. Adjust wires until you are happy with size of both loops. When ready, use your Magical  Crimpers to close the crimp tube. For crimping instructions, click here.

Finally, trim off the excess wire close to the crimp. Make your second earring dangle the same way. When making the second earring pay attention to the loop sizes of both loops before crimping.

Now, we’ll make two ear wires. For the ear wires, cute two 3″ lengths of your 20G Craft Wire. Using your Nylon jaw pliers smooth out your wire. Then, create a wire loop on one end of each wire piece with your round nose pliers. Measure your wire piece and at about 1.25″ mark use your chain nose pliers to bend the backward. Trim the wire tails to your desired length.


Using your hammer and block, work harden the loop area and the front facing portion of the wire, then with the bur cup file down the wire end that goes through your ear.

Finally, open your ear wire loops with your chain nose pliers and attach each to your earring dangles.


Here is an alternate design idea. These are the black and pewter earrings I mentioned earlier that I love and wear ALL the time! The design possibilities by simply changing beads and colored wire are endless.

Tutorial Tuesday: 3 Little Birds Layering Bracelets

3littlebirds-1

Tutorial Tuesday is a blog series where I share a do-it-yourself jewelry tutorial on Soft Flex Company’s blog.

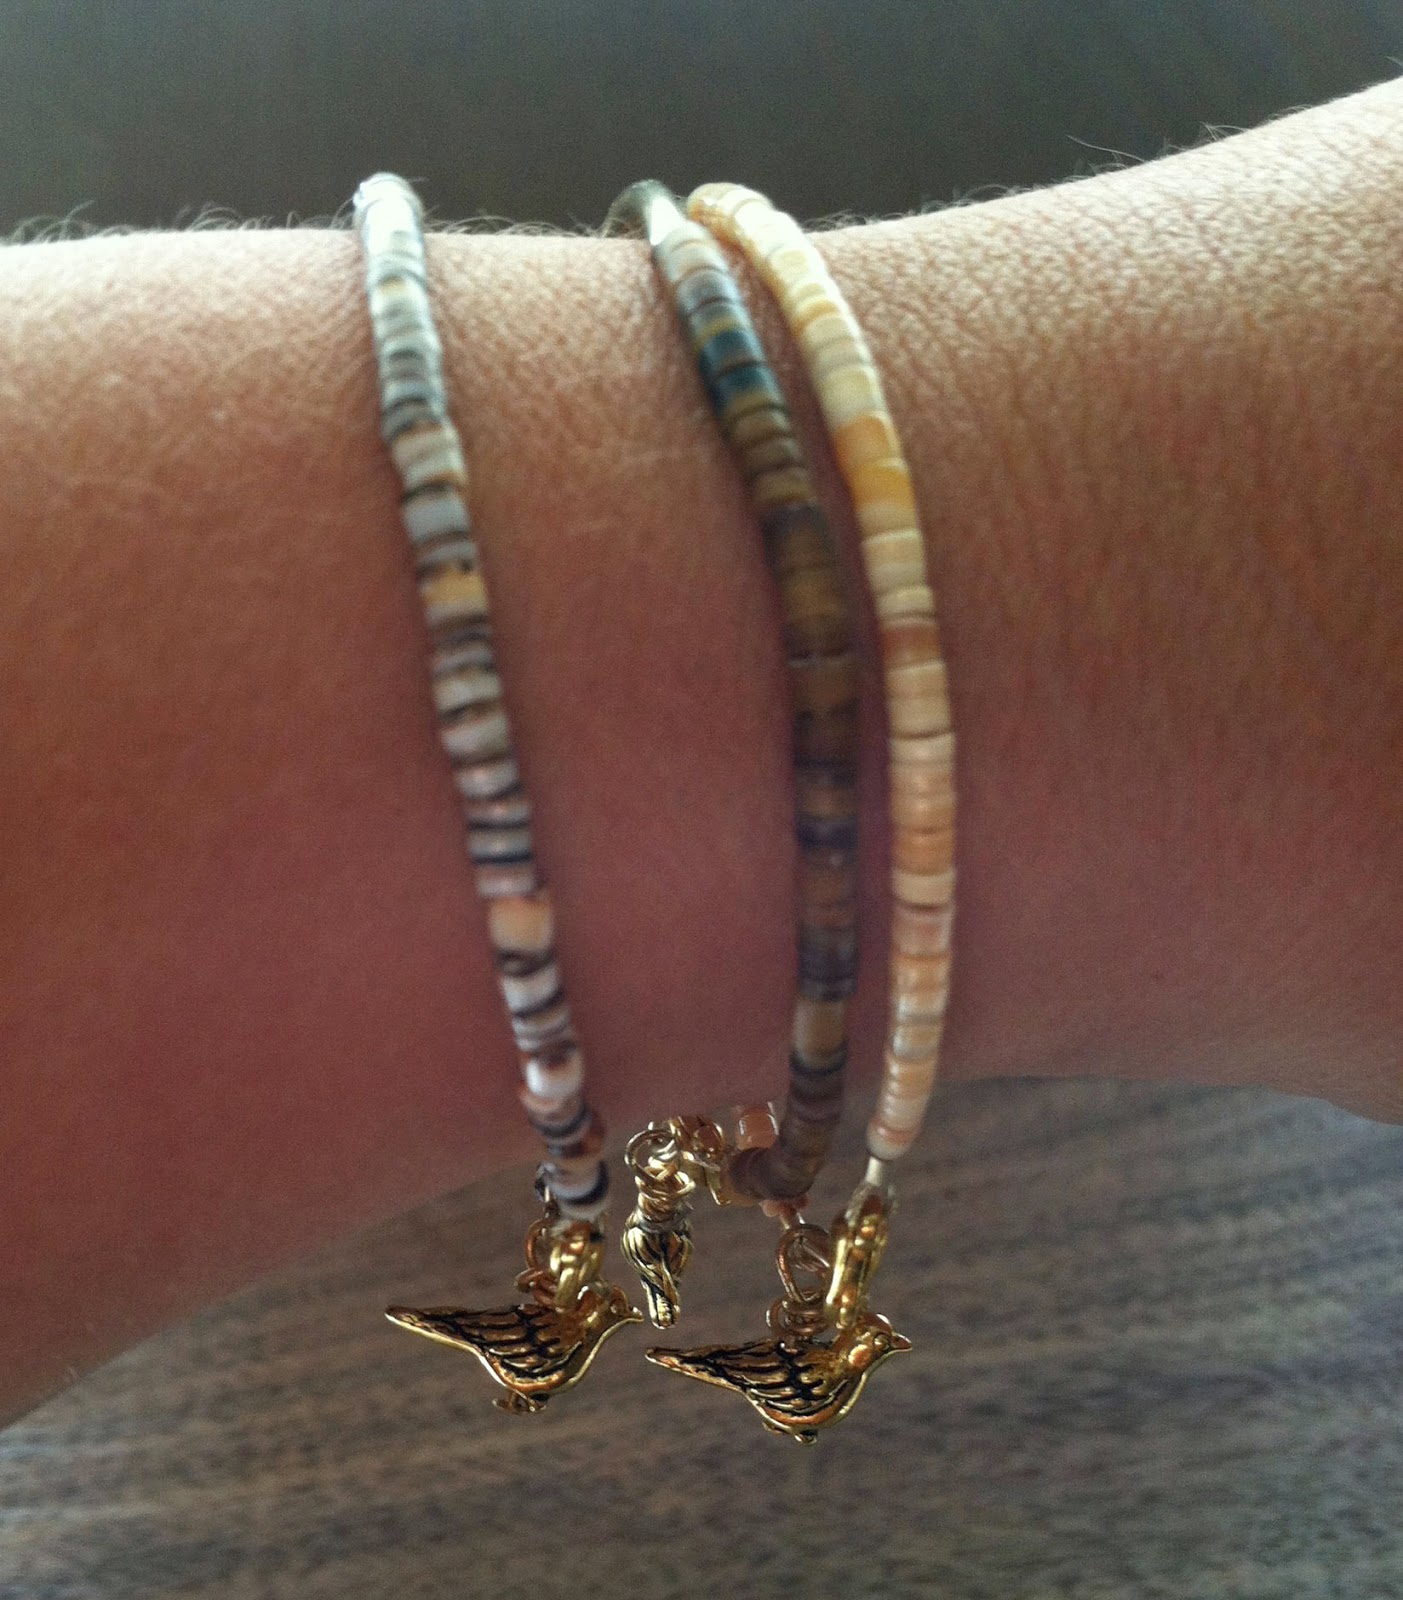
Happy Earth Day! Today, I am sharing a simple bracelet design using natural shell beads with a modern twist. The gold filled curved tube elevates the bracelet design and the little bird beads bring in a sweet touch of nature. The birds outside my window have been very chatty lately which has been so nice to listen too throughout the day.


Materials:


Cut Soft Flex Extreme Flex Beading Wire into three 9″ lengths, one for each bracelet.  Clip a bead stopper on one end and string a 2mm gold filled crimp tube, shell heishi beads, one gold filled curved bar, shell heishi beads and another crimp tube.

Attach a lobster clasp on one end and crimp. Attach a jump ring on the other end and crimp. Trim excess wire. For crimping help, please visit our webpage, All about Crimps.

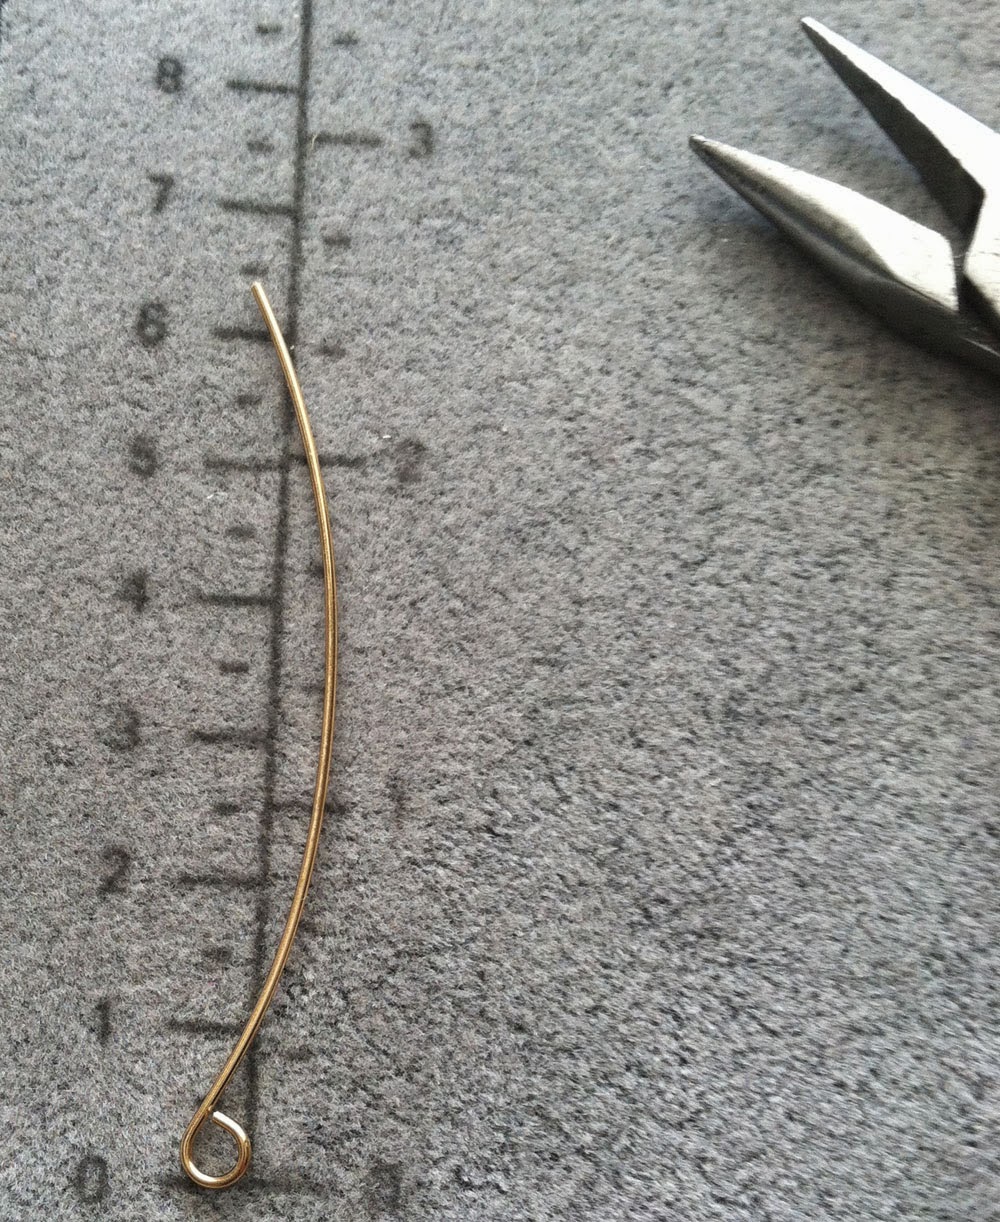
The bird bead I am using has a vertical hole. I threaded the bird bead onto a head pin. Then using your round nose pliers make a loop. Then wrap the remaining wire around the bottom of the loop formed.

Using your pliers, open the jump ring that you attached to one end of the bracelet and add your bird bead dangle. For how to make a bead dangle instructions, click here.

Repeat steps to create two more bracelets.

Layer a few of these to your wrist and be on trend – see Sara’s post for more trendy stack-able design ideas, here.

Tutorial Tuesday: Wire Wrapped Stone Necklace

WrappedStone-1

Tutorial Tuesday is a blog series where I share a do-it-yourself jewelry tutorial on Soft Flex Company’s blog.

I love how serendipitous designing jewelry can be. My sister was visiting me last weekend and brought a wire wrapped stone necklace that I made her many years ago. She said she wears it all the time and that a friend of her is always trying to swipe it from her, haha. So, naturally she wanted me to make her friend one. We set off on a shopping trip to find stone slices and because we couldn’t pick just one so, I ended up making 6 new wire wrapped stones!

Today, I’ll share my process with you. Let me start by saying I’m not a expert wire wrapper. I like to try new things and experiment and this project is very much a “go with the flow” idea. Each stone slice is shaped differently so, there is no one way to wrap it. Skills needed for this are wire looping and ability to experiment and play with the wire. Click to learn how to make a wire wrapped loop.


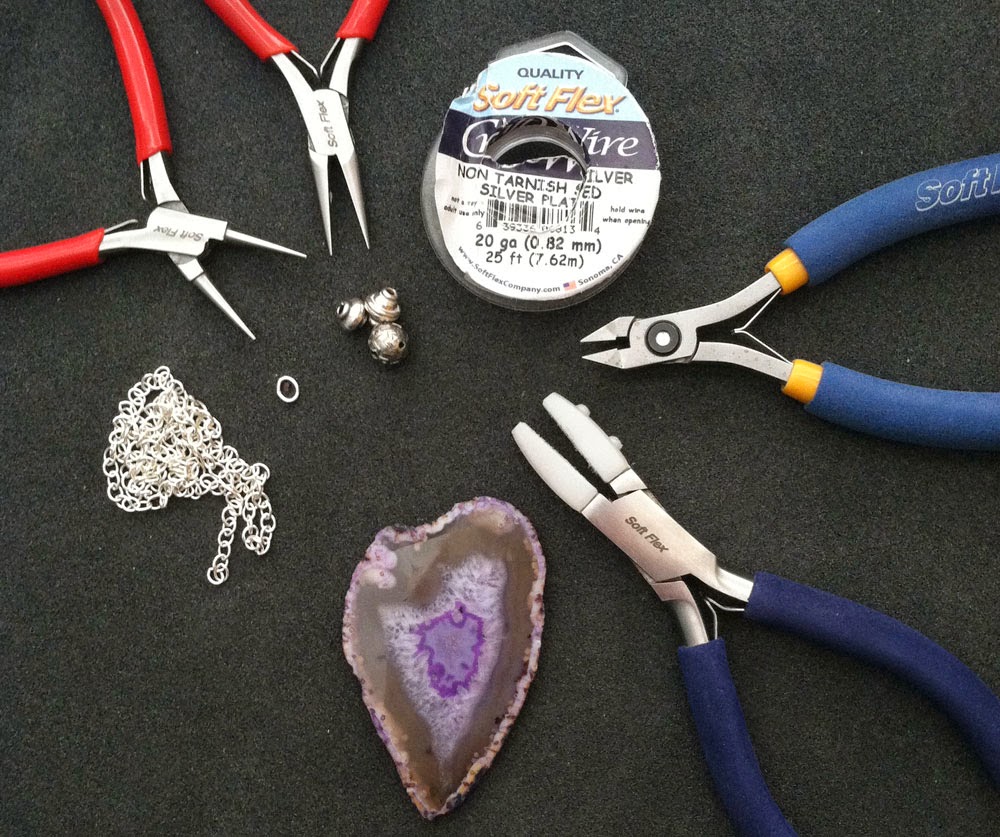
Materials:
(24″) Silver Chain
(1) Silver Jump Ring
(1) Silver Clasp (optional)

Cut Soft Flex Craft Wire into a 30″ length. I like to have more wire then less to work with so, if you are unsure go a little longer. Use your nylon jaw pliers to smooth out the wire before beginning.

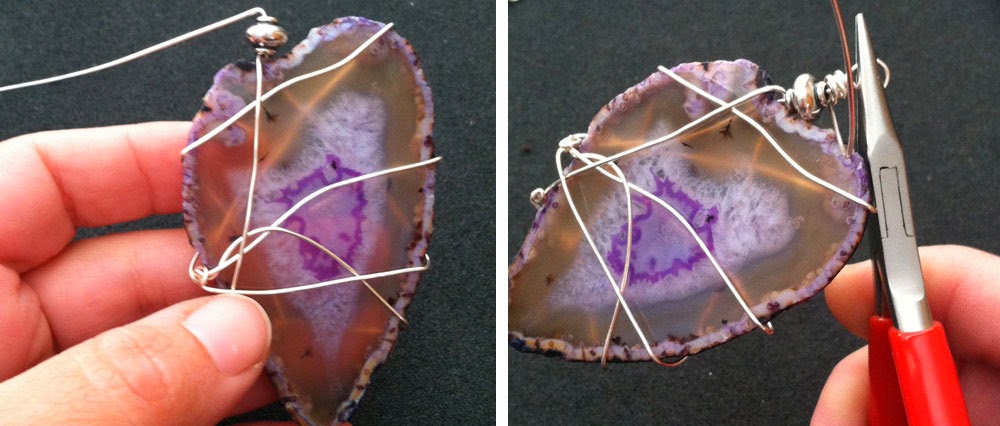
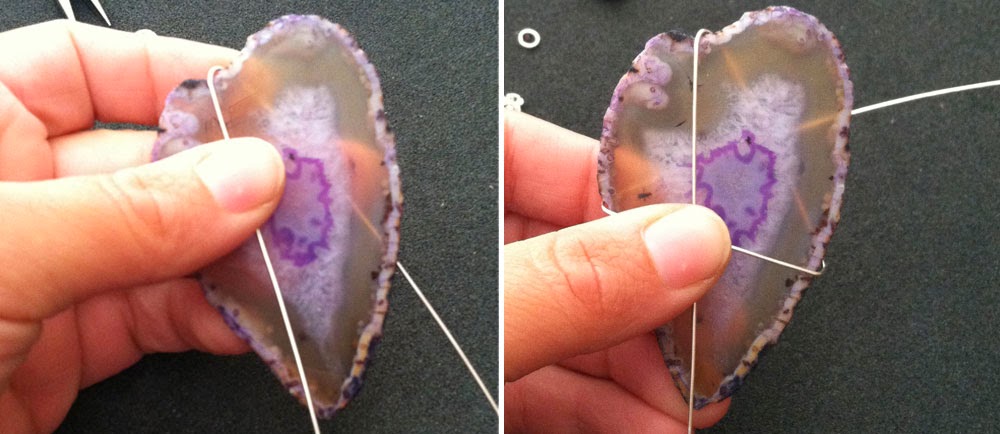
At approximately the half way point on your wire choose a spot to begin your wrap. Now, just play with wire wrapping it up and down and around the stone slice until it feels secure – being mindful to leave about 4-5″ tail of wire to wire wrap your pendant’s loop. I chose a few areas to thread the wire under a wrap as seen below to help secure the stone.When you are close the the end on one tail end wrap it around the closeout wire to finish it.


When you feel close to being done, take your long tail end and position it at the top where you will make your pendant loop. Hold the tail and lightly shake it up and down making sure the stone is secure and there are no areas springing loose. If there is a spot of weakness, you will need to adjust your wire to secure that spot before finishing.

Once secure, and your wire tail is positioned pointing up in the spot where you plan to add your loop, string your silver bead. Then using your round nose pliers create your pendant loop. I made my loop large enough to fit through my chain. Click to learn how to make a wire wrapped loop. Hold your loop with your chain nose pliers and wrap the remaining wire around your loop, the bead and under your bead if you’d like. Cut off any excess wire and tuck in the tail with your chain nose pliers.

Use your chain nose pliers and any place on my wire that was a little wonky I grabbed and gave a small twist. This helped to straighten the wire around my bend and hug the stone tighter. It also give a little extra detail.

Use your chain nose and attach the two ends of your chain to a jump ring. 24″ chain length should be large enough to slide over your head. You may lengthen or shorten the chain and add a clasp instead if you’d like.


Knitted Wire Bangle Bracelets

New knitted bangle bracelets have been added to my online shop. I hand knit these bracelets high quality Soft Flex flexible beading wire and a knitting spool. The designs are finished with cones, wire wrapping, beads and charms. Some have toggle clasps and others stretch to fit over your hand without the need for a clasp. Comfortable to wear to everyday.

http://www.etsy.com/shop/creativestash

KnittedBracelets


Tutorial Tuesday: Glass Fringe Necklace

GlassFringe-1

Tutorial Tuesday is a blog series where I share a do-it-yourself jewelry tutorial on Soft Flex Company’s blog.

I know St. Patrick’s Day was last week, but I’m Irish and love the color green so, I wanted to keep the celebration of green going with this necklace design! This time I am using Soft Flex beading wire as a design component. This project appears to be complex but, it is easy and great for any beader. Only skill required is crimping. For crimping help, please visit our webpage, All about Crimps.


Materials:
(5) 5mm Square Silver Bead Frames
(16″) Silver Chain
(2″) Adjustable Chain (optional)
(10) Silver Jump Rings
(1) Silver Lobster Claw Clasp

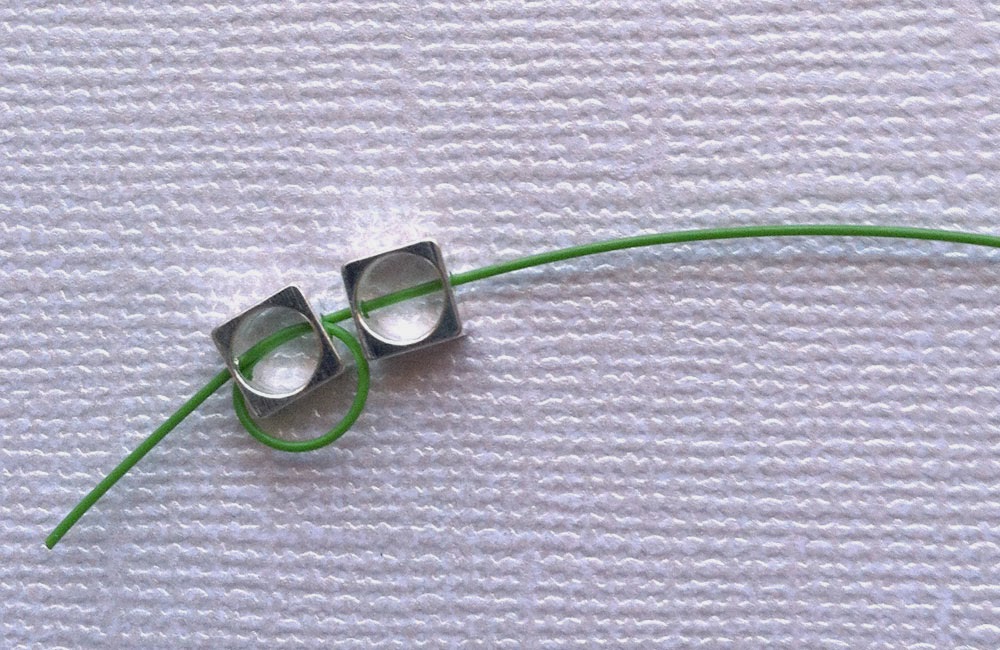
Cut Soft Flex Beading Wire into approximately a 10″ length.  String bead frame and take one end of the wire around to make a circle and back through the first bead frame to create a loop. Wiggle this first bead frame to one side of the wire leaving about 1.5″ tail on one end.


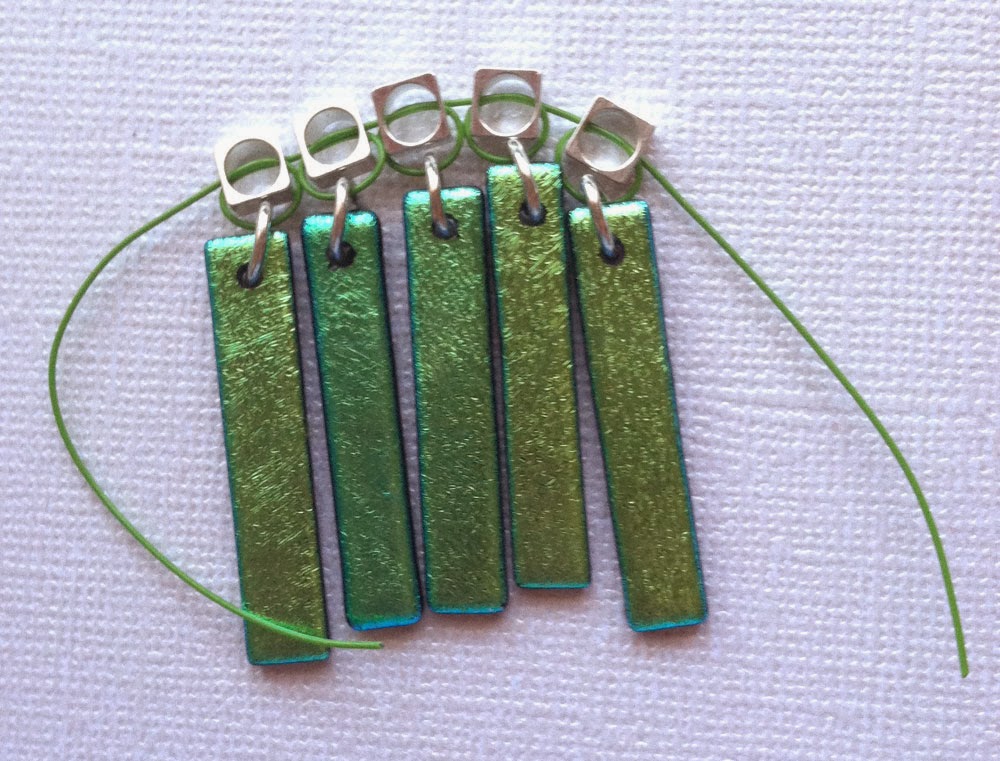
Using the longer wire tail string your next bead frame and circle around the frame and back through to create the second loop. Continue stringing bead frame and making a loop until all 5 frames are complete.

Once your bead frame section is complete, use your chain nose pliers to attach the glass rectangles to the beading wire loops with jump rings. You have a little wiggle room to get the bead frame spacing the way you want before crimping. Take a moment to adjust any frames if necessary.

Using your crimping pliers, crimp one side as close to the bead frame as possible. You may use the Regular Crimping Pliers or Universal Magical Crimper to secure the crimp. I choose to use the Universal Magical Crimper as it makes a small 2mm bead out of the tube. For regular crimping instructions, click here. For magical crimper instructions, click here. Trim off the excess wire close to the crimp.

Using your chain nose pliers to attach a jump ring on either side of the fringe section. Cut your chain length in half and attach to each jump ring. Attach the lobster claw clasp to one end and a jump ring to the other end of your chain. You  can also make it adjustable by adding one more jump ring and your optional 2″ length of chain to the back. In the photos below I’m wearing a 18″ chain in the top picture and adjusted it to a 20″ chain in the bottom picture.

Tutorial Tuesday: Celtic Bead Dangles

CelticDangle-1

Tutorial Tuesday is a blog series where I share a do-it-yourself jewelry tutorial on Soft Flex Company’s blog.

With this design, I wanted an earring that I can wear to celebrate St. Patrick’s Day! This is project is easy, fast and great for a beginning beaders. Only skill required is crimping. For crimping help, please visit Soft Flex Company’s webpage, All about Crimps.


Materials:
(2) Celtic Beads
(12) 4mm Green Fire Polish Beads
(10) Silver Spacer Tubes/Beads
(2) Silver Ear Wires

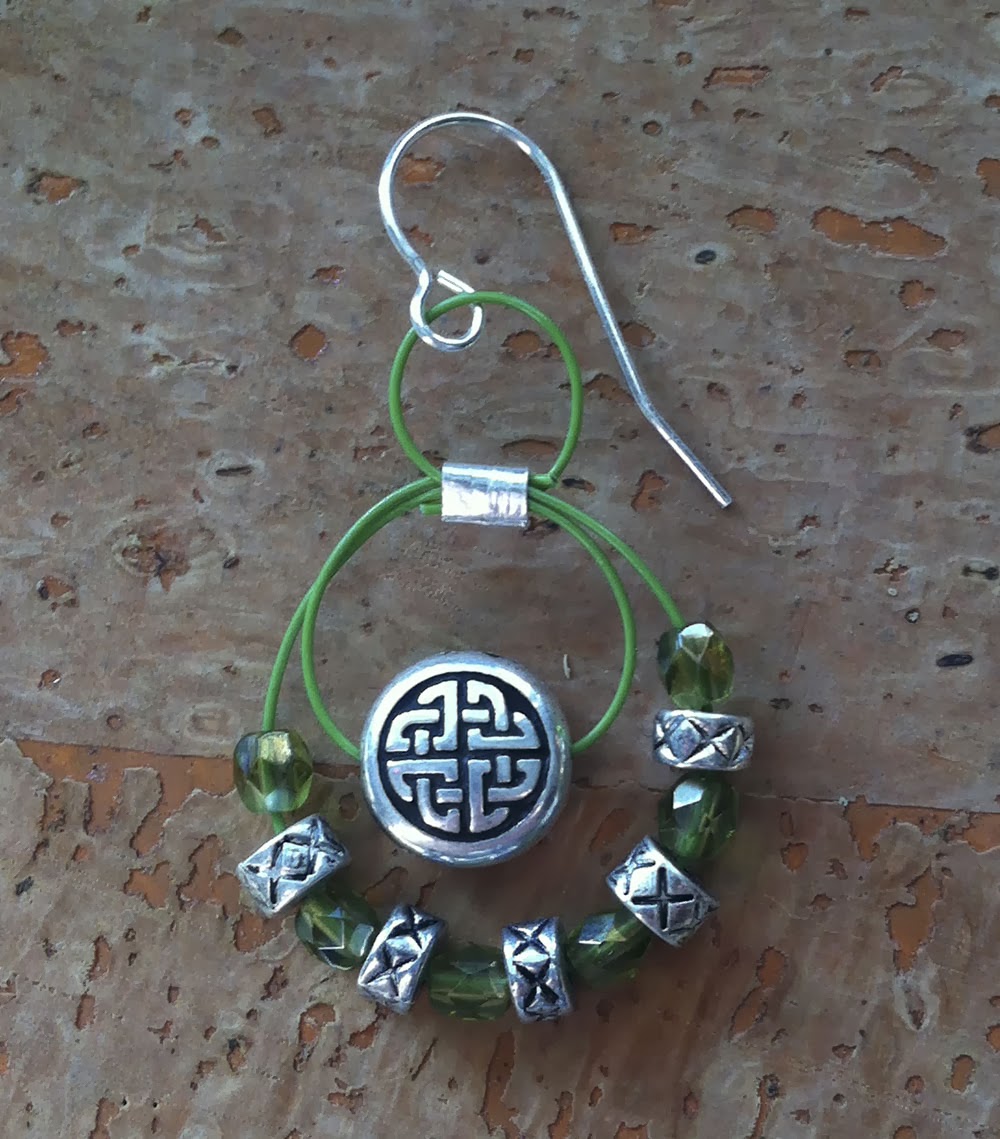
Cut Soft Flex Beading Wire into two 8″ lengths, one for each earring.  String Celtic style bead, then crimp tube. Take the other end of the wire make a circle back through the crimp tube for your first loop. Now using the tail that went through the crimp for the loop, string your beads for the second loop. Alternate 1 green fire polish bead and 1 silver spacer tube until you have 6 green fire polish beads and 5 spacer tubes. Then take the tail and feed it through the crimp tube again making your second loop.

Now take the longer wire tail and feed it through the crimp tube in the opposite direction making a small loop at the top. This little loop will attach to your ear wire. Adjust wires until you are happy with size of all three loops. When ready, use your Mighty Crimping Pliers to close the crimp tube.You use the Mighty Crimping Pliers just like the Regular Crimping Pliers. For crimping instructions, click here.

Finally, trim off the excess wire close to the crimp and use your chain nose pliers to attach you ear wire to the top loop. Make your second earring the same way. When making the second earring pay attention to the loop sizes of all three loops before crimping.

Tutorial Tuesday: Samunnat Bead Hoops

1800443_641301219241176_931121859_n

Tutorial Tuesday is a blog series where I share a do-it-yourself jewelry tutorial on Soft Flex Company’s blog.

I bought a few Samunnat polymer clay beads beads while in Tucson this year. I love the bold, geometric patterns. Have you heard of these beads? Not only are they beautiful they  have a beautiful story. Samunnat is a non-profit organization which assists Nepalese women who are affected by domestic violence. Each bead is a gift, and a story of one woman’s life and made by a woman’s hands in Nepal.

With this design, I wanted to create an earring that celebrates the bright, colorful culture of Nepal. This is project is easy, fast and great for a beginning beaders. Only skill required is crimping. For crimping help, please visit Soft Flex Company’s webpage, All about Crimps.


Materials:


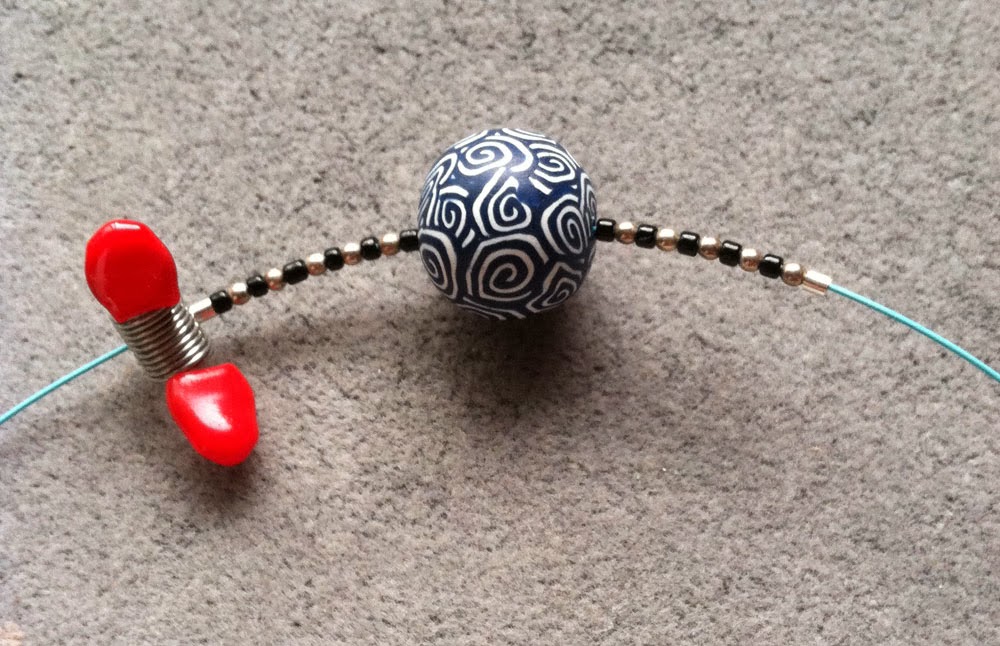
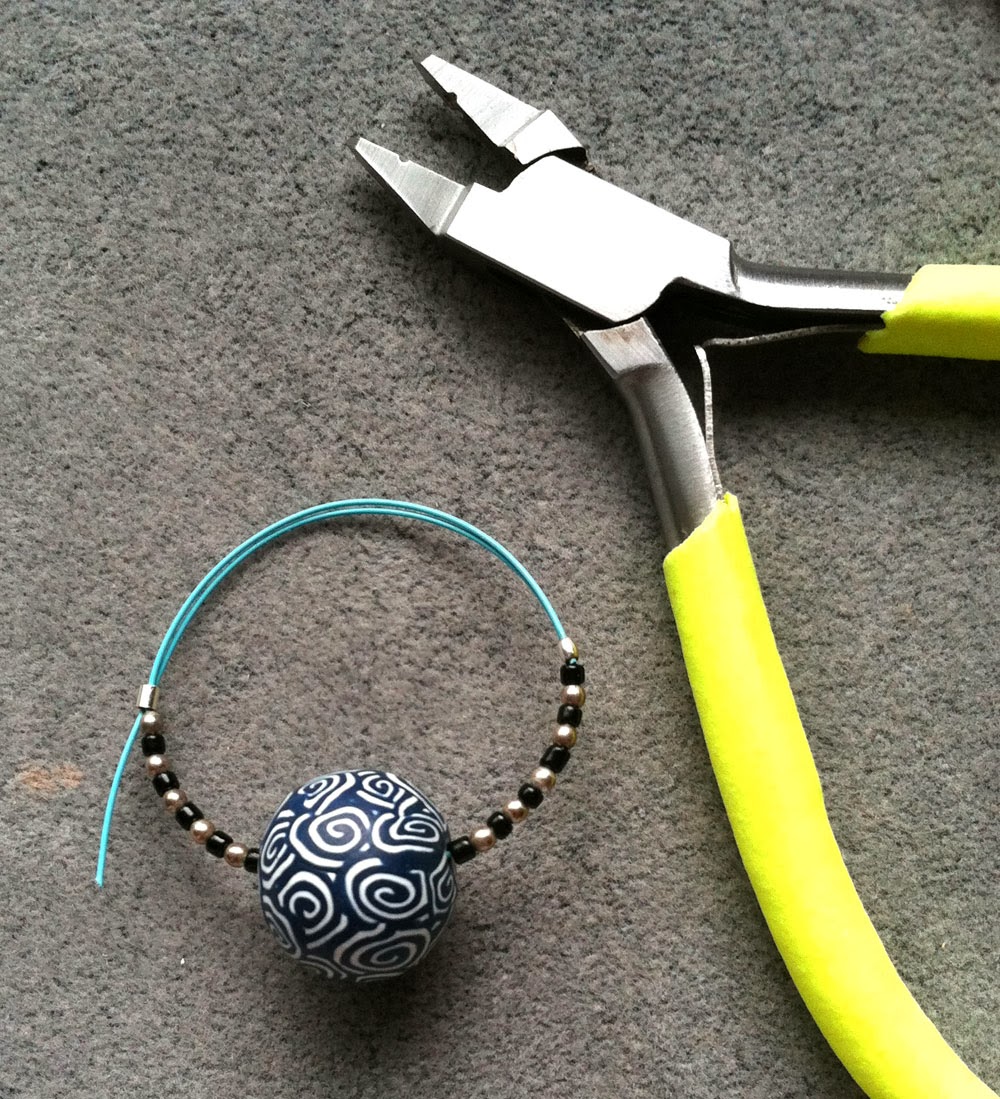
Cut Soft Flex Beading Wire into two 8″ lengths, one for each earring.  Place a bead stopper on one end of one of the wire lengths. String crimp tube, alternate seed bead and silver bead until you have 6 seed beads strung, string Samunnat Bead, alternate seed bead and silver bead until you have 6 seed beads strung, string crimp tube.

Carefully remove the bead stopper and loop each wire end around and down through the crimp tube on the opposite side to create the circle shape. Adjust wires until you are happy with circle size and shape. Reattach the bead stopper to the two wires to hold the shape.

Using your crimping pliers, crimp one side of the earring as close to the seed bead as possible. You may use the regular crimping plier  or Universal Magical Crimper to secure the crimp. I choose to use the Universal Magical Crimper as it makes a small 2mm bead out of the tube. For regular crimping instructions, click here. For magical crimper instructions, click here.
Repeat crimping on the opposite side. Trim off excess wire as close to the crimp as possible.  Attach your ear wire to the beading wire. Repeat steps for the second earring.


Knitted Sea Glass & Pearl Bangle Bracelet

Blog-SeaGlassKnit2

I am lover of texture so, knitted jewelry designs float my boat. After returning from a family vacation that included a day at the beach, I was inspired to combine Fluorite Soft Flex Beading Wire with glass pearls and sea glass for a design fit for a beach goddess.

Blog-SeaGlassKnit1

I shared a picture of this design online and had three people asking to purchase it and within a few hours it was sold! I couldn’t believe it. The combination of soft colors and knitting technique made it a desirable design. It’s so comfortable to wear too. If you are interested in seeing how I created it, I shared instructions on Soft Flex Company’s blog this week. Click to see the how-to post.

I hope you are enjoying the last days of summer. My kids go back to school next week already, I can’t believe how fast that went!

I’m in the April 2013 Issue of Bead Trends!

1361997207_1
Check out my first published jewelry design in Bead Trends magazine this month!
2013April34to36Fagan-1
Autumn Vines Knitted Bangle
by Kristen Fagan
Bead Trends – April Issue

Check out my first published jewelry design in Bead Trends magazine this month! I adore all the texture in this design. The knitted Soft Flex Beading Wire is stretchy and flexible, the red beads add a hint of sparkle, the hard copper hand wrapped cones give the hand forged feel I love so much and the centerpiece is an intricate bezel design I picked up at the 2012 Bead&Button show by Kerri Fuhr with my original art print “Autumn Vines” set in resin. Pick up your copy on newsstands or the Bead Trends website and get full instructions on how I created this bangle on pages 34-36.

2013AprilOehlerBliss-1

Wedding Bliss
by Sara Oehler
Bead Trends – April Issue

My wonderful friend and co-worker Sara Oehler is also featured in this issue with me! How cool is that?! I love the connector technique she created with Soft Flex Extreme Wire in her design. The silver and crystal combination is so elegant.  Be sure to check out Sara’s gorgeous design “Wedding Bliss” on pages 114-115.

Simple Truths Celebration

100_4931Tesori Trovati Simple Truths Pendant “follow your bliss”

Erin Paris-Hintz of Tesori Trovati is celebrating her Simple Truths line of art pendants today. I am delighted to be part of the celebration and share a necklace I made with Erin’s Simple Truths pendant.

100_4929

I was first introduced to Erin and her work in 2010 when I worked with her on her featured web page over at Soft Flex Company’s Spotlight On …. I instantly fell in love with Erin’s style and the jewelry she creates and was lucky enough to meet up with Erin at the Bead&Button show last month, she is so kind and easy to talk to. She generously gifted me a Simple Truths pendant of my choosing. She handcrafts so many beautiful pendants that it was hard to choose. Ultimately, the wise words “follow your bliss” choose me and are a beautiful reminder for me to create with passion and follow my bliss!

100_4932

In addition to designing jewelry, Erin creates this line of Simple Truths art pendants that combine wise phrases with sweet images on hand painted polymer clay. You can find Simple Truths and her jewelry in her etsy shop, Tesori Trovati. 

Be sure to visit Erin’s blog where she will be giving away a Simple Truths subscription to one lucky commenter who has never owned a Simple Truths pendant as well as a discount offer for her shop.

Please visit these designers and see their Simple Truths creations, you will be glad you did.

Erin Prais-Hintz http://treasures-found.blogspot.com

Sharon Misuraco http://goinoffthebeadinpath.blogspot.com/

Tanya Goodwin http://pixiloo.blogspot.com

Alice Peterson http://www.alice-dreaming.blogspot.com

Melissa Trudinger http://beadrecipes.wordpress.com

Lori Bowring Michaud http://artfullyornamental.blogspot.com

Rebecca Anderson http://songbeads.blogspot.com

Chris White http://dzeyenrstudio.blogspot.com

Cherrie Fick http://designsinthelight.com

Rosanne Garvison http://fabfibers@blogspot.com

Shelley Turner http://www.shelleygrahamturner.blogspot.com

Marlene Cupo http://amazingdesigns-marlene.blogspot.com/

Mary Harding http://www.maryhardingjewelrybeadblog.blogspot.com

Lola Surwillo http://www.beadlolabead.blogspot.com

Michelle Burnett http://reverieandrevival.blogspot.com

Kirsi Luostarinen http://kirsiluokorut.blogspot.com

Paige Maxim http://pmaximdesigns.blogspot.com

Cynthia Riggs http://cynthsblog.blogspot.com

Thank you, Erin for your generosity and the motivation to bring my Simple Truths pendant to life!