March 2015

Volunteer Art Projects

When artistic opportunities arise at my kids’ schools I try my best to make the time to help. It’s not always easy but, it is always worth it. It’s a way I can be involved while doing something I love to do – win/win!

Here are two art projects that came up this year that I was happy to help with.

MrsSilvaCollage

Hudson’s class worked on a collaborative art project to auction off at the school’s annual fundraiser. I was delighted to help the class with their creation. I brought in few options and the class voted on which idea they liked best. Then, I went into class a few times to assist the kids in painting the background and patterns for the piece. We also decided to include their classroom character traits so, you’ll see words like Honest, Respectful, Appreciative sprinkled throughout. Then I took all the painted sticks home, arranged them and framed them. I really love the end result – the kids did an amazing job!

EthanFieldCollage

Ethan’s school athletic day was centered around the Greek Olympic games and the P.E. instructor had the idea to create shields for the teams. They traced Greek symbols onto the shields and me and few other parents painted them for the event. I also helped out during field day by scoring the shot put event and got to see the opening and closing ceremonies with all the shields displayed! Such a fun day.

Paint Like You

LikeYou

The desire to paint a flower still life has been in the back of my mind for awhile. I had a vision for how I thought it would turn out.  After getting some tulips from my sweet husband it inspired me to get started. I began these 3 paintings below – sunflowers, peonies and tulips. They started with good intentions and vision but fell flat on execution for me. I was getting so frustrated and I think it shows in the tight, unnatural feeling I got from this work so, I let them sit for a few days.


StillLife

I picked up the sunflower painting and added pattern, deeper colors and was feeling better about it.  I slept on it and the next day I realized it just didn’t feel right and I asked myself – would I hang this art proudly in my home? The answer was no. It didn’t feel like me. At that moment, I reminded myself of something that I had read recently … paint like you. I needed to forget about what I wanted it to be, stop comparing my work to other still life art on Pinterest and just paint like me.


So, I got to work covering up the sunflower still life and this happened instead!

SunflowersCollage


I love looking at the collage and seeing that I could have stopped at frame 5 or 6 or 8 and be really happy with it. Stopping before I “go to far” is something I continue to work towards feeling more confident about. Taking many pictures as I work is helping me see when to let go, call it done and remember to just paint like me.


I encourage you to do things your way too! It is truly freeing to give yourself permission to just be you.

Tutorial Tuesday: Soft Flex Kumihimo Bracelet

KumihimoBracelet-1

Tutorial Tuesday is a blog series where I share a do-it-yourself jewelry tutorial.

Materials

Instructions

You will need 10 strands of beading wire, approximately 20″ length for each strand, in assorted colors. If you have 10ft spools of Soft Flex beading wire you may work directly from the spool otherwise, cut your wire strands. I didn’t feel the need to use bobbins with my cut wire strands.

Gather your wires and slide a 3mm crimp tube on one end of your cut wires or the end not attached to your spool if working from the spool. Slide your crimp up the wire strands leaving a 4″ tail and crimp using your mighty crimping pliers. The crimped wire side will go into the middle of your Kumihimo plate. Click here for crimping instructions.

Set your plate up to have 6 beading wire strands across the top and 4 beading wire strands across the bottom.

Watch Anne Dilker’s Square Kumihimo video for instructions on the braiding technique used
Continue braiding with the technique shown in the video above until you have about 2″ of braided wire and at least 4″ of excess wire left. Remove your wire from the Kumihimo plate. If working from the spools you should now cut the wires free from the spools making sure each strand has about 4″.

Gather the wire and slide on a 3mm crimp tube and crimp using the mighty crimping pliers at the base of your finished braid. Click here for crimping instructions.

Choose one wire strand on each side of your braid to be your stringing wire to complete your bracelet. Trim all other wire strands as close to the crimp tube as possible as shown below.

On one side of your braided centerpiece, string 1 fire polish bead, 1 seed bead, 1 fire polish bead, 1 seed bead and continue to repeat until you have 8 fire polish beads and 8 seed beads. You may need to adjust the number of beads used based on the final design size needed.

Add a 2mm crimp tube and crimp around 1 jump ring using the magical crimper. Attach one side of the toggle clasp to the jump ring. Click here for magical crimping instructions.

Repeat you bead stringing on the other side of the braided centerpiece, 1 fire polish bead, 1 seed bead, 1 fire polish bead, 1 seed bead and continue to repeat until you have 8 fire polish beads and 8 seed beads. You may need to adjust the number of beads used based on the final design size needed.

Add a 2mm crimp tube and crimp around 1 jump ring using the magical crimper. Attach the other side of the toggle clasp to the jump ring. Click here for magical crimping instructions.

Lastly, create a bead dangle using your headpin and 1 fire polish blue bead and attach it to the jump ring connected to your toggle bar. Click here for instructions on how to make a bead dangle.

Note: My design had one strand side longer then the other so, my design turned out slightly asymmetrical with on side having 5 fire polish beads and the other 11 fire polish beads.

Below is another variation you may want to try. This bracelet uses the same braiding pattern on the entire bracelet and introduces beads in the middle.

I followed the kumihimo braid that is shown in the video and when about half the bracelet was braided I strung beads onto the two wires that were held on the sides of the kumihimo board and then continued the braid. Again, I strung beads on the next two wires that were on the side of the kumihimo board and then continued to braid. I repeated that process until I was happy with the center and then continued to braid the second half of the bracelet without adding any beads. Because I used cut wire, I was able to slide a bead on whenever the wires where on the side before braiding them back in.

Hello Spring

11057275_10152882525424842_1352325950274922134_n

Spring has surely sprung here in the desert. I took some time to look and enjoy the plants and flowers blooming in our backyard. Today we have much to celebrate, there will be a solar eclipse and supermoon as well as Spring Equinox! The equinox has long been celebrated as a time of beginning and renewal. I am feeling it and hope you are too.


Irish Soda Bread

11059405_10152890241144842_1782223369761769656_n


Happy St. Patrick’s Day! To celebrate, I cooked my first corn beef and cabbage dinner and baked my grandmother’s Irish Soda Bread. I make this bread every year and always look forward to it. It’s so good, I could eat this entire pan by myself! My grandma’s recipe originated in Ireland and has been passed down to my grandmother, then my mother and now me. Her Irish heritage was so special to her and I know she is smiling up in heaven knowing how much our family loves her recipe. Love and miss you Grandma. xoxo


Irish Soda Bread

3 cups flour
1 1/2 cups of buttermilk
1 teaspoon baking soda
1 teaspoon baking powder
1/2 teaspoon salt
1 1/2 cups of raisins (omit for traditional “plain” soda bread)

Mix all the ingredients together. Knead for a few minutes on floured surface. Place in a cake pan. Make a cross with a knife in dough. Bake for 35 minutes at 350 degrees. There’s no doubting that soda bread tastes best still warm from the oven and simply spread with butter. So delicious and so easy to make.


Short History

Soda bread is a quick bread dating back to approximately 1840 in which baking soda is used for leavening rather than yeast. The ingredients of traditional soda bread are flour, baking soda, salt, and buttermilk. Some believe that the cross was placed in the bread to ward off evil and some say the cross is used to help with the rising of the bread.

After some research I found that my great-grandmother’s soda bread could actually be named “Spotted Dog” due to it’s addition of raisins. Originating in Ireland, the Spotted Dog is a fruit bread made using the same key ingredients as traditional Irish Soda Bread with the addition of sugar and dried fruit. Typically, raisins or currants, which make the bread look “spotted” and thus the name.

However, my great-grandmother’s recipe contains no sugar so, maybe it’s a cross breed between spotted dog and plain soda bread? Either way it is yummy and the kids agree!

Tutorial Tuesday: Double Strand Macrame Bracelet

DoubleMacrame-1

Tutorial Tuesday is a blog series where I share a do-it-yourself jewelry tutorial.

Materials:
Instructions
Cut the black beading wire into two 12 inch lengths. Fold one 12 inch piece in half, push the looped end through one side of the Swarovski twist link connector, fold it over the connector and pull the rest of the cord through the looped end. Repeat this  on the other side of the twist link connector. These strands will be anchored and remain stationary. Lay the design on your macrame board or table with the strands vertical and tuck the strands into the grooves.Cut the red beading wire into two 36 inch length. Center one 36 inch length of red beading wire under the two anchored black strands. Begin the 1st half of your square knot by fold the right wire over the middle strands and under the left wire. Pull the left wire under the right and middle strands and through the loop on the right side. Slide wire knot close to your connector and pull tightly.

Finish the 2nd half of the square knot by folding the left wire over the middle strands and under the right wire. Pull the right wire under the left and middle strands and through the loop on the left side. Pull tightly and repeat the steps – right, left, right, left, right.

Note: if you feel your bracelet start twisting you may have knotted two right sides or two left sides in a row – simply remove the knot from the wire and fix direction. 

Continue knotting until the desired length for one half of your bracelet is reached keeping your clasp size in mind. Pick up your second 36 inch length of red wire and repeat the square knot on the other of your bracelet.

 Once your strands are at the desired length, string a 3x3mm crimp tube to each of the strands ends and thread through the clasp. Before you crimp, check that the size length is correct and that the strands are straight.  Once your happy, crimp the 3x3mm crimp tubes using the mighty crimping pliers. Click here for standard crimping instructions.
Now, let’s make the second strand of this bracelet. Cut two 8″ strands of black beading wire. Thread one strand through one side of the black crystal connector. String a 2x2mm crimp tube onto both ends of the black beading wire and even out the tails. Crimp the wire in place using the magical crimper. Click here for magical crimping instructions.
String one red crystal on one wire and one red crystal on the second wire. String a second 2x2mm crimp tube onto both ends of the black beading wire and crimp about 1/2″ apart from the first crimp.
String one red crystal on one wire and one red crystal on the second wire. String a second 2x2mm crimp tube onto both ends of the black beading wire, loop one strand of the black wire around the clasp and back through the last crimp tube, crimp and trim excess wire.
 Repeat all the steps on the other half of the bracelet. For added interest, I attached the second strand on opposite sides of the macrame square knot strand.

Releasing 2014, Invoking 2015 and my Sacred Word.

I have been writing this post on and off for months and am finally ready to hit publish! Woo hoo, officially beginning my new year!

2014-15WorkbookCollage

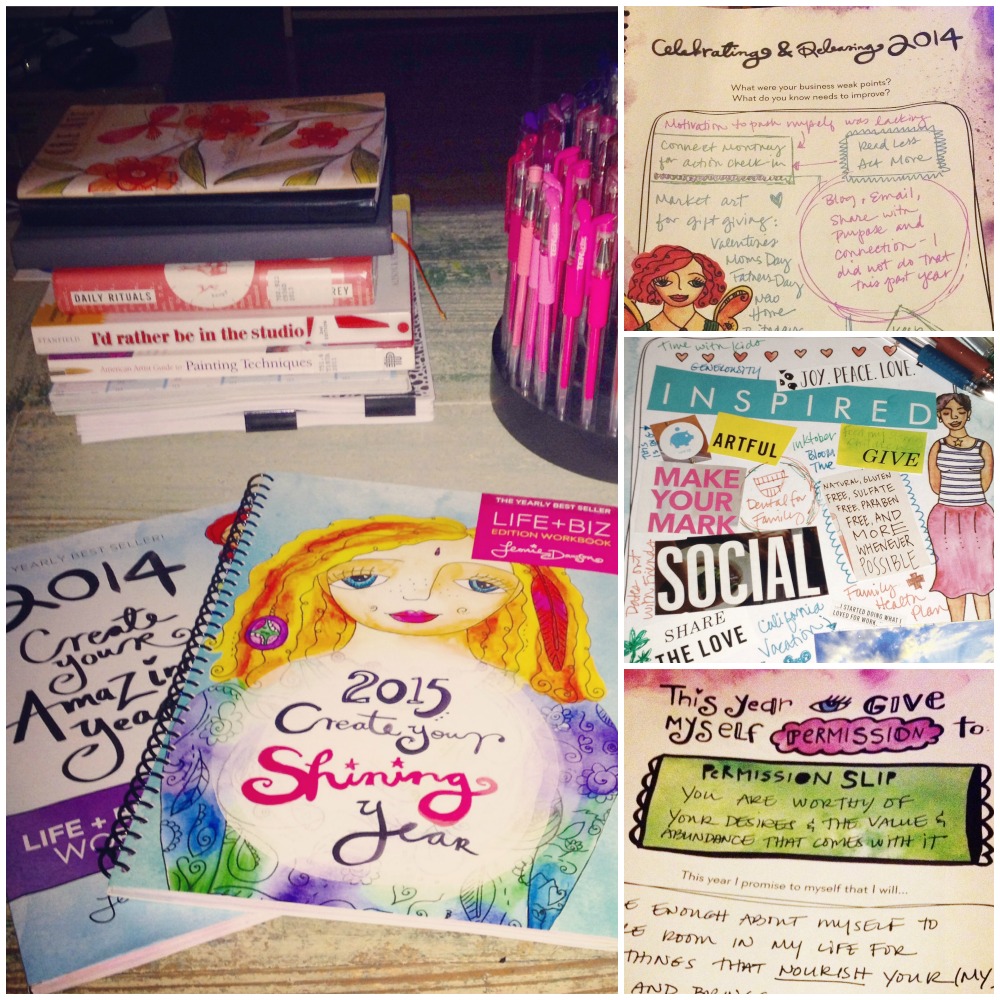
I always feel the need to slow down, reflect, take time off, rest and slowly start thinking of the new year. I love day dreaming and planning. Last year, I picked up Leonie Dawson’s workbook and LOVED it. I pre-ordered my 2015 workbook this year as I wanted it as soon as possible and have spent countless hours releasing 2014 and invoking 2015.

When I started day dreaming about 2015, I felt a uneasy and a little lost. After spending some time releasing 2014 my goals and ideas became clearer. This is the first year I have the luxury of planning things out instead of riding whatever wave comes along or sitting in transition and not riding at all because a path has not been cleared. That feels scary really. I’m used to knee-jerk reactions and letting things come to me instead of really figuring out what I want and going after it.

This year as something different in store. To step up and embody my soul yearnings, my  truth, my dreams and desires. With that calling brings all the fears: the fear of not being good enough, the fear of not being able to handle it, the fear of failure. Yet, I know these fears lead my fulfilling my deeper purpose.

I know that, for myself, this means investing in my self-care and support more, so that I can step it up. That means yoga and meditation and dance, learning from those I admire and taking action on what I have learned, spending time outdoors and with my loved ones and taking care of the little things: rest, eating whole food, juices and smoothies for nourishment, and going to the dr for a long past due checkup. All this is necessary so that I can show up and fully embrace all that I am, and all that I have to share and do in the world this year.

This is my third year of choosing a “sacred word” to guide me. My sacred work for the year is NOURISH and I’m looking froward to how it will serve me in my life + biz + art this year.

IMG_7862

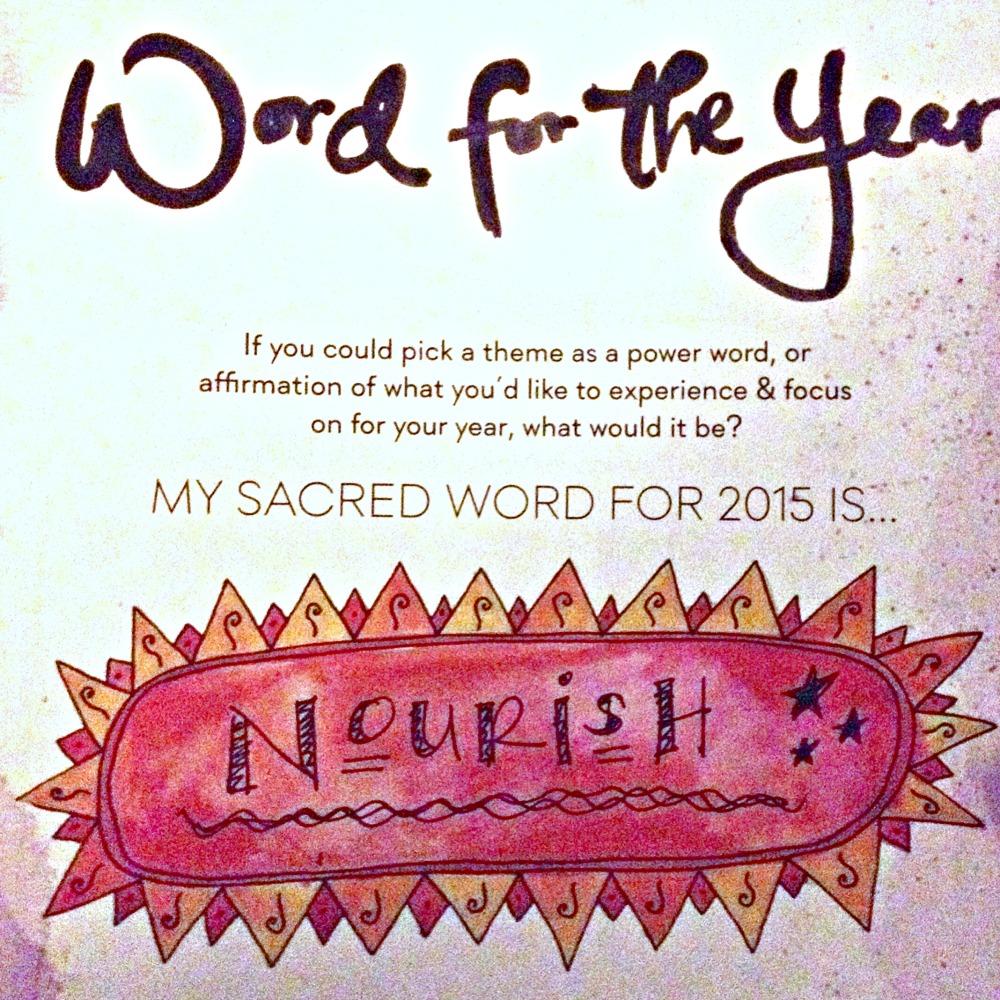
For 2015, my word Nourish showed up easily and it I knew quickly it was right. This past year was a big transition year for me. I all but stopped my freelance design. I changed my working hours so, I was available for the kids after school. My oldest son started at a new school with it’s own challenges. My husband now works away from the house instead of at home with me. With all that transitioning, I have felt mal-nourished in my body, mind and creative spirit. Which is why Nourish is speaking to me so loudly. What have I been denying myself that now needs to be nourished and cared for?In declaring my INTENTION for the year with you, I believe that it creates a sacred energy that feeds and nourishes our intention. My heart has chosen NOURISH as my intention for 2015.

NOURISH, and be fully present in, every moment for the gifts, lessons and blessings it holds.

NOURISH, and cherish, the relationships with friends and family that are the true gifts of life.

NOURISH, my body and well being through sleep, yoga, meditation, clean eating and open space in my schedule.

NOURISH, and inspire the creative source within and around me through nature walks, day trips and art walks.

NOURISH, and stay tuned into, the truth that when we integrate our purpose and passion into our business… miracles happen. Share meaningful content, process pictures and video, authentic voice, thoughtful product launches and art series.

I’m so excited to see how the word “nourish” shows up this year. It may have taken awhile to get here, but I’m here now and my year can begin. Have you selected your INTENTION for 2015?

It’s Time to Transform

PhoenixII-copyright

Phoenix II, Kristen Fagan, Acrylic on Canvas, 24″x24″, 2015

The Phoenix is a mythical bird that consumes itself in flames to be reborn new from its ashes. The Phoenix is the symbol of the transformation of human consciousness and our creative spirit that we must undergo to create what we desire.

I have been running in many different directions for what feels like forever. The holidays and the rush of work and play that come with them feel like yesterday when in fact I should be fully decompressed from that by now. My new years life + biz reflecting and goal setting should be planting new seeds of creation when in fact I have yet to even hit publish on my intentions. In January, I took off on family trip for my godson’s baptism followed immediately by two work trips (one with my work and one with my husband’s work). I felt good, inspired and ready to tackle my intentions, my artwork, my well being when I returned from my travels when in fact I have done none of those things.

Instead, I have been caring for our family, our home, figuring out where everyone else is at this moment and what kind of support they need from me to be their very best. All noble, worthy things of course. In addition, my youngest son had urology surgery last week (he is doing great) and my oldest son had a medical issue the day after my other son’s surgery that required drs, an emergency room visit and an ultrasound last week (he is well now). It was a scary and stressful few days. I am very grateful that everyone is healthy and on the mend.

I am however, feeling all my to do’s, should haves, obligations and soul yearnings hit me at once. I am cranky. I am run-down. I am detached. I feel heavy, out of balance, undernourished (ironically, nourish is my word of the year), exhausted and depleted. I am now the one needing support. It’s time to transform and create what I desire and that means standing up for the precious time I have to call my own. I need to give myself some structure and space to allow dreams to happen!