Blog

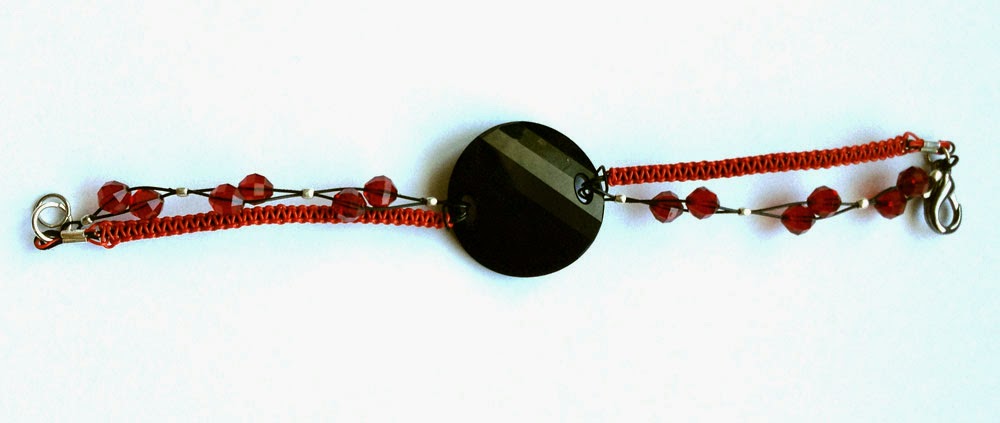
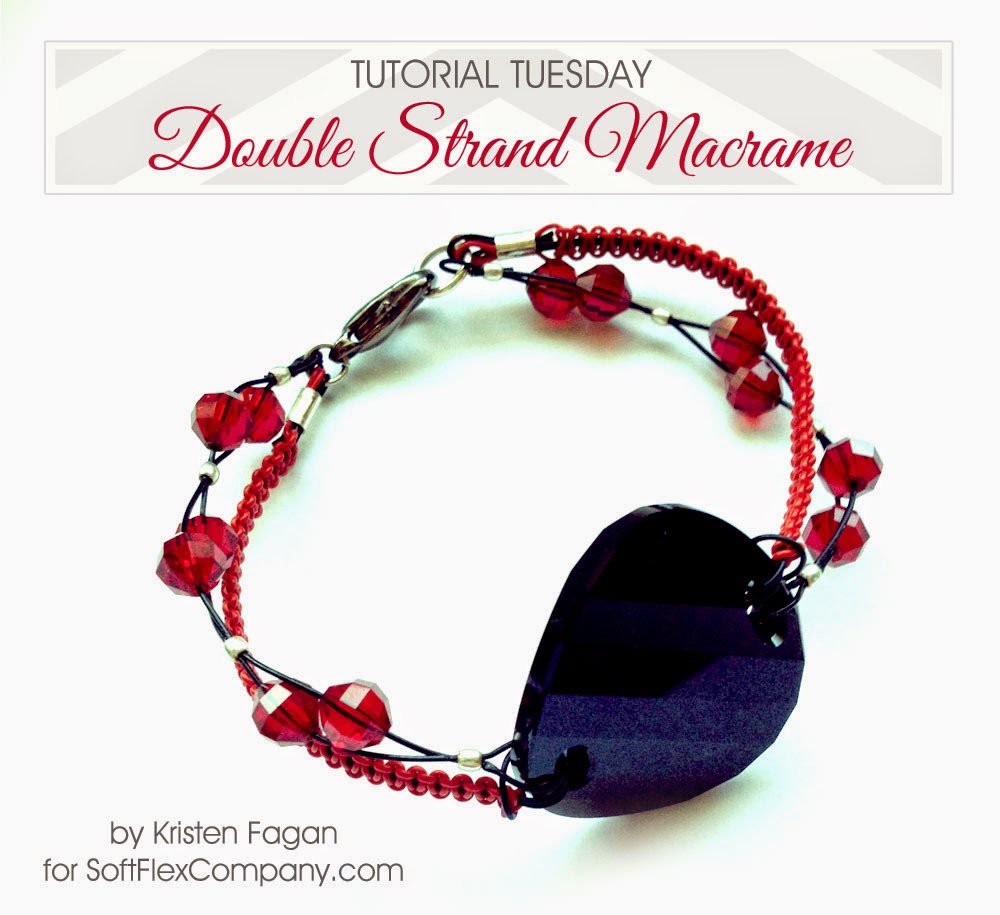
Tutorial Tuesday: Double Strand Macrame Bracelet

DoubleMacrame-1

Tutorial Tuesday is a blog series where I share a do-it-yourself jewelry tutorial.

Materials:
Instructions
Cut the black beading wire into two 12 inch lengths. Fold one 12 inch piece in half, push the looped end through one side of the Swarovski twist link connector, fold it over the connector and pull the rest of the cord through the looped end. Repeat this  on the other side of the twist link connector. These strands will be anchored and remain stationary. Lay the design on your macrame board or table with the strands vertical and tuck the strands into the grooves.Cut the red beading wire into two 36 inch length. Center one 36 inch length of red beading wire under the two anchored black strands. Begin the 1st half of your square knot by fold the right wire over the middle strands and under the left wire. Pull the left wire under the right and middle strands and through the loop on the right side. Slide wire knot close to your connector and pull tightly.

Finish the 2nd half of the square knot by folding the left wire over the middle strands and under the right wire. Pull the right wire under the left and middle strands and through the loop on the left side. Pull tightly and repeat the steps – right, left, right, left, right.

Note: if you feel your bracelet start twisting you may have knotted two right sides or two left sides in a row – simply remove the knot from the wire and fix direction. 

Continue knotting until the desired length for one half of your bracelet is reached keeping your clasp size in mind. Pick up your second 36 inch length of red wire and repeat the square knot on the other of your bracelet.

 Once your strands are at the desired length, string a 3x3mm crimp tube to each of the strands ends and thread through the clasp. Before you crimp, check that the size length is correct and that the strands are straight.  Once your happy, crimp the 3x3mm crimp tubes using the mighty crimping pliers. Click here for standard crimping instructions.
Now, let’s make the second strand of this bracelet. Cut two 8″ strands of black beading wire. Thread one strand through one side of the black crystal connector. String a 2x2mm crimp tube onto both ends of the black beading wire and even out the tails. Crimp the wire in place using the magical crimper. Click here for magical crimping instructions.
String one red crystal on one wire and one red crystal on the second wire. String a second 2x2mm crimp tube onto both ends of the black beading wire and crimp about 1/2″ apart from the first crimp.
String one red crystal on one wire and one red crystal on the second wire. String a second 2x2mm crimp tube onto both ends of the black beading wire, loop one strand of the black wire around the clasp and back through the last crimp tube, crimp and trim excess wire.
 Repeat all the steps on the other half of the bracelet. For added interest, I attached the second strand on opposite sides of the macrame square knot strand.

Releasing 2014, Invoking 2015 and my Sacred Word.

I have been writing this post on and off for months and am finally ready to hit publish! Woo hoo, officially beginning my new year!

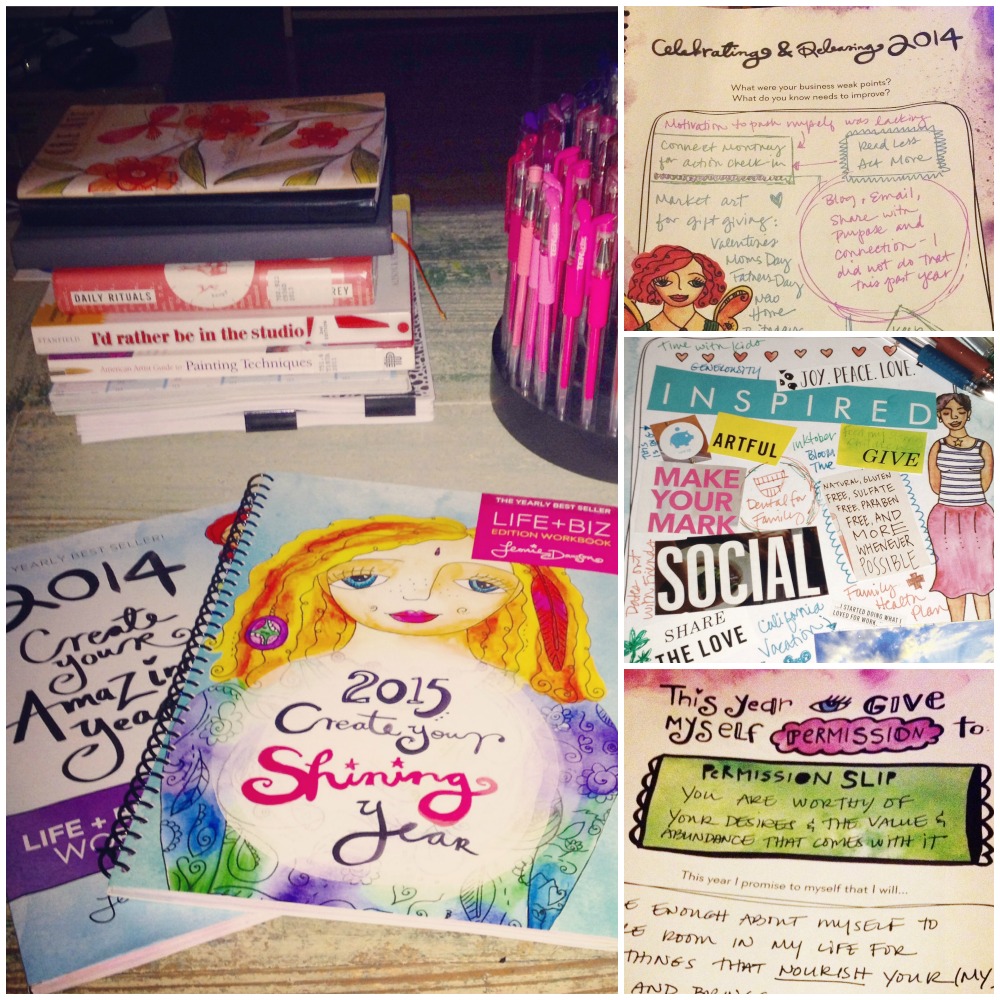
2014-15WorkbookCollage

I always feel the need to slow down, reflect, take time off, rest and slowly start thinking of the new year. I love day dreaming and planning. Last year, I picked up Leonie Dawson’s workbook and LOVED it. I pre-ordered my 2015 workbook this year as I wanted it as soon as possible and have spent countless hours releasing 2014 and invoking 2015.

When I started day dreaming about 2015, I felt a uneasy and a little lost. After spending some time releasing 2014 my goals and ideas became clearer. This is the first year I have the luxury of planning things out instead of riding whatever wave comes along or sitting in transition and not riding at all because a path has not been cleared. That feels scary really. I’m used to knee-jerk reactions and letting things come to me instead of really figuring out what I want and going after it.

This year as something different in store. To step up and embody my soul yearnings, my  truth, my dreams and desires. With that calling brings all the fears: the fear of not being good enough, the fear of not being able to handle it, the fear of failure. Yet, I know these fears lead my fulfilling my deeper purpose.

I know that, for myself, this means investing in my self-care and support more, so that I can step it up. That means yoga and meditation and dance, learning from those I admire and taking action on what I have learned, spending time outdoors and with my loved ones and taking care of the little things: rest, eating whole food, juices and smoothies for nourishment, and going to the dr for a long past due checkup. All this is necessary so that I can show up and fully embrace all that I am, and all that I have to share and do in the world this year.

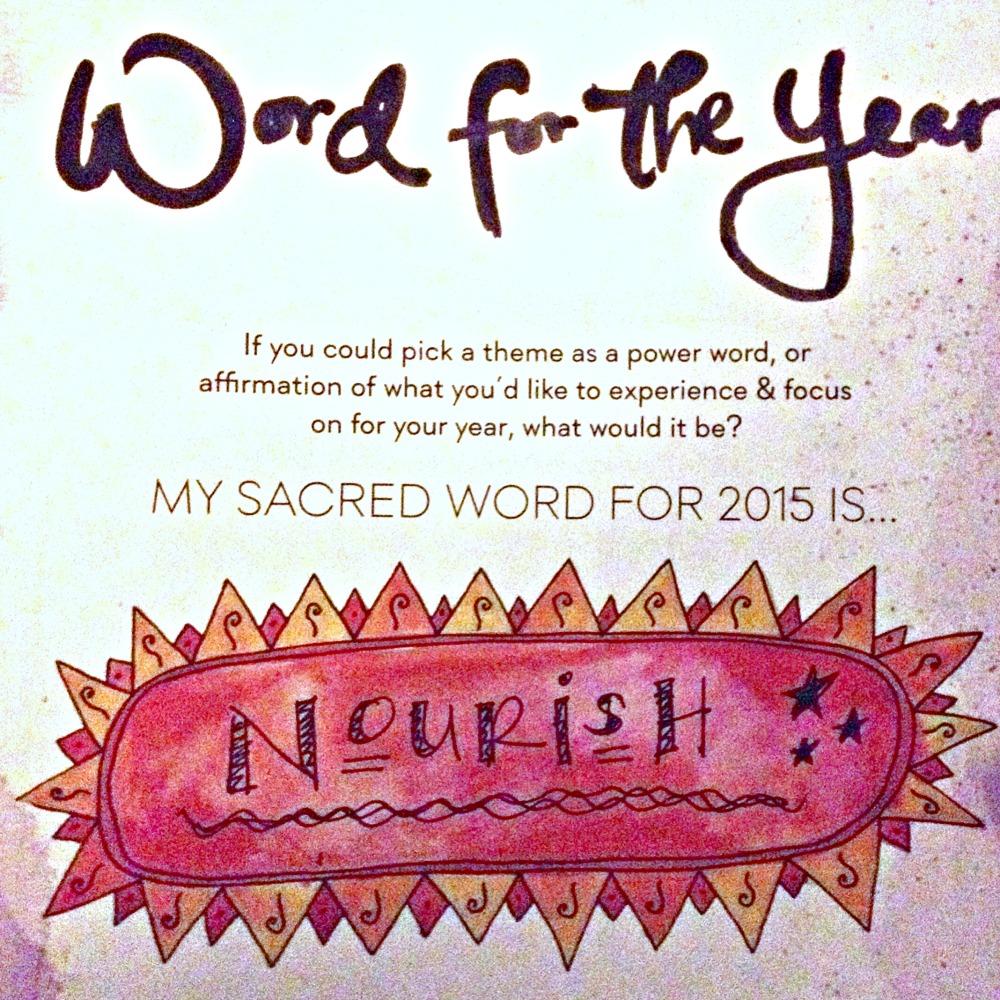
This is my third year of choosing a “sacred word” to guide me. My sacred work for the year is NOURISH and I’m looking froward to how it will serve me in my life + biz + art this year.

IMG_7862

For 2015, my word Nourish showed up easily and it I knew quickly it was right. This past year was a big transition year for me. I all but stopped my freelance design. I changed my working hours so, I was available for the kids after school. My oldest son started at a new school with it’s own challenges. My husband now works away from the house instead of at home with me. With all that transitioning, I have felt mal-nourished in my body, mind and creative spirit. Which is why Nourish is speaking to me so loudly. What have I been denying myself that now needs to be nourished and cared for?In declaring my INTENTION for the year with you, I believe that it creates a sacred energy that feeds and nourishes our intention. My heart has chosen NOURISH as my intention for 2015.

NOURISH, and be fully present in, every moment for the gifts, lessons and blessings it holds.

NOURISH, and cherish, the relationships with friends and family that are the true gifts of life.

NOURISH, my body and well being through sleep, yoga, meditation, clean eating and open space in my schedule.

NOURISH, and inspire the creative source within and around me through nature walks, day trips and art walks.

NOURISH, and stay tuned into, the truth that when we integrate our purpose and passion into our business… miracles happen. Share meaningful content, process pictures and video, authentic voice, thoughtful product launches and art series.

I’m so excited to see how the word “nourish” shows up this year. It may have taken awhile to get here, but I’m here now and my year can begin. Have you selected your INTENTION for 2015?

It’s Time to Transform

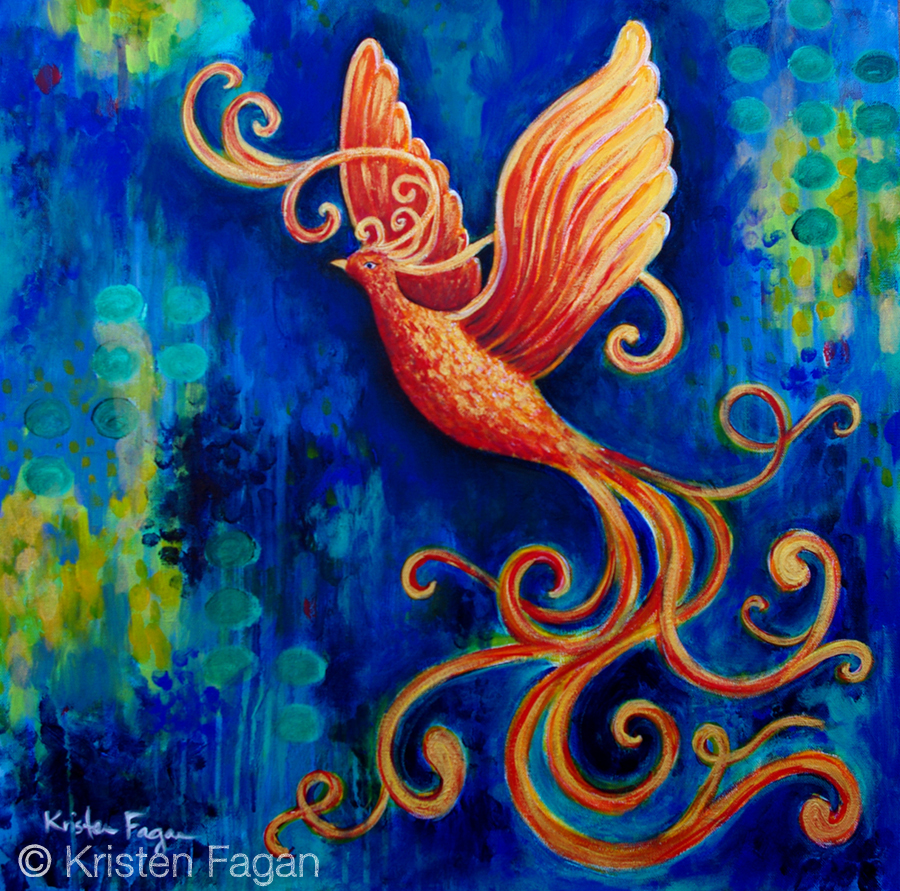
PhoenixII-copyright

Phoenix II, Kristen Fagan, Acrylic on Canvas, 24″x24″, 2015

The Phoenix is a mythical bird that consumes itself in flames to be reborn new from its ashes. The Phoenix is the symbol of the transformation of human consciousness and our creative spirit that we must undergo to create what we desire.

I have been running in many different directions for what feels like forever. The holidays and the rush of work and play that come with them feel like yesterday when in fact I should be fully decompressed from that by now. My new years life + biz reflecting and goal setting should be planting new seeds of creation when in fact I have yet to even hit publish on my intentions. In January, I took off on family trip for my godson’s baptism followed immediately by two work trips (one with my work and one with my husband’s work). I felt good, inspired and ready to tackle my intentions, my artwork, my well being when I returned from my travels when in fact I have done none of those things.

Instead, I have been caring for our family, our home, figuring out where everyone else is at this moment and what kind of support they need from me to be their very best. All noble, worthy things of course. In addition, my youngest son had urology surgery last week (he is doing great) and my oldest son had a medical issue the day after my other son’s surgery that required drs, an emergency room visit and an ultrasound last week (he is well now). It was a scary and stressful few days. I am very grateful that everyone is healthy and on the mend.

I am however, feeling all my to do’s, should haves, obligations and soul yearnings hit me at once. I am cranky. I am run-down. I am detached. I feel heavy, out of balance, undernourished (ironically, nourish is my word of the year), exhausted and depleted. I am now the one needing support. It’s time to transform and create what I desire and that means standing up for the precious time I have to call my own. I need to give myself some structure and space to allow dreams to happen!

Tutorial Tuesday: Woven Triangle Necklace


WovenTriangle-1

Tutorial Tuesday is a blog series where I share a do-it-yourself jewelry tutorial.

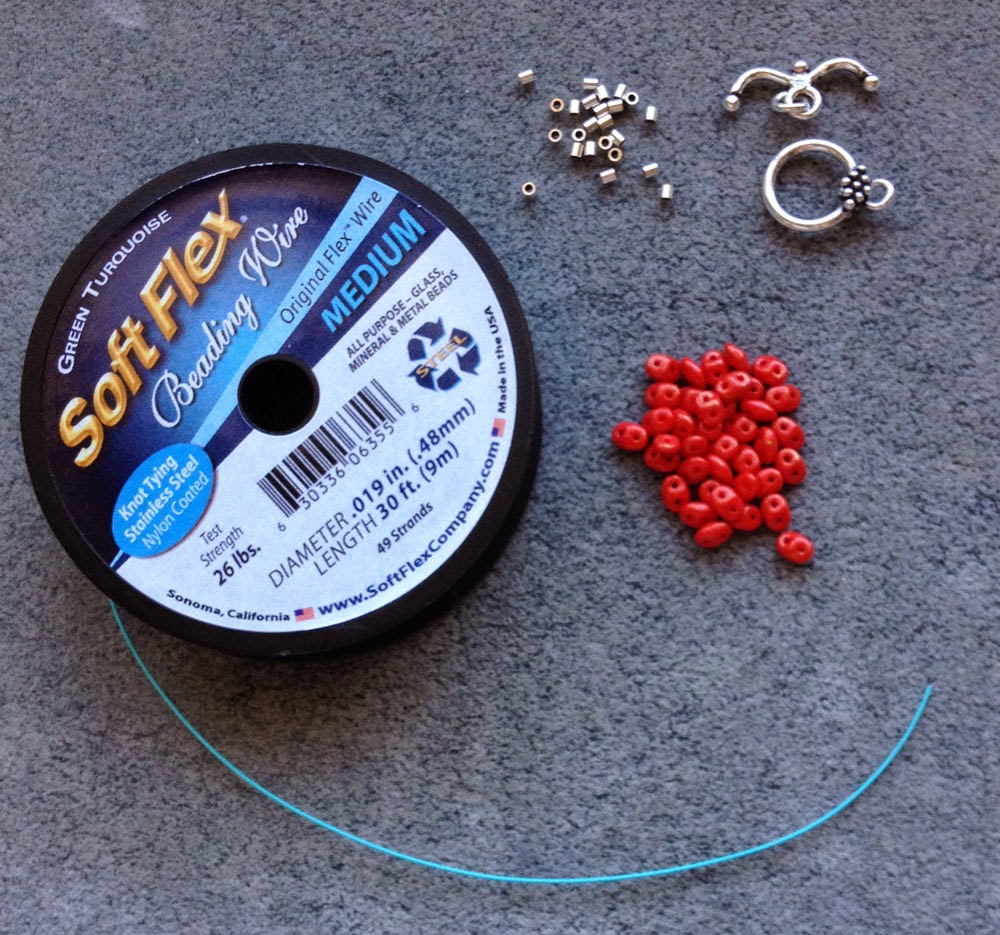
My creative co-worker Sara Oehler originally created this design in Tucson last year. It has been showcased in our booth for the past year and people always love this design – including me! I have wanted to make my own as soon as I laid eyes on it. Since it’s such a popular design, I wanted to share the tutorial with you, our lovely Soft Flex wire fans and hope you’ll give it a try.


Materials


Instructions

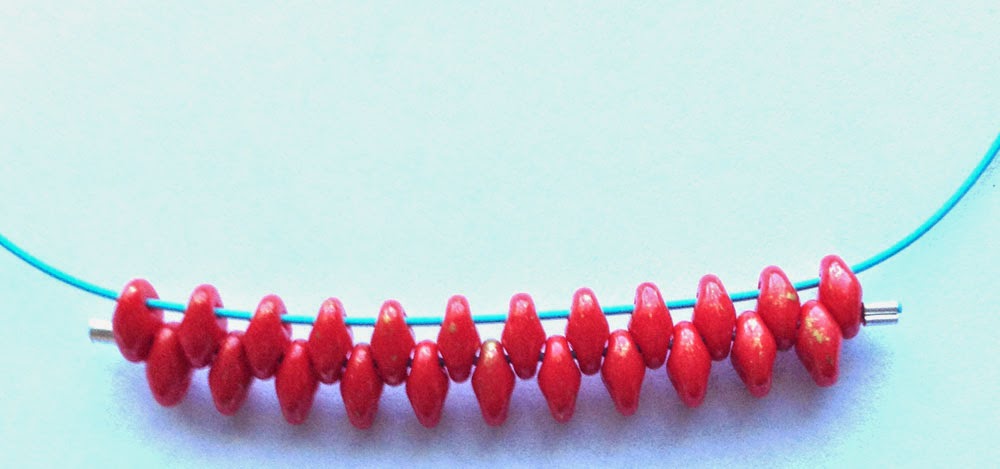
Cut a 20″ piece of Soft Flex beading wire, attach your bead stopper to one end and string 12 SuperDuo beads through one h ole.Now, attach the bead stopper to both ends of wire to hold your beads on the strand.
Cut a second 24″ piece of Soft Flex beading wire – this will be your bead weaving strand of wire. (Note: Using a long strand of wire is key. A short strand of wire will make this design unnecessarily hard. I learned that from trying a shorter wire the first time around.)
String one 2x2mm crimp tube onto the 16″ bead weaving wire strand and crimp near the end of the wire. Use the wire strand side not crimped and string through the bottom hole of the first SuperDuo bead, string through one hole of a new SuperDuo bead, then string through the bottom hole of the second SuperDuo bead. Continue this pattern until you have 11 new SuperDuo beads strung in between the 11 beads in the row above. String through the final SuperDuo bead from the original row 12 beads. String one 2x2mm crimp tube onto the end and crimp as close to the last bead as possible.

Test that your crimp is secure and not slipping then, trim excess wire on both crimp ends.This completes your second row of beads.

Design notes: You will need to manipulate and bend your completed woven SuperDuo rows to allow you to only pass through one bead at a time on the third row and so on. This third row is where the longer beading wire begins to come in handy. After you string a new bead and go through the bottom hole of the next bead your wire will curl in a circle, just wiggle your wire through. The slight wire bend will not affect the final design.  

String one 2x2mm crimp tube onto the bead weaving wire strand and crimp near the end of the wire. Use the wire strand side not crimped and string through the bottom hole of the first SuperDuo bead. Next, string through one hole of a new SuperDuo bead, then string through the bottom hole of the second SuperDuo bead. Continue this pattern until you have 10 new SuperDuo beads strung in between the 11 beads in the row above. String your wire through the final SuperDuo bead from the second row of 11 beads. String one 2x2mm crimp tube onto the end and crimp as close to the last bead as possible. Test that your crimp is secure and not slipping then, trim excess wire on both crimp ends.

Continue with this bead weaving pattern until you have a total of 12 rows and have crimped one final bead at the bottom of the triangle.

Attach a jump ring to each end of your toggle clasp. Remove the bead stopper from each side of your necklace. String a crimp tube onto one end, wrap wire around one jump ring and crimp. String a crimp tube onto the other end, wrap wire around the other jump ring, adjust necklace to your desired size (I chose 18″) and crimp. Trim excess wire.

Using the same pattern, you can create two small triangles and make matching earrings!

2014: A Year of Painting

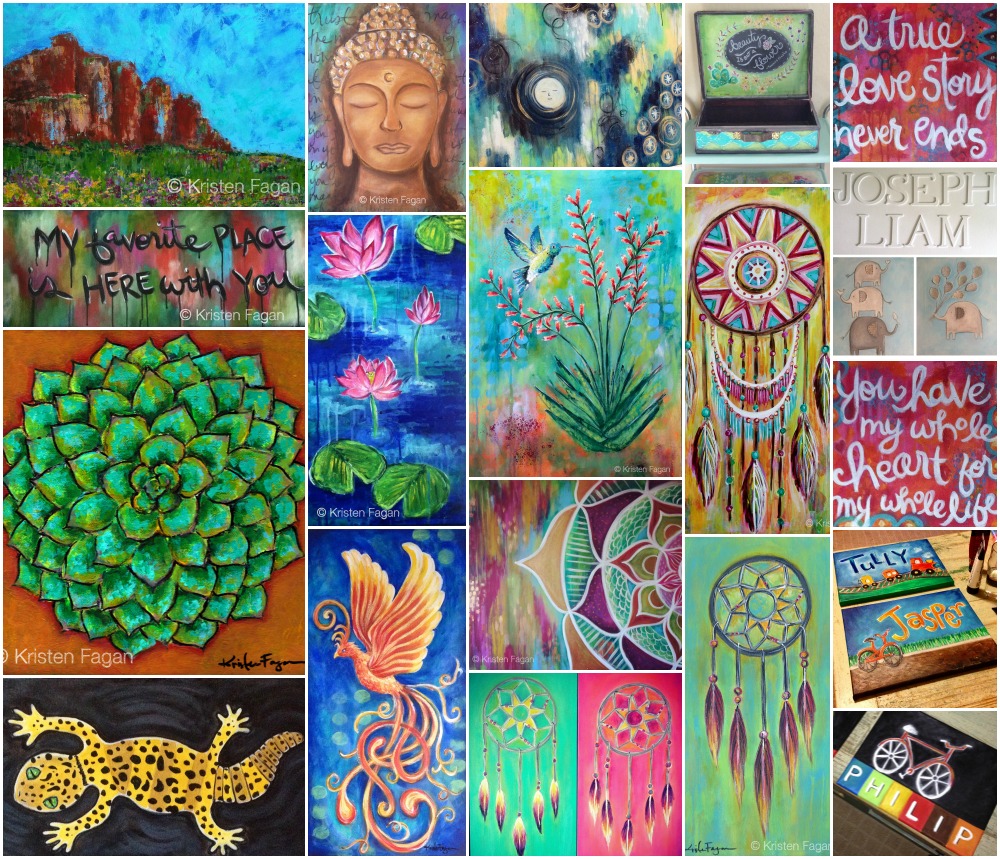
It’s been one year since I embarked on a fresh start in my little corner of the internet.  In keeping with the season of celebrating the past year, I wanted to take a look back at the artwork I created in 2014. It’s been a beautifully colorful journey in a variety of painting styles, subjects and a much larger mix of commissions then years past. I am still feeling my way through what feels right and what’s my authentic self. Just keep painting, that’s my plan for 2015!

2014PaintingCollage

The Best Things I Did in 2014

2014Collage2014.

What changed my life this year? I want to share the things that made a difference in my happiness, life + abundance.

A really big deal for me this year was that I completed this new website and blog. Although it’s taking me a little while to get settled I love this new space so much. I started blogging in 2008 and was ready for an upgrade. My website was so out of date I took it down for a couple years before I completed this one. I had it in my head for at least two years that I wanted to take it up a notch and create something that I felt proud to show people and that I could grow with for the next few years. It feels good to begin again with a fresh new home on the web.

After a couple of years really concentrating on my health and wellness I got sidetracked. Towards the end of 2014 I began to come out of the fog and re-commit to eating healthy and moving my body. It hasn’t been easy or consistent but, it’s a step in the right direction and my mind is more on board with making the commitment then it’s been in some time.

I allowed myself to say no to business opportunities and projects that didn’t feel right. I spent more time at home, with my family and doing “mom stuff”. It’s been a huge transition year for our family schedule, finances and time management and one of the best things I did was acknowledge that a lot was changing and that I needed to let things flow and in some cases let things go and be totally okay with it.

I treated myself and our kids more. Our family has been on a very tight budget for what seems like forever and treating ourselves has been at the very bottom of the list. This year, I bought new clothes, art supplies, body care, high quality food, kitchen gadgets and home decor items – all of which were out of reach the last few years. I also did the same for our kids. When they needed something, I got it. When they wanted to play a sport, I signed them up. If we were out and they wanted something small, I said yes more often. My kids are really great about understanding the cost of things. They have only ever known us to be on a budget. If it wasn’t on sale it wasn’t likely to happen. It’s felt really nice to give a little more then they have been used to. I didn’t go crazy but, I loosened the reins and allowed all of us to enjoy some things “just because”.

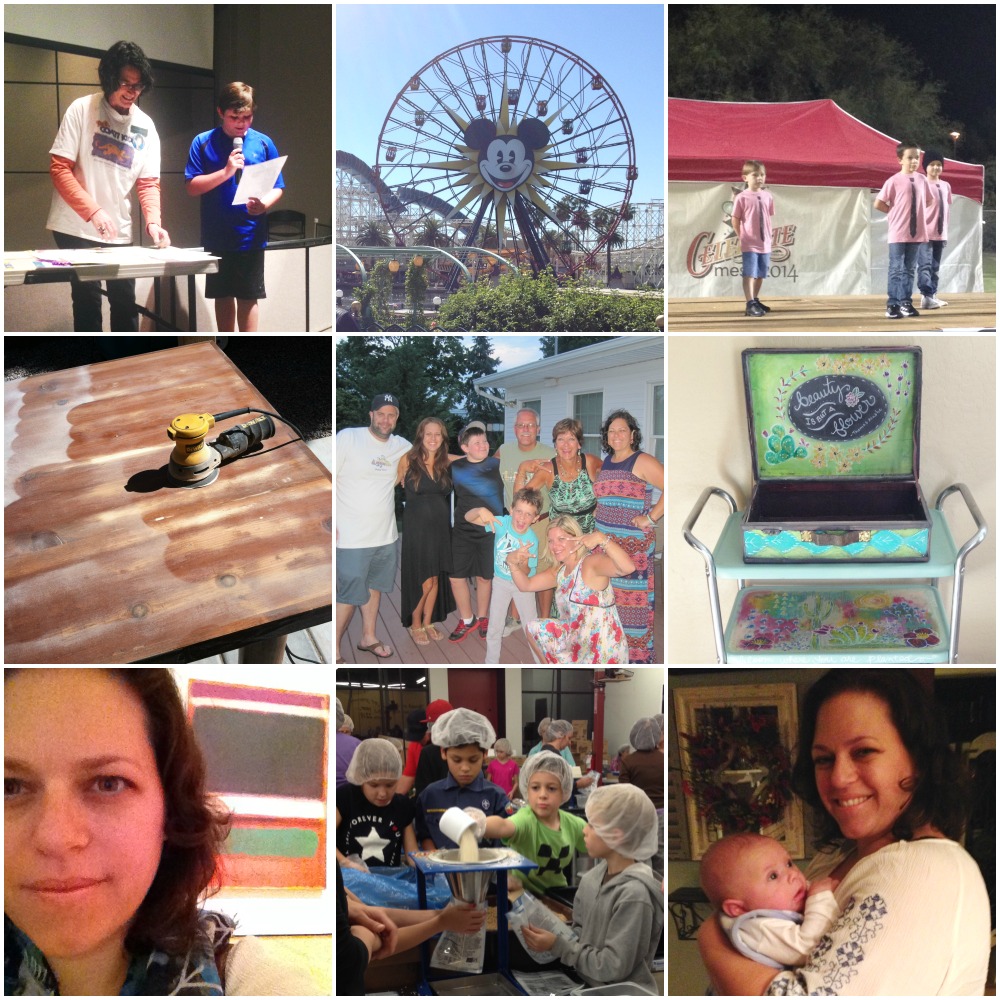
Here are some notable events and things that happened this year:

Art Date at Moma

Participated in Inktober – 31 Days, 31 Drawings

– Changed my weekday work schedule to be off when kids get home from school

– Took my kids to help pack food at Feed my Starving Children

– Met my godson, Joseph Liam and painted art for his nursery.

– Refinished our dining room table

Shared new art works in progress

– Took a family vacation to Disneyland

Participated in the community art project, Mesa Street Art Love

– Family trip to New York, celebrated my sister’s baby shower, fun on Fire Island, visited the NYC and saw Phish.

Collaborated with my youngest son, Hudson on our backyard art bench

Participated in the Beads of Courage Jewelry Design Challenge

– Got a ton of dental work done, everyone in the family is all caught up

– Took a sewing class with my friend Amanda and learned how to use a sewing machine.

Shared monthly jewelry tutorials

– Saw Ethan read his poem at the Arizona-Sonora Desert Museum. He won Honorable Mention out of 600 entries

– Watched many dance performances with Hudson and his hip hop performance crew

– Supported my husband any way I could as he took on his own journey of growth and success.

This year has really been about giving my family as much support as I can to help them thrive as well as allowing myself to take a step back and be supported and cared for instead of doing it all by myself.

I hope your 2014 has been filled with wonderful lessons and that you’ve emerged from it stronger, wiser + more joyful than ever before.
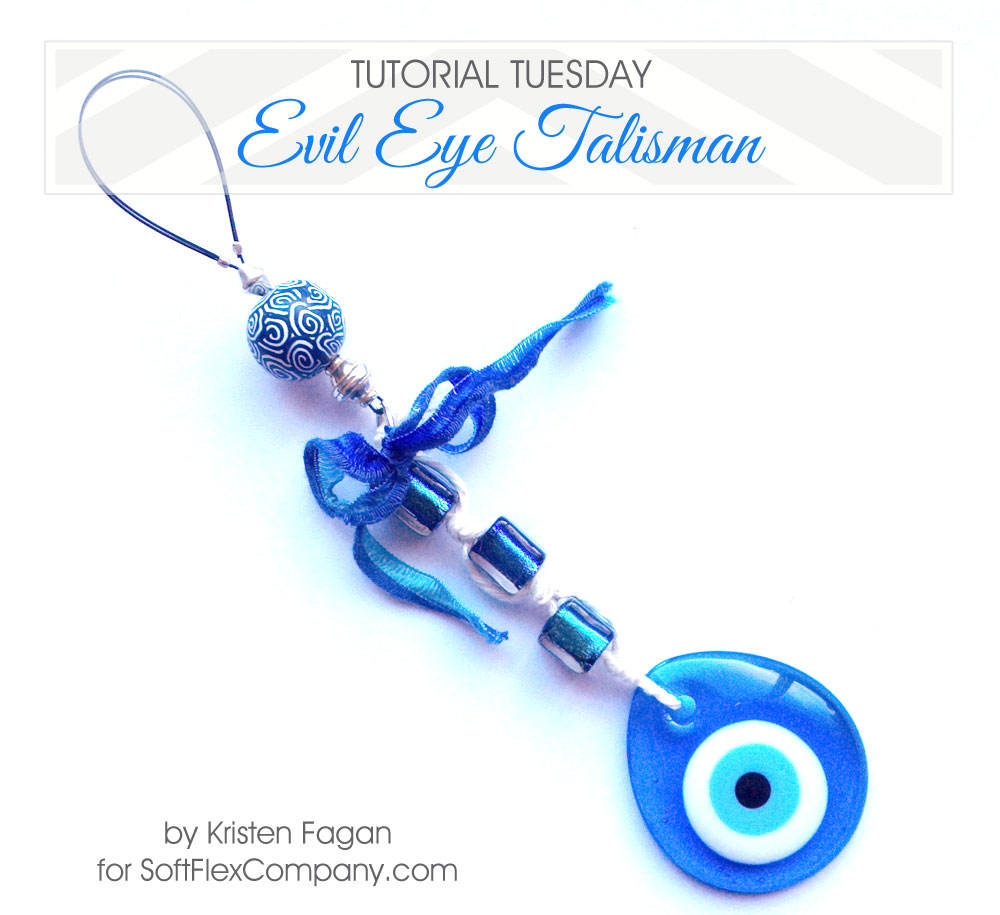
Tutorial Tuesday: Evil Eye Talisman

EvilEye-1

Tutorial Tuesday is a blog series where I share a do-it-yourself jewelry tutorial on Soft Flex Company’s blog.

Throughout history, man has made many forms of talismans designed to ward off bad luck and in Turkey, the tailsman is the Nazar Boncuğu (evil eye). I picked up this evil eye pendant at the 2014 Bead&Button show to give to one of my best friends to display in her home. It is said that when an evil eye cracks, it has done its job of protecting you. I gave it to her this weekend. I wasn’t sure if she had one already but, her mom assured me that you cannot have too many!


Materials:

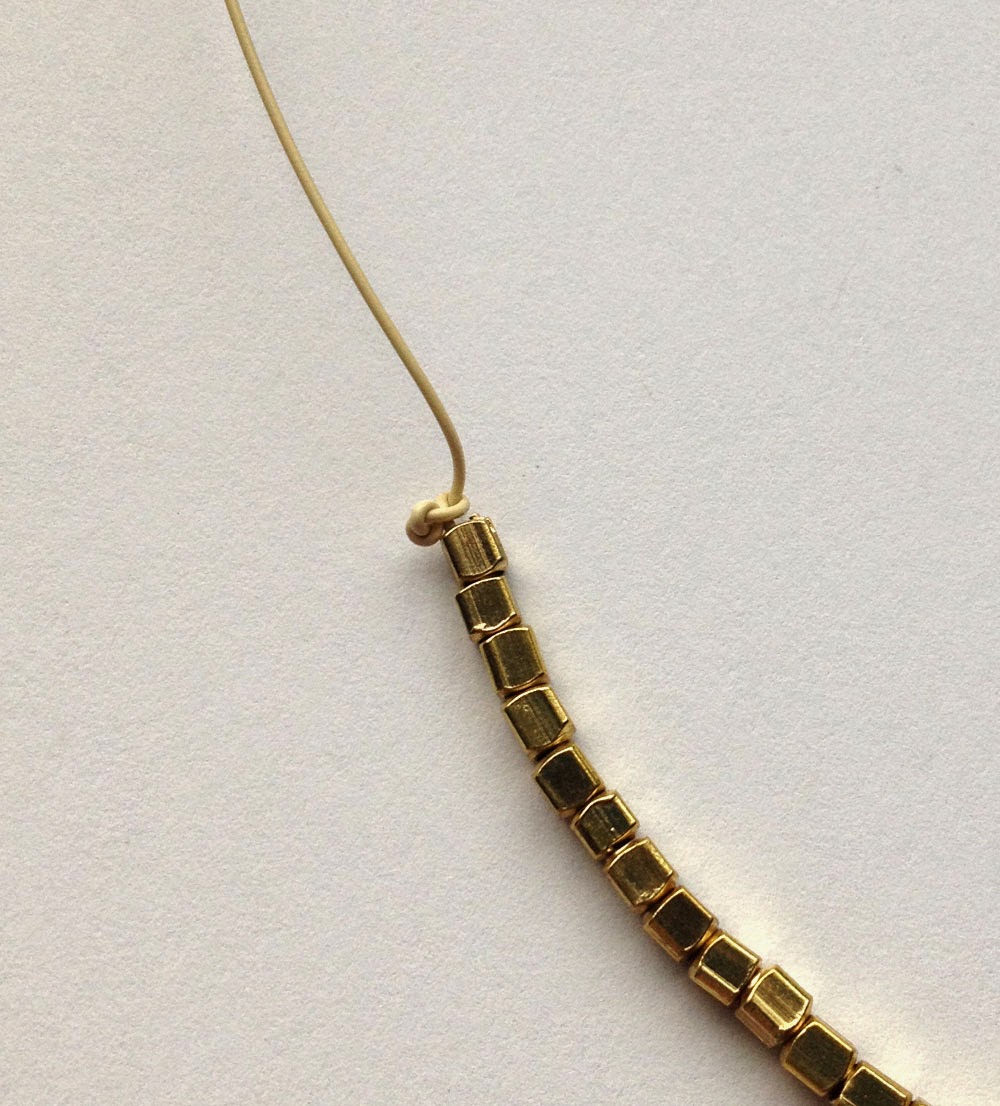
Cut a 24″ piece of white string or cord and feed it through the pendant hole evenly. Grab both string pieces, wrap around your finger and tie a tie at the base of the pendant.

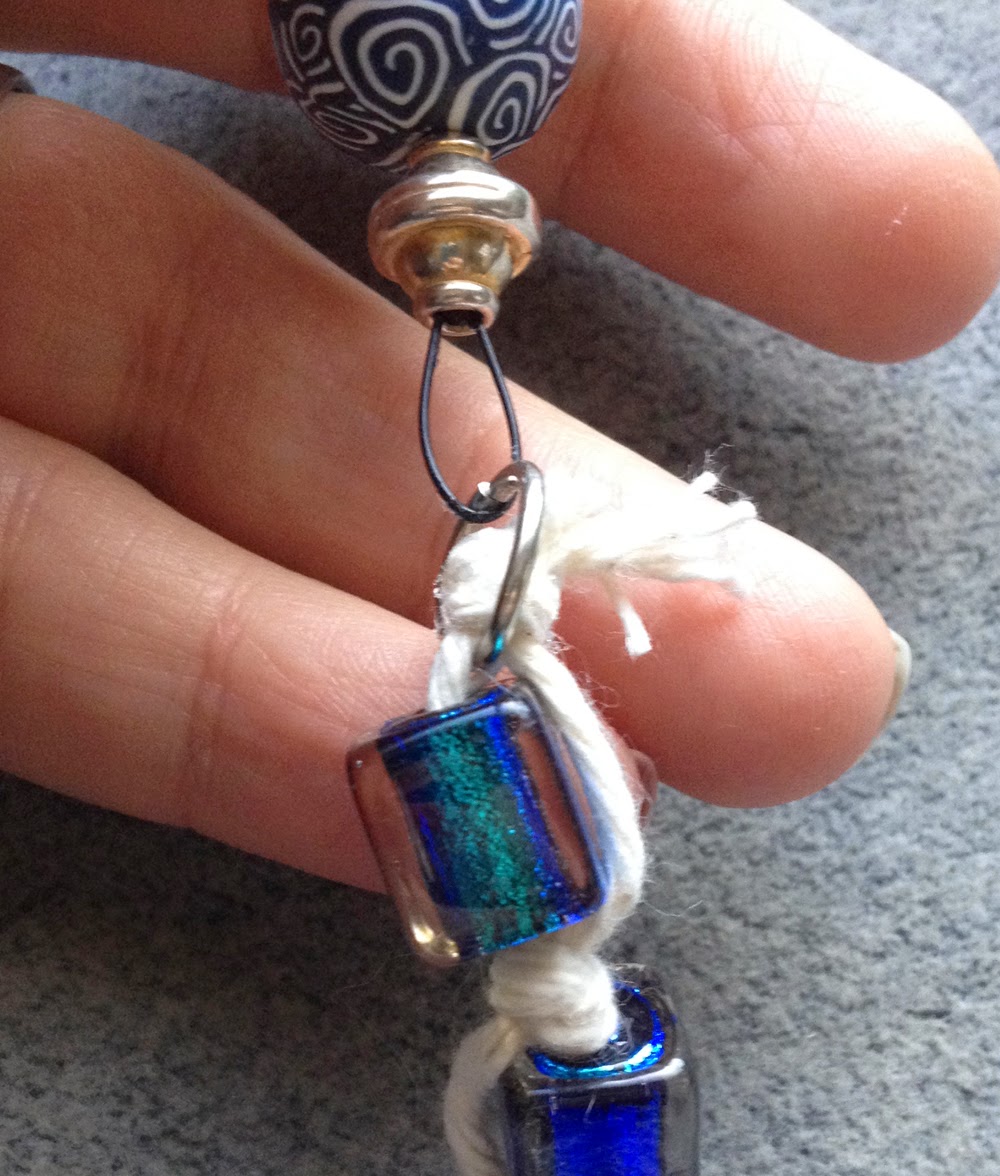
Put a dab of glue on the end pieces of the string to stiffen it and make it easier to thread through the dichroic beads. String 1 dichroic bead onto one of the strings and then holding both strings make a knit close to the bead. String 1 dichroic bead onto the opposite strings from the first and then holding both strings make a knit close to the bead. String 1 dichroic bead onto the first string again and then holding both strings make a knit close to the bead.

Put a dab of glue around the knot of the string and cut off excess string. Attach the jumpring to the final knot.

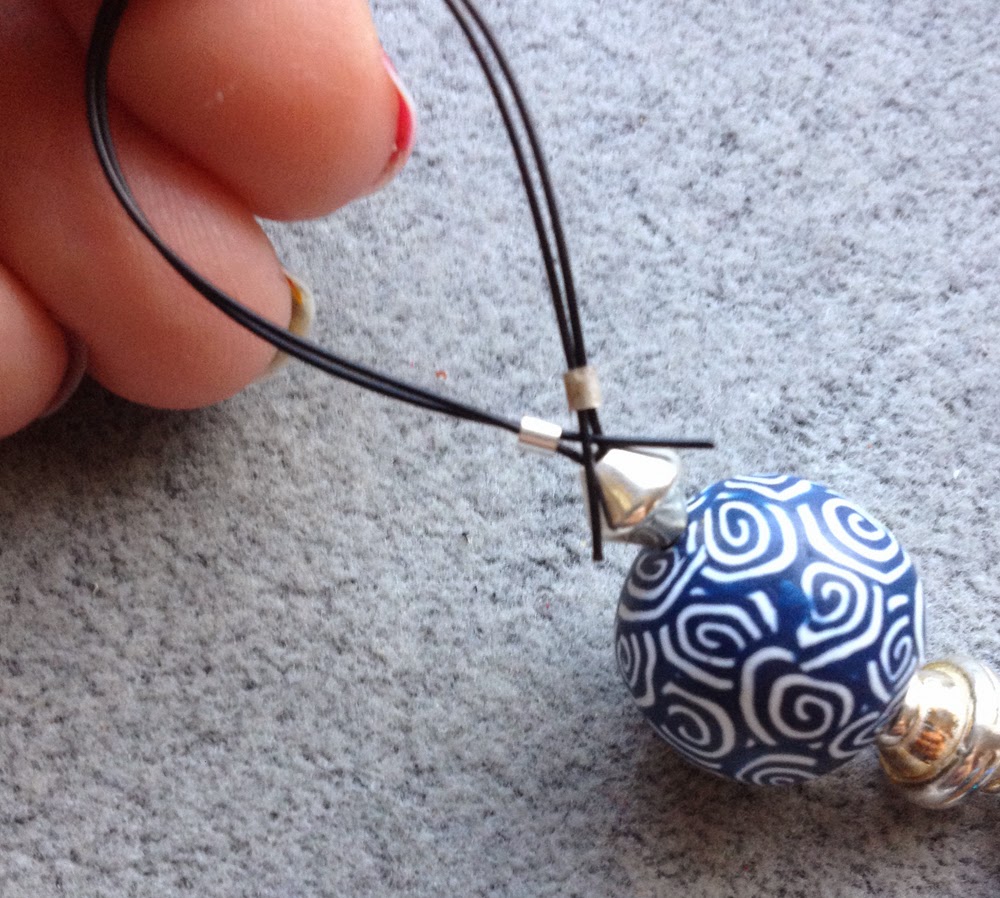
Cut a 10″ strand of black Soft Flex beading wire and feed through the jumpring. Then string 1 large silver spacer bead, 1 Samunnat clay bead and 1 small silver spacer bead. You should have two wire ends coming up from the last spacer bead.

String a 2x2mm crimp tube on each wire end. Loop your wire back through the crimp tubes creating the top loop and crimp. (Note: You just need one crimp to securely make a top loop, I choose to use two for the symmetrical look). Cut off any excess wire. For step by step instructions on how to crimp with the magical crimping pliers, click here.
 

Lastly, using 10″ of colored silk ribbon tie a bow through the jumpring between the string and beading wire to finish it off.
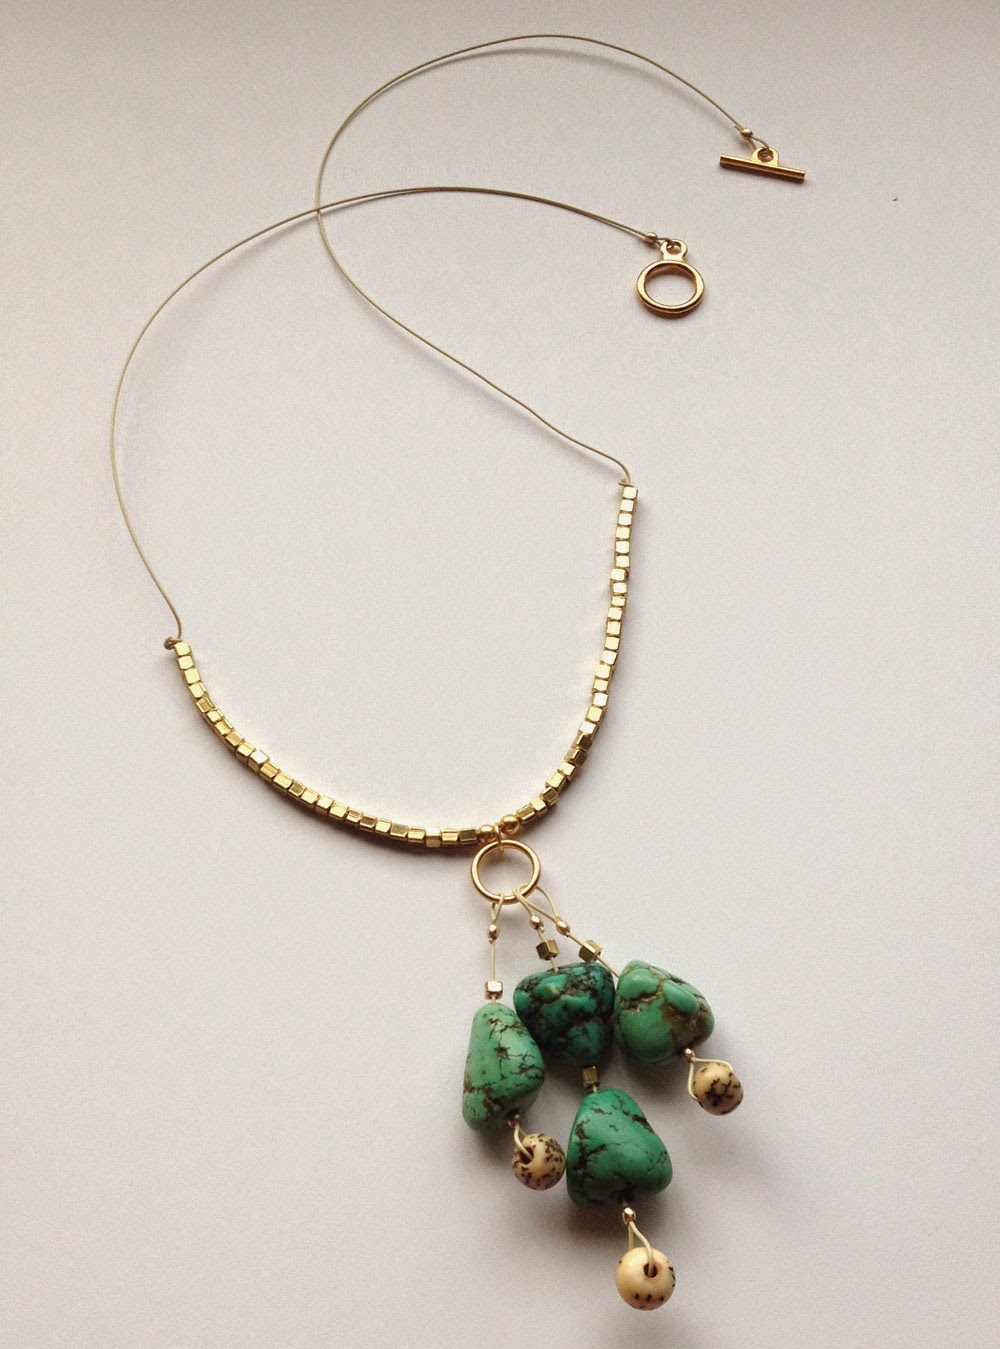
Tutorial Tuesday: Turquoise Nugget Cluster Necklace and Earrings

TurquoiseNugget-1

Tutorial Tuesday is a blog series where I share a do-it-yourself jewelry tutorial on Soft Flex Company’s blog.

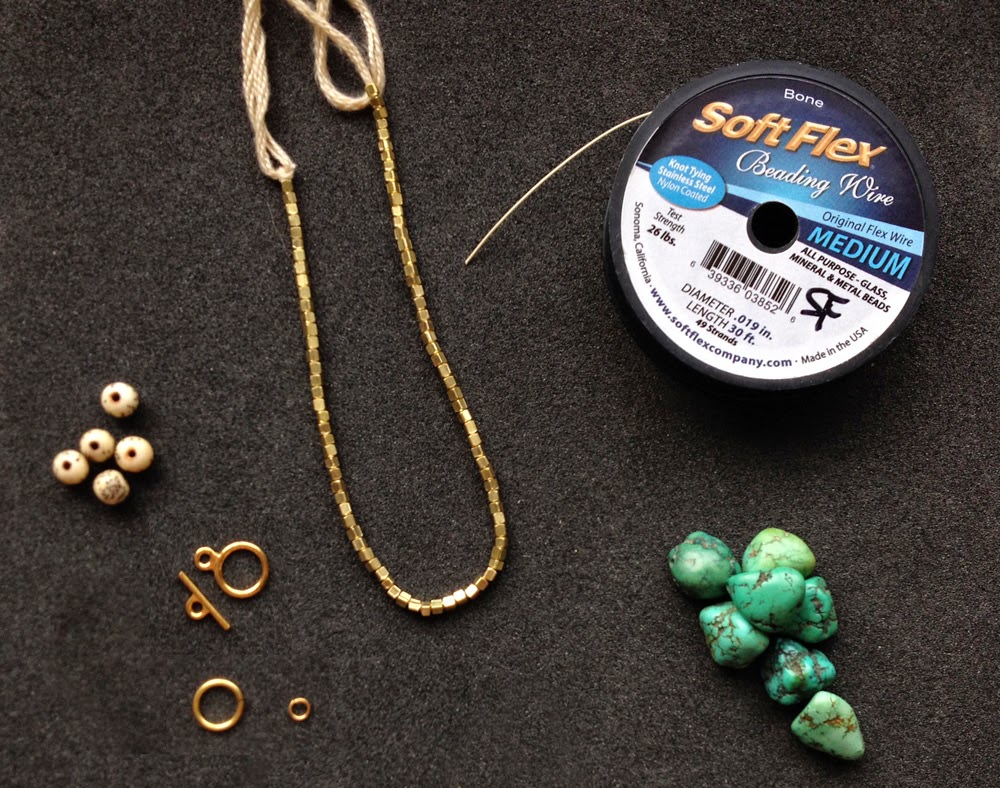
The Tucson Gem and Bead Show is right around the corner! I think that had something to do with me reaching for these turquoise nugget beads. Will you be visiting Tucson this year? It is a tradition for owners and designers to gather in Tucson every year and search for new and exciting beads, gemstones, and jewelry and Soft Flex Company is in a whole new location for 2015. This year, you can find us at the To Bead True Blue show from February 1-9th at the Doubletree Tucson Reid Park, we’ll be in the Board Room. Hope to see you!
Materials:

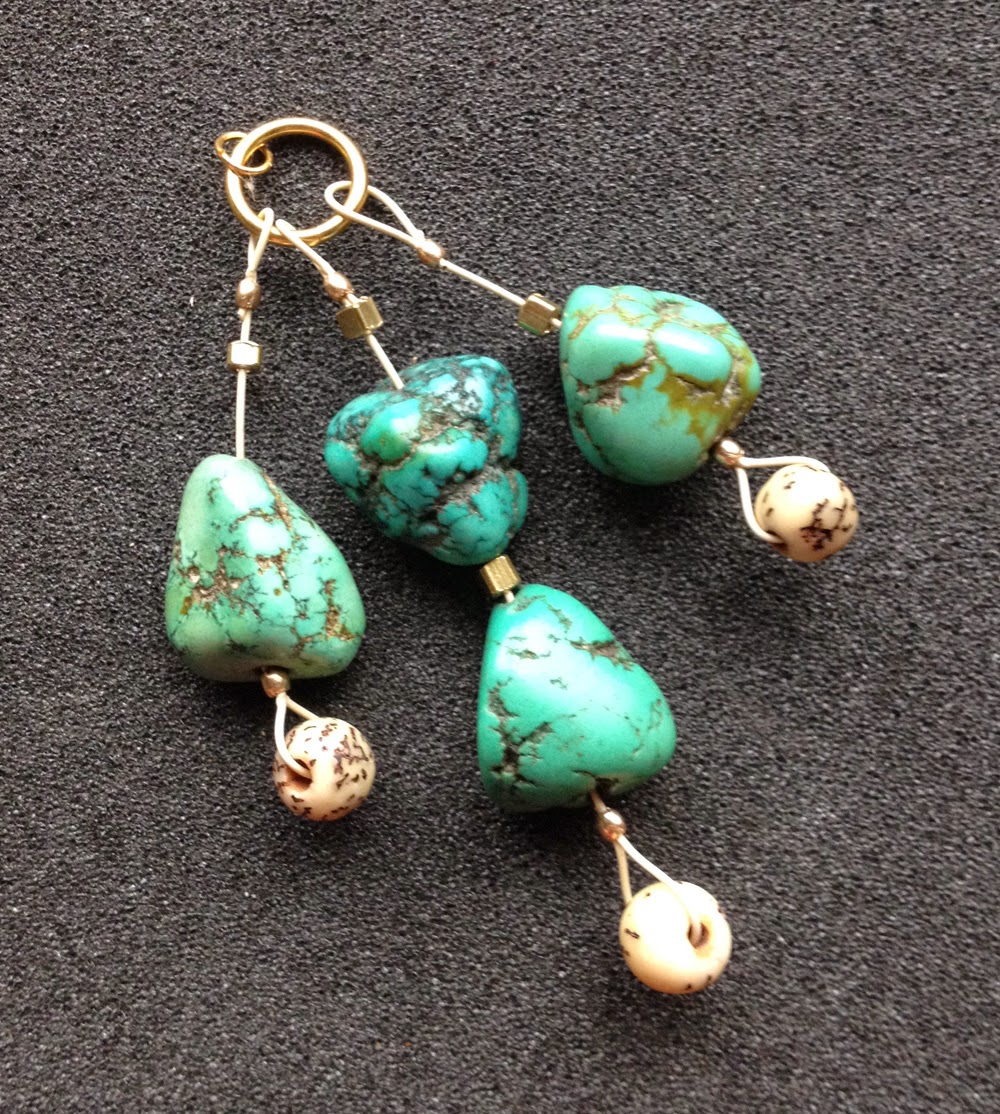
We’ll start with the necklace cluster dangle. Cut three 6″ pieces of bone Soft Flex beading wire. On each strand, string one gold 2mm crimp tube and one round bone bead. Loop the wire back through the gold 2mm crimp tube and crimp. Cut off excess wire.

Next, string one turquoise nugget bead and one gold cube bead on two strands of the three strands of wire. On the third strand, string a turquoise nugget bead, a gold cube bead, another turquoise nugget bead and another gold cube bead.

Add a gold 2mm crimp tube to each strand. Aligned the longest strand in the middle and two smaller strands on each side. For each strand loop the wire around the 10mm jump ring and back through the crimp tube. Leave a little bone beading wire showing on each strand before crimping for a flexible dangle. For step by step instructions on how to crimp with the magical crimping pliers, click here.

Attach the small 4mm jump ring to the top of the 10mm jump ring.

Now let’s create the necklace. Cut 24″ length of bone Soft Flex beading wire. Place a bead stopper at one end. String 25 gold cube beads, one 3mm gold plated round bead, small 4mm jump ring attached to the dangle you created, one 3mm gold plated round bead and 25 gold cube beads.

Tie a figure 8-knot on one side of the gold beads then remove the bead stopper and tie another figure 8-knot on the other side. (Note: you could also add a gold crimp to each side and crimp the beads in place if you prefer). For step by step instructions on how to tie and 8-knot, click here.

Lastly, figure out your desired length, string a 2mm crimp tube on each wire end. Loop your wire around the toggle and bar clasp on either end, back through the crimp tube and crimp. Cut off excess wire. For step by step instructions on how to crimp with the magical crimping pliers, click here.

For the earrings, create two dangles the same way you created the cluster dangle above. Instead of attaching to a jump ring you attach each strand to a gold plated ear wire.

Art Date at MoMA

While on a trip home to New York this past Fall to visit family and meet my newest member, my adorable nephew Joseph Liam, I took a train ride to NYC for an art date at the Modern Museum of Art. Swoon. It was a beautiful day. I love walking around a museum. Although, I love having company when I go out on the town, I also love going it alone.  I went to college in NYC and one of my favorite things to do was just wander around on my own, being inspired and surprised by what I saw. I miss that and felt so blessed to have a day to myself to wander in a city I love.

MoMA

It is amazing to see so many iconic artworks and famous artists in one place. I thought I would be there a couple hours and explored other parts of the city but, I ended up staying there all day and honestly could have stayed longer. Here are some pictures of my time at MoMA.

MoMACollage

Top Left to Right: Henri Matisse, Henri Mattisse, Piet Mondrian, Pablo Picasso, Frida Kahlo, Pablo Picasso, Joan Miro, Mark Rothko, Vasily Kandinsky.

MeandMonetMe and Claude Monet.

Toulouse-Lautrec

I stumbled into the exhibit The Paris of Toulouse – Lautrec: Prints and Posters. Henri de Toulouse-Lautrec (1864–1901) brought the language of the late-19th-century avant-garde to the public through his famous posters, prints, and illustrations for journals and magazines.  His work shows many facets of Parisian life, from politics to culture and the popular entertainment in the form of cabarets and café-concerts. This is the first MoMA exhibition in 30 years dedicated solely to Lautrec, and features over 100 examples of the best-known works created during the apex of his career. I love the color schemes and expression in his illustrations.


Matisse

While there, I had the pleasure of seeing the Henri Matisse: The Cut-Outs – the largest and most extensive presentation of the artist’s cut-outs ever assembled. I went to the museum specifically to see this exhibit.

10173803_10153552258502281_1613575310333678287_n-1

[Installation view of “Henri Matisse: The Cut-Outs” at The Museum of Modern Art, New York (October 12, 2014-February 8, 2015). Photo by Jonathan Muzikar. © 2014 The Museum of Modern Art]

I have always admired Matisse’s eye for pattern and color in his painting but, in all honesty the cut outs didn’t move me as much. That said, I knew it was a rare chance to see it and for me to be in NY while it was there it would be a shame to miss it. Well, seeing it in person makes all the difference. They are beautiful and playful works created during a difficult time in his life. The size and shear volume of work is captivating. The shapes, pin holes and colors are wonderful. As are the videos they have compiled about his work, his process and the tedious process of restoring the swimming spool.  Go see it if you can! It’s on exhibit through February 10, 2015. http://www.moma.org/


Tutorial Tuesday: Jingle Bell Necklace

JingleBellNecklace-1

Tutorial Tuesday is a blog series where I share a do-it-yourself jewelry tutorial on Soft Flex Company’s blog.

‘Tis the season for a statement necklace to go with your holiday outfit! Tired of the traditional giant jingle bell on a rope? Want to add a little sparkle and pop of color? I think this super simple update on the jingle bell necklace is just the thing to give your holiday a last minute jingle, jangle color burst.

Materials:

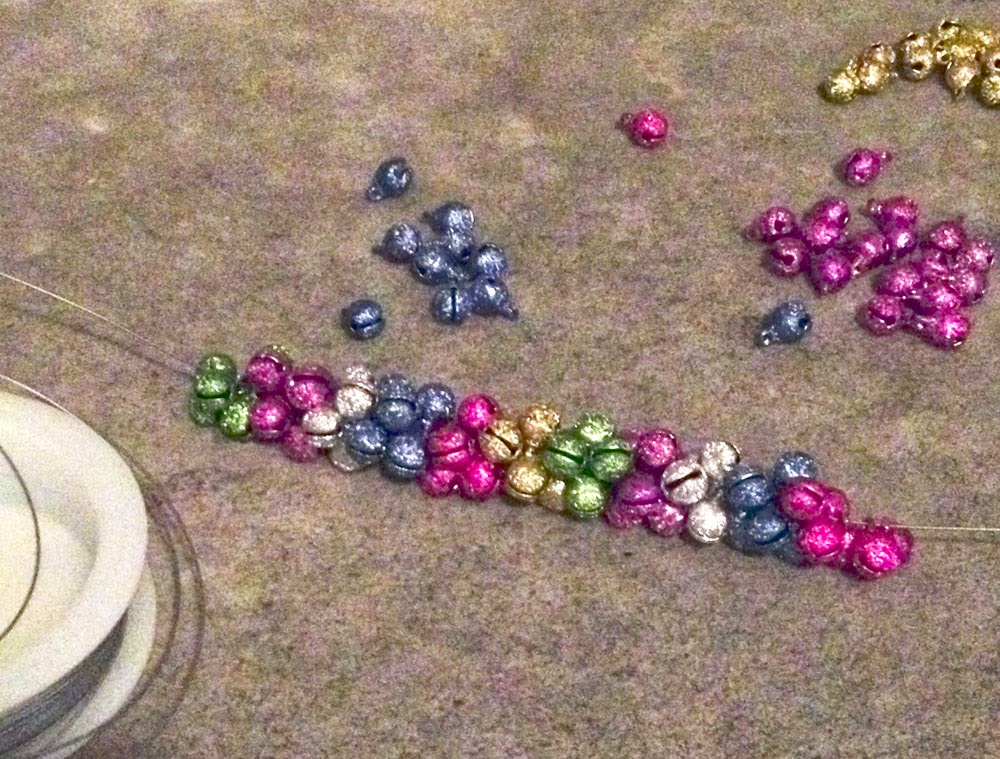
Begin by separating your jingle bell beads into colors. Cut 8″ strand of beading wire from your spool. I chose to use Soft Touch, our premium wire, in this design because of the soft thread like drape you get with it.

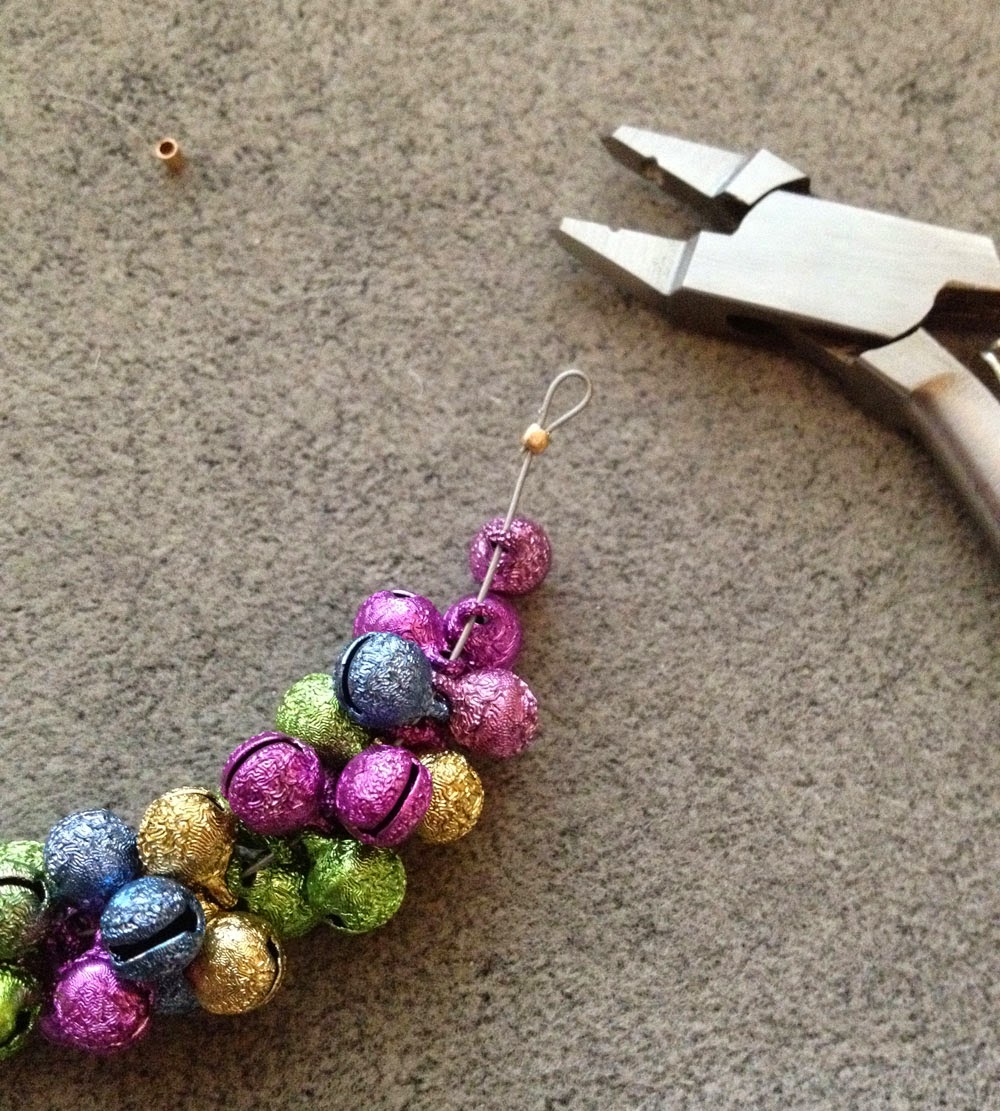
String a 2x2mm crimp tube on one side of your wire. Loop your wire back through the crimp tube leaving a small loop and crimp. Cut off excess wire. For step by step instructions on how to crimp with the magical crimping pliers, click here.

String 6 silver, 6 gold, 6 green, 6 purple, 6 silver, 6 blue, 6 pink, 6 gold, 6 pink, 6 blue, 6 silver, 6 purple, 6 green, 6 gold and 6 silver jingle bell beads. String a 2x2mm crimp tube. Loop your wire back through the crimp tube leaving a small loop and crimp. Cut off excess wire.

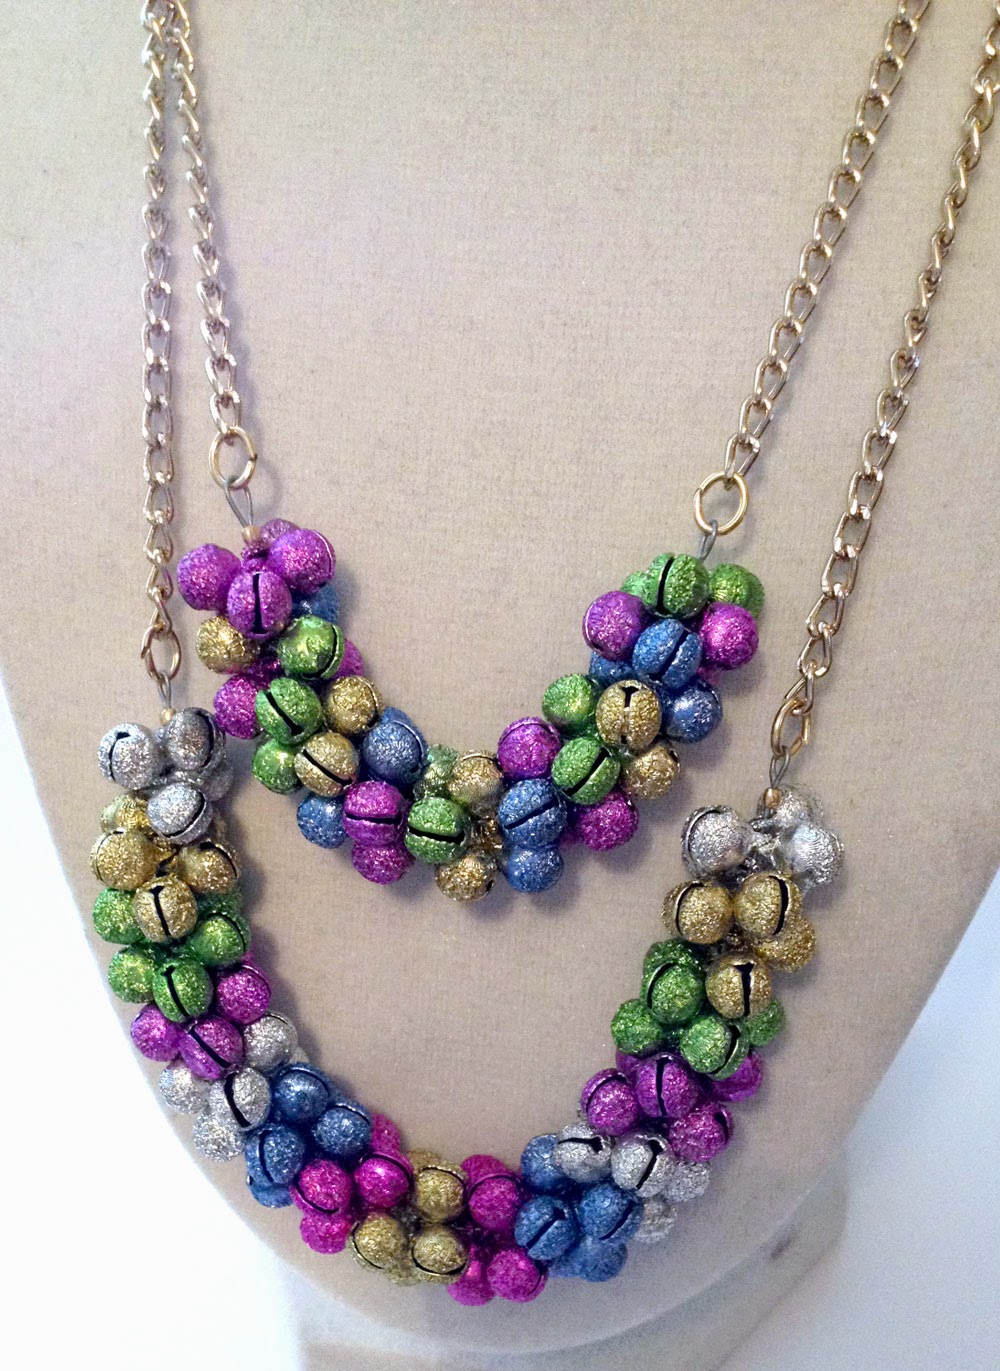
Measure your chain to your desired length and cut into two lengths. I cut two 9″ of chain. Using your chain nose pliers, open two gold jump rings and attach each chain length to your crimp loops on each end of your jingle bell strand.

Lastly, add a jump ring to each end of the chain and attach your lobster clasp.

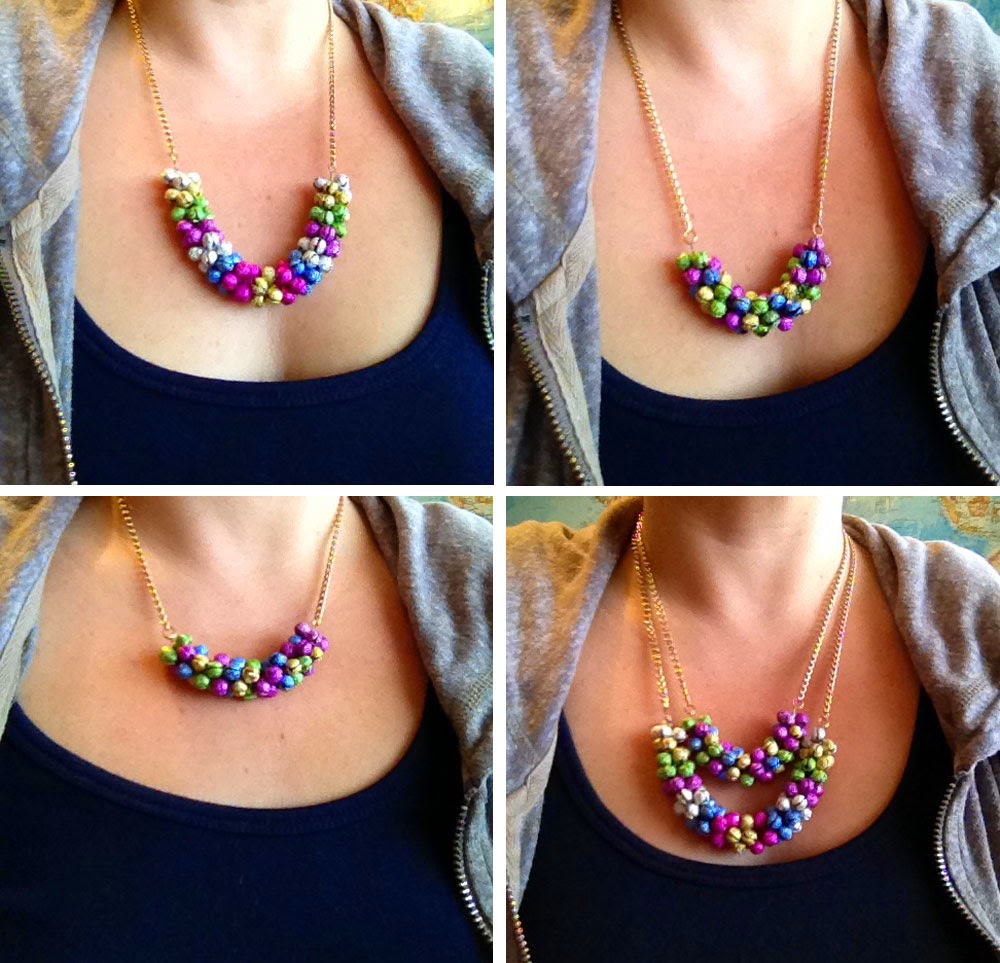
With my leftover jingle bell beads and chain, I created another smaller version of this necklace. The smaller version can be worn shorter or pair them together for a double jingle jangle design!